Nginx 入门指南:理解、配置和优化

本文最后更新于:2 个月前

就像大海包容每一滴水珠,愿你的胸怀也能如此宽广,接纳世间万物,包括那些不完美的自己。

破冰

🥣 推荐阅读:

Nginx 是什么

  • 官⽅解析 :
1
Nginx(发⾳为“engine-x”)是⼀个⾼性能的开源 Web 服务器和反向代理服务器,可以处理⼤ 量的并发连接和请求。它使⽤事件驱动的异步架构和多线程设计,可以⾼效地处理并发请求, 同时也⽀持反向代理、负载均衡、动态HTTP缓存、SSL/TLS终⽌、基于模块的扩展等功能。
  • Nginx 的应⽤场景⾮常⼴泛,以下是其中的⼏个:

  • Web 服务器:Nginx 可以作为 HTTP 服务器,处理并发的静态请求和动态请求,并且可 以⽀持负载均衡和缓存,为⽹站提供⾼性能和⾼可⽤性。

  • 反向代理服务器:Nginx 可以作为反向代理服务器,接收客户端请求并将其转发到后端服 务器,同时也可以⽀持负载均衡和缓存。

  • 邮件代理服务器:Nginx 可以作为邮件代理服务器,⽀持 POP3、IMAP 和 SMTP 协议, 并且可以⽀持 SSL/TLS 加密和反垃圾邮件功能。

  • 流媒体服务器:Nginx 可以作为流媒体服务器,⽀持 RTMP、HLS 和 DASH 协议,可以 ⽤于实现直播、点播和视频-on-demand(VoD)等场景。

  • 总之,Nginx 具有⾼性能、可扩展性和可靠性等特点,被⼴泛应⽤于⼤型⽹站、互联⽹公司、 云计算、视频流媒体、游戏等领域

思维碰撞

Nginx 部署静态站点(2024 最新)

2024 年 6 月 3 日

Nginx 安装

这里推荐宝塔面板安装,一条龙完成:

安装宝塔面板:

访问宝塔面板:

1
/etc/init.d/bt default	# 获取宝塔面板账号密码

image-20240603091818493

一键编译安装:

image-20240603091901391

记得查看默认访问端口,宝塔面板安装下的 nginx 默认是 888 端口,云服务器也要开放 888 端口

搞完了直接访问就行。

尝试部署静态页面

接下来就是四十八小时时间里的踩坑记录,仅供参照:

2024 年 6 月 1 日

【一篇学会】Nginx 静态资源部署保姆级教程_nginx 部署静态资源-CSDN 博客

Nginx 静态资源服务的配置-腾讯云开发者社区-腾讯云 (tencent.com)

1
2
MIME 类型
MIME(多用途互联网邮件扩展类型)是一种标准化的方式,用于表示文档、文件或字节流的性质和格式。它在IETF RFC 6838中进行了定义和标准化,由互联网号码分配机构(IANA)负责跟踪所有官方MIME类型。MIME类型由两部分组成:类型(type)和子类型(subtype),它们之间用斜杠(/)分隔,不允许空格存在。MIME类型对大小写不敏感,但传统写法都是小写

Nginx 配置文件详解-CSDN 博客

8 分钟用 Nginx 搭建一个自己的网站_哔哩哔哩_bilibili

Linux 使用 nginx 部署静态网页 - WindSnowLi - 博客园 (cnblogs.com)

手把手教你搭建静态/博客网站 | 起凡 Code 闲聊 (jarcheng.top)

跟着网上的教程搞了一下午,就是部署不了静态页面,甚至连访问 Nginx 本身都好像有问题,搞不明白,实在是搞不明白。

不管怎么说,今晚我就死磕这个 Nginx 了,多少个晚上都像现在这样把它放过,所以到现在都没有学习完成过 Nginx。

2024 年 6 月 2 日

[root@iZ2ze4yceifsrmdejokfymZ ~]# nginx
nginx: [emerg] bind() to 0.0.0.0:7010 failed (98: Unknown error)
nginx: [emerg] bind() to 0.0.0.0:888 failed (98: Unknown error)
nginx: [emerg] bind() to 0.0.0.0:80 failed (98: Unknown error)
nginx: [emerg] bind() to 0.0.0.0:7071 failed (98: Unknown error)
nginx: [emerg] bind() to 0.0.0.0:7001 failed (98: Unknown error)
nginx: [emerg] bind() to 0.0.0.0:7020 failed (98: Unknown error)
nginx: [emerg] still could not bind()

image-20240602182928144

[Nginx 重启时提示”nginx: emerg] bind() to 0.0.0.0”解决方法 - 八艾云 (8a.hk)

image-20240602185109255

极简 Nginx 学习 + 使用,点到为止 - 编程导航文章 (code-nav.cn)

1
2
3
4
5
6
7
8
9
10
11
12
13
14
15
16
17
18
19
20
21
22
23
24
25
要查看当前用户是否是管理员(在Unix和Linux系统中通常指的是root用户,或在Windows系统中指的是具有管理员权限的用户),你可以使用不同的方法,具体取决于你使用的操作系统。

在Unix/Linux系统中:

查看当前用户名:
在终端中输入 whoami 命令。如果输出是 root,那么你就是管理员。
查看用户ID:
输入 id 命令。如果UID(用户ID)是0,那么你就是root用户。
查看/etc/passwd文件(需要root权限):
你可以查看/etc/passwd文件,但通常需要root权限来查看完整的文件内容。使用cat /etc/passwd命令,并查找以root:开头的行。
在Windows系统中:

打开命令提示符:
按下Win + R,输入cmd,然后按下Enter键。
检查用户账户控制(UAC)提示:
当你尝试执行需要管理员权限的任务时,Windows通常会显示一个UAC提示。如果你没有看到这些提示,那么你可能不是以管理员身份登录的。
检查用户账户:
在“控制面板”中,你可以查看用户账户并检查你的账户是否有管理员权限。
使用net user命令(在命令提示符中):
输入net user命令并查看输出。找到你的用户名,并检查它是否列出了管理员组(例如,“Administrators”组)。
运行whoami /groups(在命令提示符中):
这个命令将列出你当前用户所属的所有组。如果你看到“S-1-5-32-544”(管理员组的SID),那么你就是管理员。
使用PowerShell:
在PowerShell中,你可以使用[System.Security.Principal.WindowsIdentity]::GetCurrent().Groups命令来查看当前用户所属的组。然后,你可以检查输出中是否包含管理员组。
请注意,成为管理员用户(特别是在Unix/Linux中的root用户)具有极大的权限,可以执行系统范围内的更改。因此,请务必谨慎行事,并在需要时始终考虑使用具有较低权限的用户账户。

netstat -tulnp | grep 7010

我已经尝试了所有方法,查看冲突端口号、关闭防火墙,修改执行用户,更改文件目录权限,根本部署不了静态页面

3 分钟搞懂阿里云服务器安装 Nginx 并配置静态访问页面_阿里云服务器如何安装 nginx-CSDN 博客

image-20240602213424584

[nginx: error] invalid PID number “” in “/usr/local/webserver/nginx/logs/nginx.pid”-CSDN 博客

1
nginx -c /www/server/nginx/conf/nginx.conf

搞不定,一夜回到解放前。

Nginx 部署与静态 html_nginx 部署 html-CSDN 博客

【Linux 报错】登陆 mysql 用户报错 This account is currently not available._mysql:x:1001:-CSDN 博客

2024 年 6 月 3 日

Linux 实现 Nginx 的安装与部署并实现 html 静态资源访问_linux nginx html-CSDN 博客

1
2
3
4
5
6
7
8
9
10
11
12
13
14
15
[nginx-stable]
name=nginx stable repo
baseurl=http://nginx.org/packages/centos/7/$basearch/
gpgcheck=1
enabled=1
gpgkey=https://nginx.org/keys/nginx_signing.key
module_hotfixes=true

[nginx-mainline]
name=nginx mainline repo
baseurl=http://nginx.org/packages/mainline/centos/7/$basearch/
gpgcheck=1
enabled=0
gpgkey=https://nginx.org/keys/nginx_signing.key
module_hotfixes=true
1
2
sudo yum clean all
sudo yum makecache

image-20240603080013103

1
grep -r exclude /etc/yum.conf /etc/yum.repos.d/

image-20240603075634506

1
sudo yum install nginx

image-20240603080124927

1
2
systemctl start nginx  #启动nginx服务器
ps -aux | grep nginx #查看nginx进程
1
2
systemctl restart nginx
systemctl status nginx

image-20240603080537255

1
2
3
4
find / -name nginx.conf

cd ..
find -name nginx.conf

image-20240603081030466

1
2
3
4
5
6
7
8
9
10
11
12
13
14
15
16
17
18
19
20
21
22
23
24
25
26
27
28
29
30
31
32
33
34
35
36
37
38
39
40
41
42
43
44
server {
listen 80;
server_name localhost;

#access_log /var/log/nginx/host.access.log main;

autoindex on;
location / {
root /usr/share/nginx/html;
index index.html index.htm;
}

#error_page 404 /404.html;

# redirect server error pages to the static page /50x.html
#
error_page 500 502 503 504 /50x.html;
location = /50x.html {
root /usr/share/nginx/html;
}

# proxy the PHP scripts to Apache listening on 127.0.0.1:80
#
#location ~ \.php$ {
# proxy_pass http://127.0.0.1;
#}

# pass the PHP scripts to FastCGI server listening on 127.0.0.1:9000
#
#location ~ \.php$ {
# root html;
# fastcgi_pass 127.0.0.1:9000;
# fastcgi_index index.php;
# fastcgi_param SCRIPT_FILENAME /scripts$fastcgi_script_name;
# include fastcgi_params;
#}

# deny access to .htaccess files, if Apache's document root
# concurs with nginx's one
#
#location ~ /\.ht {
# deny all;
#}
}

nginx 服务器搭建好但是浏览器却无法访问原因排查_nginx 配置好了 网站还是访问不了-CSDN 博客

image-20240603084009334

这几天里报错最恶心的还是这条:

1
nginx: [emerg] bind() to 0.0.0.0:7010 failed (98: Unknown error)

最后是在宝塔面板卸载重装以后才解决的,现在也不知道什么原因。

还是很有收获的,学到了许多其他新知识。

2024 年 6 月 4 日

linux 怎么快速卸载并安装 node 环境 - Jun_ct - 博客园 (cnblogs.com)

yum、apt-get、wget 的区别_yum wget-CSDN 博客

wget、yum、rpm、apt-get 区别「建议收藏」-腾讯云开发者社区-腾讯云 (tencent.com)

Linux curl 命令最全详解-CSDN 博客

云服务器部署静态博客站点,搞了一上午,代码推送不上去,Nginx 也起不来了。

运维排查篇 | 访问 nginx 出现 403 错误 - 知乎 (zhihu.com)

image-20240604110147986

image-20240604110649330

过了一个小时再尝试,静态代码文件就能推送上去了。杀死已经启动的 Nginx 进程,也能成功启动 Nginx 了。

问题解决

2024 年 6 月 3 日

查看本实例的安全组,应用了哪个安全组规则:

image-20240603090238565

image-20240603090310965

以下这就是应用到的真正的安全组规则(注意上方地域选择):

image-20240603090138530

这几天以来,一直选错了地域,搞另一个地域下的安全组规则。原来根本就没放开 80、7010、7020 端口:

image-20240603090604067

重启失败

2024 年 6 月 4 日

image-20240604105639790

这个报错直接杀死正在运行的 Nginx 进程就可以了。

访问 403 错误

2024 年 6 月 4 日

🥣 推荐阅读:运维排查篇 | 访问 nginx 出现 403 错误 - 知乎 (zhihu.com)

一条龙

2024 年 6 月 3 日

🥣 安装 Nginx 并部署静态页面,看这篇博客:服务器——Nginx 安装及静态配置、部署 - 知乎 (zhihu.com)

🍚 解决 Nginx 访问失败问题,看这篇博客:nginx 服务器搭建好但是浏览器却无法访问原因排查_nginx 配置好了 网站还是访问不了-CSDN 博客

1
firewall-cmd --zone=public --add-port=8080/tcp --permanent
1
firewall-cmd --reload

使用 Nginx 部署 博客站点,看:

CPU 爆满

2024 年 6 月 21 日

最近一周云服务器 CPU 负载一直很高,经常在 80%左右,博客访问都卡的根本打不开。

image-20240621090813896

Nginx 性能优化_nginx cpu 负载高-CSDN 博客

清除 nginx 连接数 TIME_WAIT_nginx 连接数满了-CSDN 博客

image-20240621082513343

如何查看 Linux 系统 I/O 负载情况_云服务器 ECS(ECS)-阿里云帮助中心 (aliyun.com)

云服务器一直提示达到云盘类型的 IOPS 上限_读写 io 延迟过长,或达到了该云盘类型的 iops 上限,导致实例云盘读写受限-CSDN 博客

swappiness 的基本默认设置为 60,加上生效这样便完成修改设置 | 《Linux 就该这么学》 (linuxprobe.com)

image-20240621090629532

我又重启了服务器实例,试了下上面的方法,看看是否有效。

半个小时过去了,好像问题还真的解决了:

image-20240621092700202

2024 年 7 月 4 日

image-20240703234449094

2024 年 7 月 8 日

还是老问题:

服务器的 CPU 一直负载很高,监控告警也提示:

当前实例的云盘在 2024 年 7 月 4 日 09:43:00 出现读写 I0 延迟过长,或达到了该云盘类型的 I0PS 上限,导致实例云盘读写受限。

想要远程连接排查问题,Workbench 远程连接服务器又提示已禁用账号密码登录。

改用 VNC 远程连接,进去后没有任何反应,只能胡乱敲字母。

CPU 负载解决不了,部署在服务器上的博客也访问不到。

image-20240708082555734

【Linux】iftop 命令详解-CSDN 博客

云服务器管理控制台 (aliyun.com)

Linux(CentOS)网络流量实时监控(iftop)安装教程——含 yum 命令安装失败方法_centos iftop-CSDN 博客

2024 年 7 月 9 日

AtomGit Pages 服务下的博客是 HTTPS 协议的,七牛云存储空间绑定的域名目前没有部署 SSL 证书,仅支持 HTTP 协议。

这图片还显示不了了。

又打回了云服务器部署博客的注意,今天早上 CPU 都爆满到 90% 了,肯定出问题了。

image-20240709090049445

拒绝服务漏洞?这不就是问题的原因所在吗,摆明了在这我都没想过这个问题。。

阿里云漏洞库 (aliyun.com)

image-20240709090222161

image-20240709090427796

image-20240709090316918

按量付费,一次两块钱,我试试看。

晚上,睡觉前:

image-20240710001714426

Nodejs 安装

2024 年 6 月 3 日

linux 安装 nodejs yum

在 Linux 系统中,您可以使用 Yum 包管理器来安装 Node.js。以下是一个基本的步骤和示例代码,用于通过 Yum 安装 Node.js:

  1. 首先,您需要确保您的系统中已经安装了 Node.js 的官方 Yum 仓库。如果尚未安装,您可以通过运行以下命令来添加 Node.js 的仓库:
1
curl -sL https://rpm.nodesource.com/setup_14.x | sudo bash -

image-20240604085311073

这个命令会将 Node.js 14.x 的仓库添加到您的系统中。如果您想安装其他版本的 Node.js,只需将setup_14.x中的数字更改为所需的 Node.js 版本即可。

  1. 接下来,您可以使用 Yum 安装 Node.js:
1
sudo yum install -y nodejs

image-20240604085407699

这个命令会从刚才添加的 Node.js 仓库中安装 Node.js。

  1. 安装完成后,您可以检查 Node.js 的版本确保安装成功:
1
node --version

请注意,上述命令中的 URL 和版本号可能会随着 Node.js 版本更新而变化,请参照 Node.js 官方文档或者 NodeSource 提供的最新安装脚本。

image-20240604090040331

image-20240604105048890

image-20240604105149238

部署

看过了上面的一条龙 Nginx 部署静态站点服务后,基本上搞定了所有 Nginx 问题

Nginx 安装

2024 年 6 月 9 日

注意,这里还是上面提到的那篇博文内容,感觉还是把详细步骤记录下来比较好:

安装 Nginx 步骤

有两种安装 Nginx 方法:

一种是快速安装,直接执行下面代码即可:

1
yum install nginx

另一种是设置 nginx.repo 源安装,我们推荐使用设置 nginx.repo 源安装,具体步骤如下所示:

安装 yum-utils

在安装之前,首先要安装 yum-utils,执行如下代码:

1
yum install yum-utils

配置 nginx.repo 源

首先在/etc/yum.repos.d 目录下创建 nginx.repo 文件,执行如下代码:

1
touch /etc/yum.repos.d/nginx.repo

在 nginx.repo 文件中写入以下代码:

1
2
3
4
5
6
7
8
9
10
11
12
13
14
15
16
17
vim /etc/yum.repos.d/nginx.repo  #进入nginx.repo文件
# 写入以下代码:
[nginx-stable]
name=nginx stable repo
baseurl=http://nginx.org/packages/centos/$releasever/$basearch/
gpgcheck=1
enabled=1
gpgkey=https://nginx.org/keys/nginx_signing.key
module_hotfixes=true

[nginx-mainline]
name=nginx mainline repo
baseurl=http://nginx.org/packages/mainline/centos/$releasever/$basearch/
gpgcheck=1
enabled=0
gpgkey=https://nginx.org/keys/nginx_signing.key
module_hotfixes=true

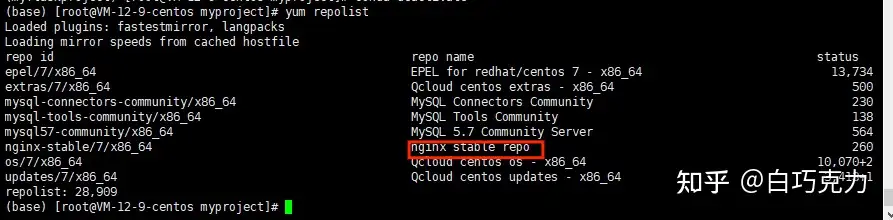
写入文件后,保存并退出,执行如下代码查看是否加载了 Nginx 安装源:

1
yum repolist

img

安装 nginx

安装 nginx 执行如下代码即可安装:

1
yum install nginx

系统启动 nginx 服务器

在系统管理中,我们可以执行如下代码启动 nginx 服务器:

1
2
systemctl start nginx  #启动nginx服务器
ps -aux | grep nginx #查看nginx进程

如下图所示:

img

这样就启动了 nginx 服务器,我们进入浏览器并输入公网 id 即可看到如下页面:

img

假如没能成功显示该页面,则需要在云服务器开放 80 端口。

nginx.conf 配置

为什么输入本机的 IP 地址就会显示上面的网页呢,带着疑问,我们来看看 Nginx 的配置文件,nginx 默认的配置文件 nginx.conf 的目录为:/etc/nginx/nginx.conf,也可以执行如下代码找出 nginx.conf 的位置:

1
find -name nginx.conf

如下图所示:

img

找到 nginx.conf 配置文件路径后,进入 nginx.conf 配置文件:

1
2
3
4
5
6
7
8
9
10
11
12
13
14
15
16
17
18
19
20
21
22
23
24
25
26
27
28
29
30
31
32
vim /etc/nginx/nginx.conf
user nginx;
worker_processes auto;

error_log /var/log/nginx/error.log notice;
pid /var/run/nginx.pid;


events {
worker_connections 1024;
}


http {
include /etc/nginx/mime.types;
default_type application/octet-stream;

log_format main '$remote_addr - $remote_user [$time_local] "$request" '
'$status $body_bytes_sent "$http_referer" '
'"$http_user_agent" "$http_x_forwarded_for"';

access_log /var/log/nginx/access.log main;

sendfile on;
#tcp_nopush on;

keepalive_timeout 65;

#gzip on;

include /etc/nginx/conf.d/*.conf;
}

其内容如下所示:

1
2
3
4
5
6
7
8
9
10
11
12
13
14
15
16
17
18
19
20
21
22
23
24
25
26
27
28
29
30
31
user  nginx;     #用户名
worker_processes auto; #工作进程数为自动增加

error_log /var/log/nginx/error.log notice; #错误日志文件
pid /var/run/nginx.pid; #进程文件


events {
worker_connections 1024; #允许同时连接的连接数
}


http {
include /etc/nginx/mime.types; #http请求类型文件
default_type application/octet-stream; #默认为application的http请求

log_format main '$remote_addr - $remote_user [$time_local] "$request" '
'$status $body_bytes_sent "$http_referer" '
'"$http_user_agent" "$http_x_forwarded_for"'; #日志格式

access_log /var/log/nginx/access.log main; #日志目录

sendfile on;
#tcp_nopush on;

keepalive_timeout 65; #连接超时时间

#gzip on; #压缩格式

include /etc/nginx/conf.d/*.conf; #辅助配置文件
}

我们在 nginx.conf 配置文件中没有找到呈现刚才网页直接相关的代码,只有一个辅助配置文件,那么我们执行如下代码进入复制配置文件目录:

1
2
cd /etc/nginx/conf.d
ls

发现只有一个名为 default.conf 的配置文件,执行如下代码进入 default.conf 辅助配置文件:

1
vim /etc/nginx/conf.d/*.conf

其内容如下所示:

1
2
3
4
5
6
7
8
9
10
11
12
13
14
15
16
17
18
19
20
21
22
23
24
25
26
27
28
29
30
31
32
33
34
35
36
37
38
39
40
41
42
43
server {
listen 80; #服务器端口号
server_name localhost; #服务器名

#access_log /var/log/nginx/host.access.log main;

location / { #项目网址http:ip地址/
root /usr/share/nginx/html; #项目路径
index index.html index.htm; #http文件
}

#error_page 404 /404.html;

# redirect server error pages to the static page /50x.html
#
error_page 500 502 503 504 /50x.html; #访问出错500,502,503,504时呈现50x.html网页
location = /50x.html {
root /usr/share/nginx/html;
}

# proxy the PHP scripts to Apache listening on 127.0.0.1:80
#
#location ~ \.php$ {
# proxy_pass http://127.0.0.1;
#}

# pass the PHP scripts to FastCGI server listening on 127.0.0.1:9000
#
#location ~ \.php$ {
# root html;
# fastcgi_pass 127.0.0.1:9000;
# fastcgi_index index.php;
# fastcgi_param SCRIPT_FILENAME /scripts$fastcgi_script_name;
# include fastcgi_params;
#}

# deny access to .htaccess files, if Apache's document root
# concurs with nginx's one
#
#location ~ /\.ht {
# deny all;
#}
}

在辅助配置文件中,我们找到了网页项目文件相关的代码,我们进入/usr/share/nginx/html 项目路径,执行如下代码:

1
vim /usr/share/nginx/html/index.html

打开 index.html,发现其内容正是我们刚才公网 id 访问浏览器显示的内容。

也就是说,只要我们修改 default.conf 配置文件中的项目路径改为我们项目的路径,即可把我们的项目放在服务器上面了,但是一般情况下,我们都不会去修改 nginx 原来的 default.conf 配置文件,一般会通过使用自定义的配置文件来启动 nginx 服务。

关闭 nginx 服务器

当我们使用系统管理来启动 nginx 服务器时,需要系统管理来关闭 nginx 服务器,执行如下代码:

1
systemctl stop nginx

可以根据需求执行如下代码:

1
2
3
4
5
6
#通过系统管理nginx服务
systemctl enable nginx #设置nginx为开机启动
systemctl disable nginx #禁止开机启动
systemctl status nginx #查看nginx状态
systemctl start nginx #启动nginx服务
systemctl stop nginx #关闭nginx服务

配置文件启动 nginx 服务

在使用系统管理启动 nginx 服务时,浏览器访问自身的 IP 地址呈现的是一个欢迎使用 nginx 服务的网页,要想浏览器访问自身的 IP 地址呈现的是其他网页时,需要修改其辅助配置文件 default.conf,但一般情况下,我们不会去修改 nginx 原来的 default.conf 配置文件,那么怎么启动 nginx 服务器让浏览器访问自身 IP 地址呈现其他网页呢?

这时我们可以自己编写一个 nginx 配置文件 mynginx.conf(配置文件名可以随意),执行以下代码来启动 nginx 服务:

1
nginx -c 配置文件路径

配置文件编写

那么问题来了,如何编写 nginx 配置文件呢?首先系统管理启动 nginx 服务涉及了两个配置文件——nginx.conf 和 default.conf,其中控制网页内容的呈现相关的是 default.conf 配置文件,而 nginx.conf 是一些日志、错误等一些文件配置,所以我们只需要把 nginx.conf 配置文件和 default.conf 配置文件的内容复制在自己编写的 mynginx.conf 配置文件即可,复制代码后,我们通过增删改查,最终得出以下代码:

1
2
3
4
5
6
7
8
9
10
11
12
13
14
15
16
17
18
19
20
21
22
23
24
25
26
27
28
29
30
31
32
33
34
35
36
37
user  root;       #将nginx.conf的nginx改为root
worker_processes auto;

error_log /var/log/nginx/error.log notice;
pid /var/run/nginx.pid;

events {
worker_connections 1024;
}

http {
include /etc/nginx/mime.types;
default_type application/octet-stream;

log_format main '$remote_addr - $remote_user [$time_local] "$request" '
'$status $body_bytes_sent "$http_referer" '
'"$http_user_agent" "$http_x_forwarded_for"';

access_log /var/log/nginx/access.log main;

sendfile on;
#tcp_nopush on;

keepalive_timeout 65;

#gzip on;

server { #default.conf代码复制在nginx.conf配置文件的http里面,并将注释的代码删除
listen 6789;
server_name localhost;

location / {
root /tmp/test/templates; #修改为你项目的路径
index Hello.html Hello.htm; #修改为你的首页网页
}
}
}

修改的地方我们已经在代码中注释了,好了,通过简单的修改复制的代码,我们成功编写了自己的 nginx 配置文件 mynginx.conf,我们将配置文件放在 Flask 程序根目录中。

Flask 程序如下所示:

1
2
3
4
5
6
7
8
9
10
from flask import Flask, render_template
app = Flask(__name__)
app.config['DEBUG']=True
app.config['ENV']='development'

@app.route('/')
def hello_world():
return render_template('Hello.html')
if __name__ == '__main__':
app.run()

启动 nginx 服务

好了,配置文件已经写好了,执行如下代码启动 nginx 服务:

1
2
nginx -c /root/demo/myflask/mynginx.conf   #启动nginx服务
ps -aux | grep nginx #查看nginx进程

这样我们就启动了自己编写的 nginx 配置文件,如下图所示:

img

浏览器访问http://ip:port,这里我们设置的端口号为 6789,如下图所示:

img

关闭 nginx 服务

通过配置文件启动 nginx 服务,需要执行如下代码关闭 nginx 服务:

1
2
3
nginx -s quit  #正常关闭
nginx -s stop #快速关闭
nginx -s reload #重新加载配置

好了,服务器——Nginx 安装及 Nginx 静态配置、部署就讲到这里了。

Nginx 简介和安装

  • 了解 Nginx:功能、优势和应用场景

简介

  • 这篇关于 Nginx 的介绍是我看过最详细的了:Nginx 学习-KuangStudy-文章
  • 这里我就不详细展开说了,网上的资料对 Nginx 都有着详尽的介绍,我仅依照自己的理解,给出我对 Nginx 的认识:
  • Nginx 是一个高性能的 HTTP 和反向代理 web 服务器,它的特点是负载均衡、反向代理

安装

windows 安装

  • Nginx 官网下载:nginx: download
  • 只需在官网下载安装包,在本地解压即可

本地 Linux 原始安装

宝塔 Linux 一键安装

  • 不论是云服务器还是本地服务器,宝塔 Linux 都是一键安装的,省去了大部分繁琐的配置
  • 你可以在登录宝塔面板之后,在软件商店里下载安装:
image-20230622143528026
  • 也可以在终端里,像本地 Linux 服务器一样,使用命令安装配置 Nginx

服务启停

  • 学会安装、启动和停止 Nginx 服务
  • 这里补充下 Nginx 常用命令:
1
nginx 					# 启动Nginx
1
nginx -c filename  		# 指定配置⽂件
1
nginx -V 				# 查看Nginx的版本和编译参数等信息
1
nginx -t 				# 检查配置⽂件是否正确,也可⽤来定位配置⽂件的位置
1
nginx -s quit 			# 优雅停⽌Nginx
1
nginx -s stop 			# 快速停⽌Nginx
1
nginx -s reload 		# 重新加载配置⽂件
1
nginx -s reopen 		# 重新打开⽇志⽂件

配置文件

🔥 推荐阅读:

反向代理和负载均衡

  • Nginx 反向代理和负载均衡:有效分发流量
  • 我们在本地的 4000、5173、8080 三个端口开启静态站点服务:

image-20230708095447602

image-20230708095520028

image-20230708095552638

  • 在 nginx.conf 文件下,分别开放 8887、8888、8889 端口,反向代理三个静态站点服务
  • 详细配置如下:
1
2
3
4
5
6
7
8
9
10
11
12
13
14
15
16
17
18
19
20
21
22
23
24
25
26
27
28
29
30
31
32
33
34
35
36
37
38
39
40
41
42
43
44
45
46
47
48
49
50
51
52
53
54
55
56
57
58
59
60
61
62
63
http {
include mime.types;
default_type application/json;

sendfile on;

keepalive_timeout 65;

upstream memory-blog {
server localhost:4000;
}

upstream memory-docs1 {
server localhost:5173;
}

upstream memory-docs2 {
server localhost:8080;
}

server {
listen 8887;
server_name localhost;

location / {
proxy_pass http://memory-blog;
}

error_page 500 502 503 504 /50x.html;
location = /50x.html {
root html;
}
}

server {
listen 8888;
server_name localhost;

location / {
proxy_pass http://memory-docs1;
}

error_page 500 502 503 504 /50x.html;
location = /50x.html {
root html;
}
}


server {
listen 8889;
server_name localhost;

location / {
proxy_pass http://memory-docs2;
}

error_page 500 502 503 504 /50x.html;
location = /50x.html {
root html;
}
}
}
  • 有关配置的详细讲解,在配置文件 👆 一栏中了解
  • 修改完配置,我们重新加载配置文件,并启动 Nginx 服务
1
nginx -s reload
1
nginx
  • 分别访问本地 8887、8888、8889 端口:

image-20230708100936095

image-20230708100544510

image-20230708100612584

  • 可以看到,我们开启了 Nginx 服务,只需访问 Nginx 给我们开放的端口,就能够访问到对应服务器,获取页面数据
  • 这是因为 Nginx 将我们的请求转发给了服务器,而用户是无感知的,这就是 Nginx 反向代理

静态网站部署

HTTPS 配置

  • 使用 Nginx 配置 HTTPS:安全加密通信

虚拟主机

  • Nginx 虚拟主机配置:多个网站共享一台服务器

踩坑经历

访问 Nginx403 错误

  • 开启错误日志:
image-20230622154707468
  • 查看错误日志,发现问题所在:
image-20230622154920109 image-20230622155144376
  • 然后访问 Nginx(记得 nginx -s reload),访问成功,大功告成
  • 这就是访问 Nginx 发生 403 错误的具体解决办法了,很有收获

总结


Nginx 入门指南:理解、配置和优化
https://test.atomgit.net/blog/2023/06/22/Nginx 入门指南:理解、配置和优化/
作者
Memory
发布于
2023年6月22日
更新于
2024年7月9日
许可协议