大道至简:快速搭建博客与文档站点的终极指南2.0
本文最后更新于:2 个月前

破冰
对 Gitee 进行简介,介绍其作为开源托管平台的优势和受欢迎程度
提出使用 Gitee 来托管静态网站的需求和好处
2024 年 7 月 15 日
🥣 推荐阅读:
yadong.zhang/OneBlog - 码云 - 开源中国 (gitee.com)
思维碰撞
云服务器部署 Hexo 博客
尝试,经验
以下是我从五月初到六月初这一个月以来,尝试云服务器部署 Hexo 博客的实操经历,仅供参考。
如果需要学习详细的博客部署全流程,可以跳过这部分内容,直接看最全最细的部署流程
2024 年 5 月 7 日
上上周六下午突然发现 Gitee Pages 失效了,等了快半个月官方仍没有发任何公告或通知。今天看到消息,估计官方计划关闭个人账户下的 Gitee Pages 服务,只保留企业版的。
我是不能坐以待毙了,赶紧学一学如何部署 Hexo 博客网站到云服务器上,正好去年十一月份买的阿里云服务器闲置着没地方用呢。
Hexo 博客搭建并发布到云服务器 - 我如云影君如梦 - 博客园 (cnblogs.com)
在云服务器上搭建 hexo 博客(亲测可用) - 菲尼克斯交警 - 博客园 (cnblogs.com)
Hexo 部署到云服务器 - 简书 (jianshu.com)
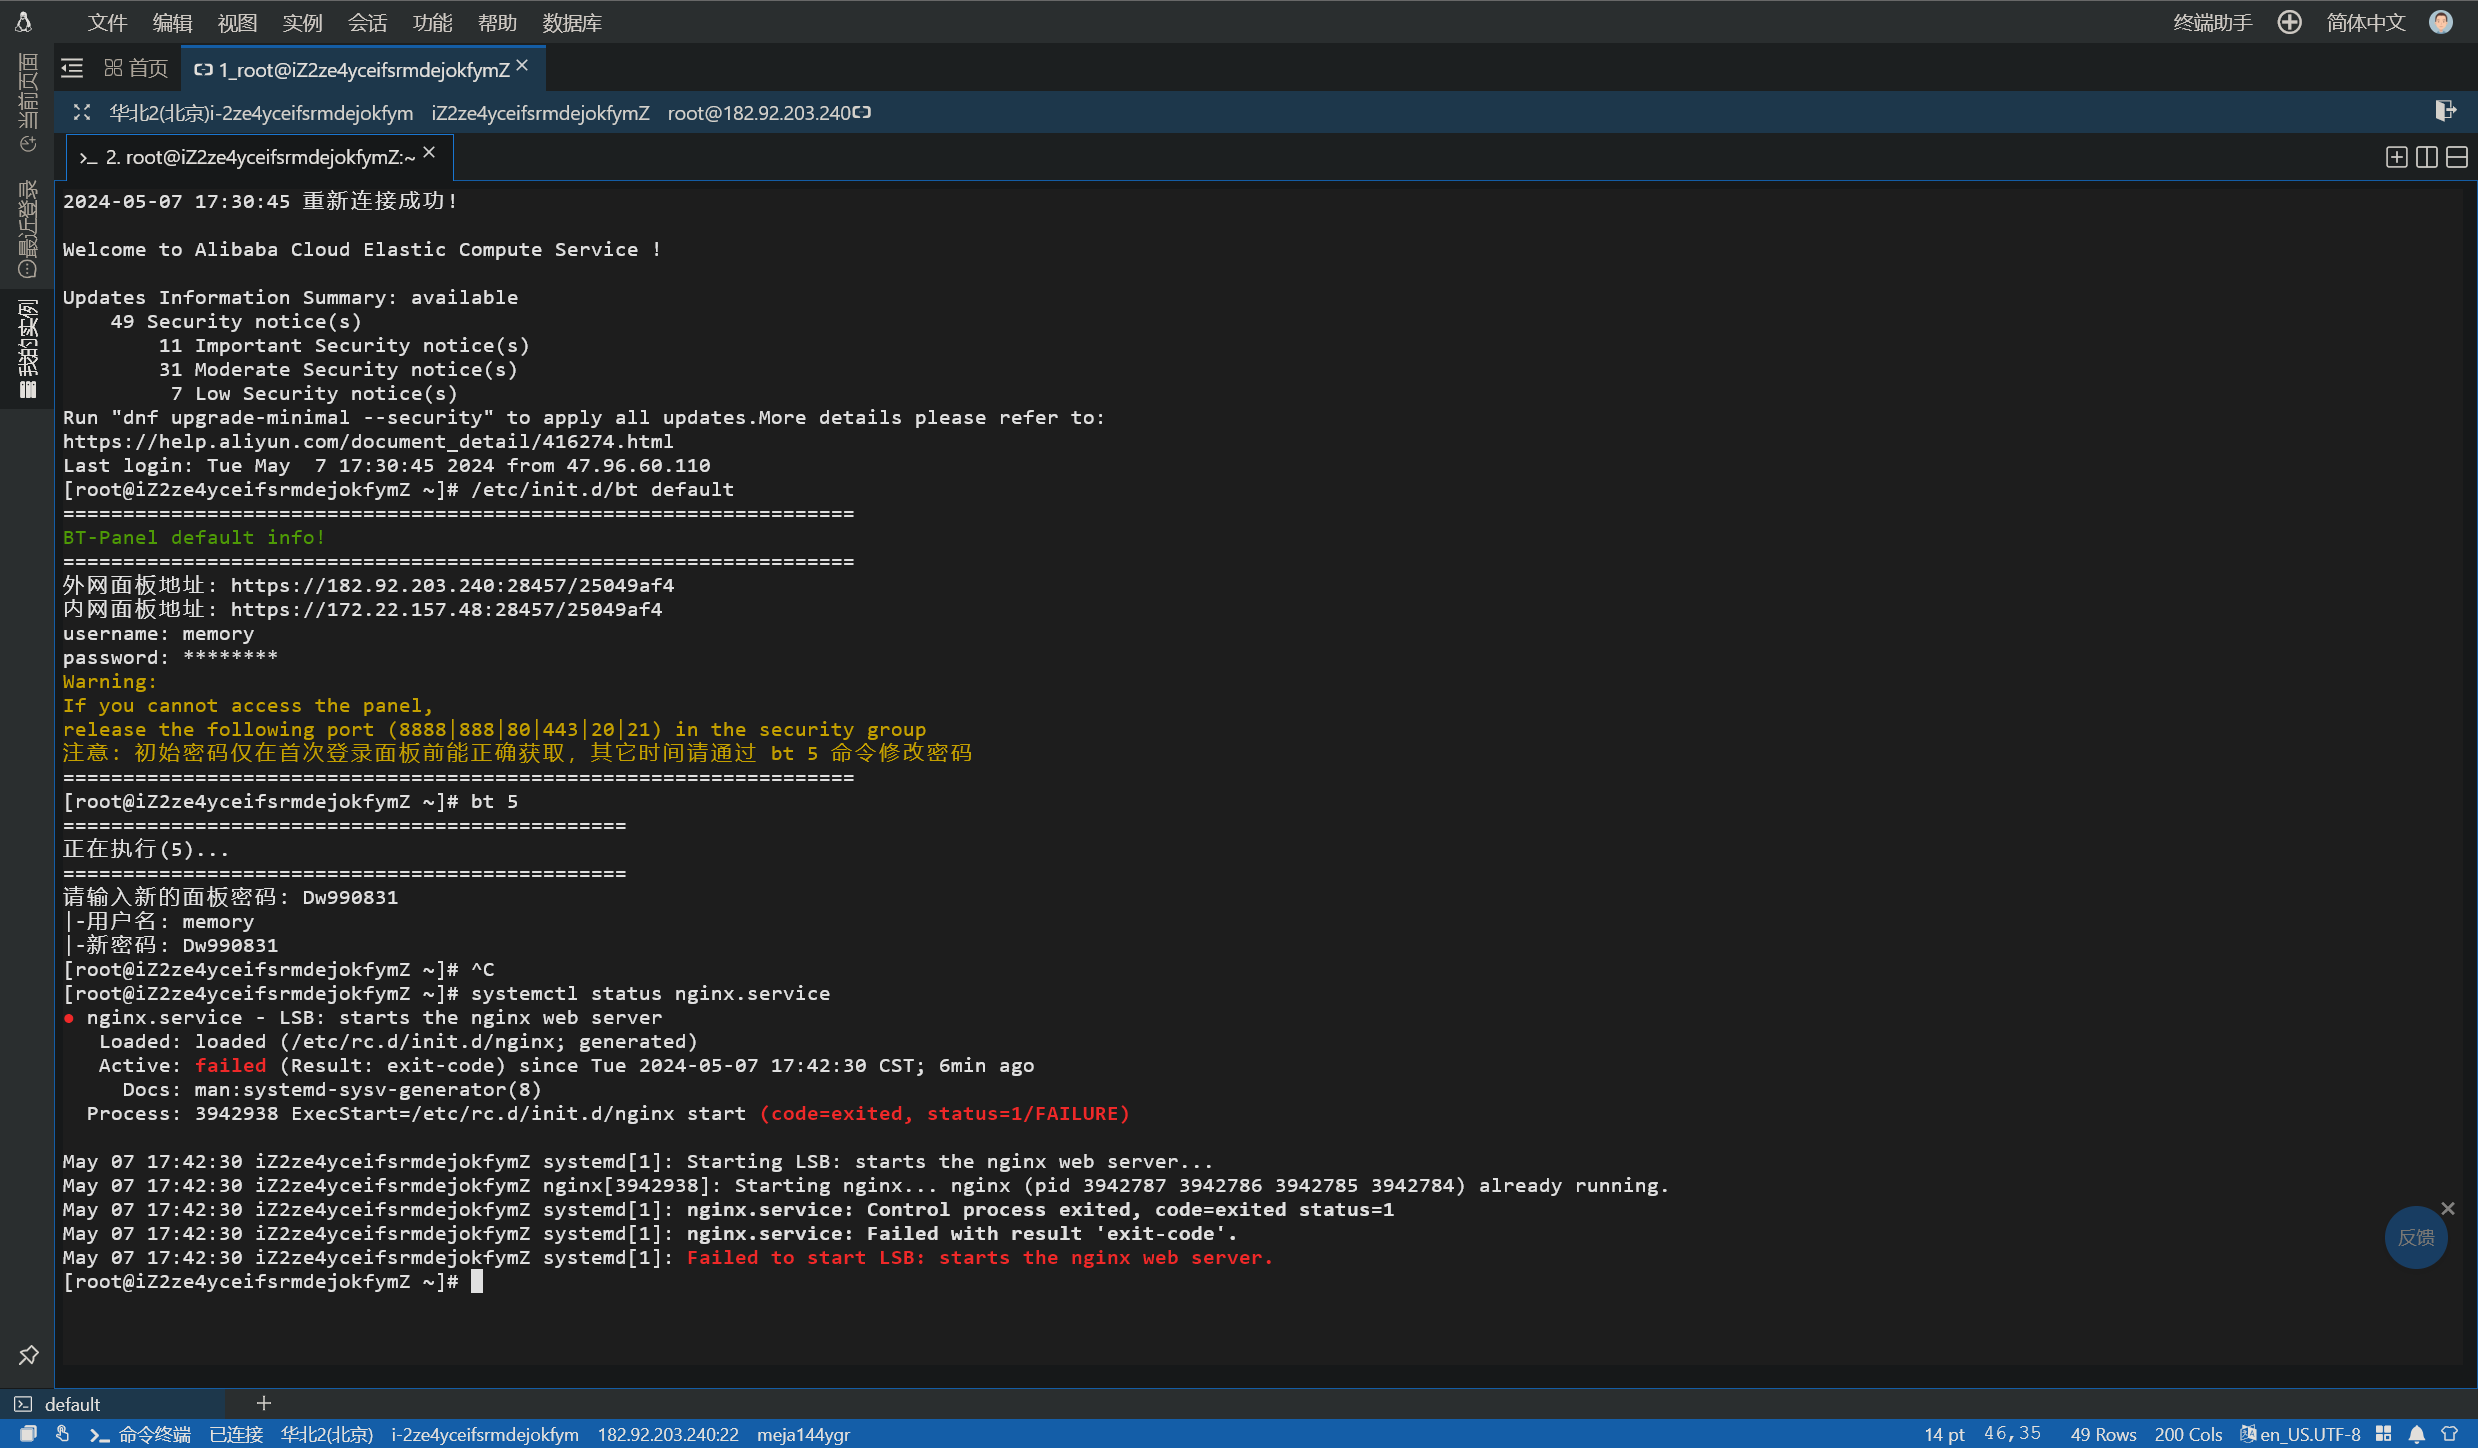
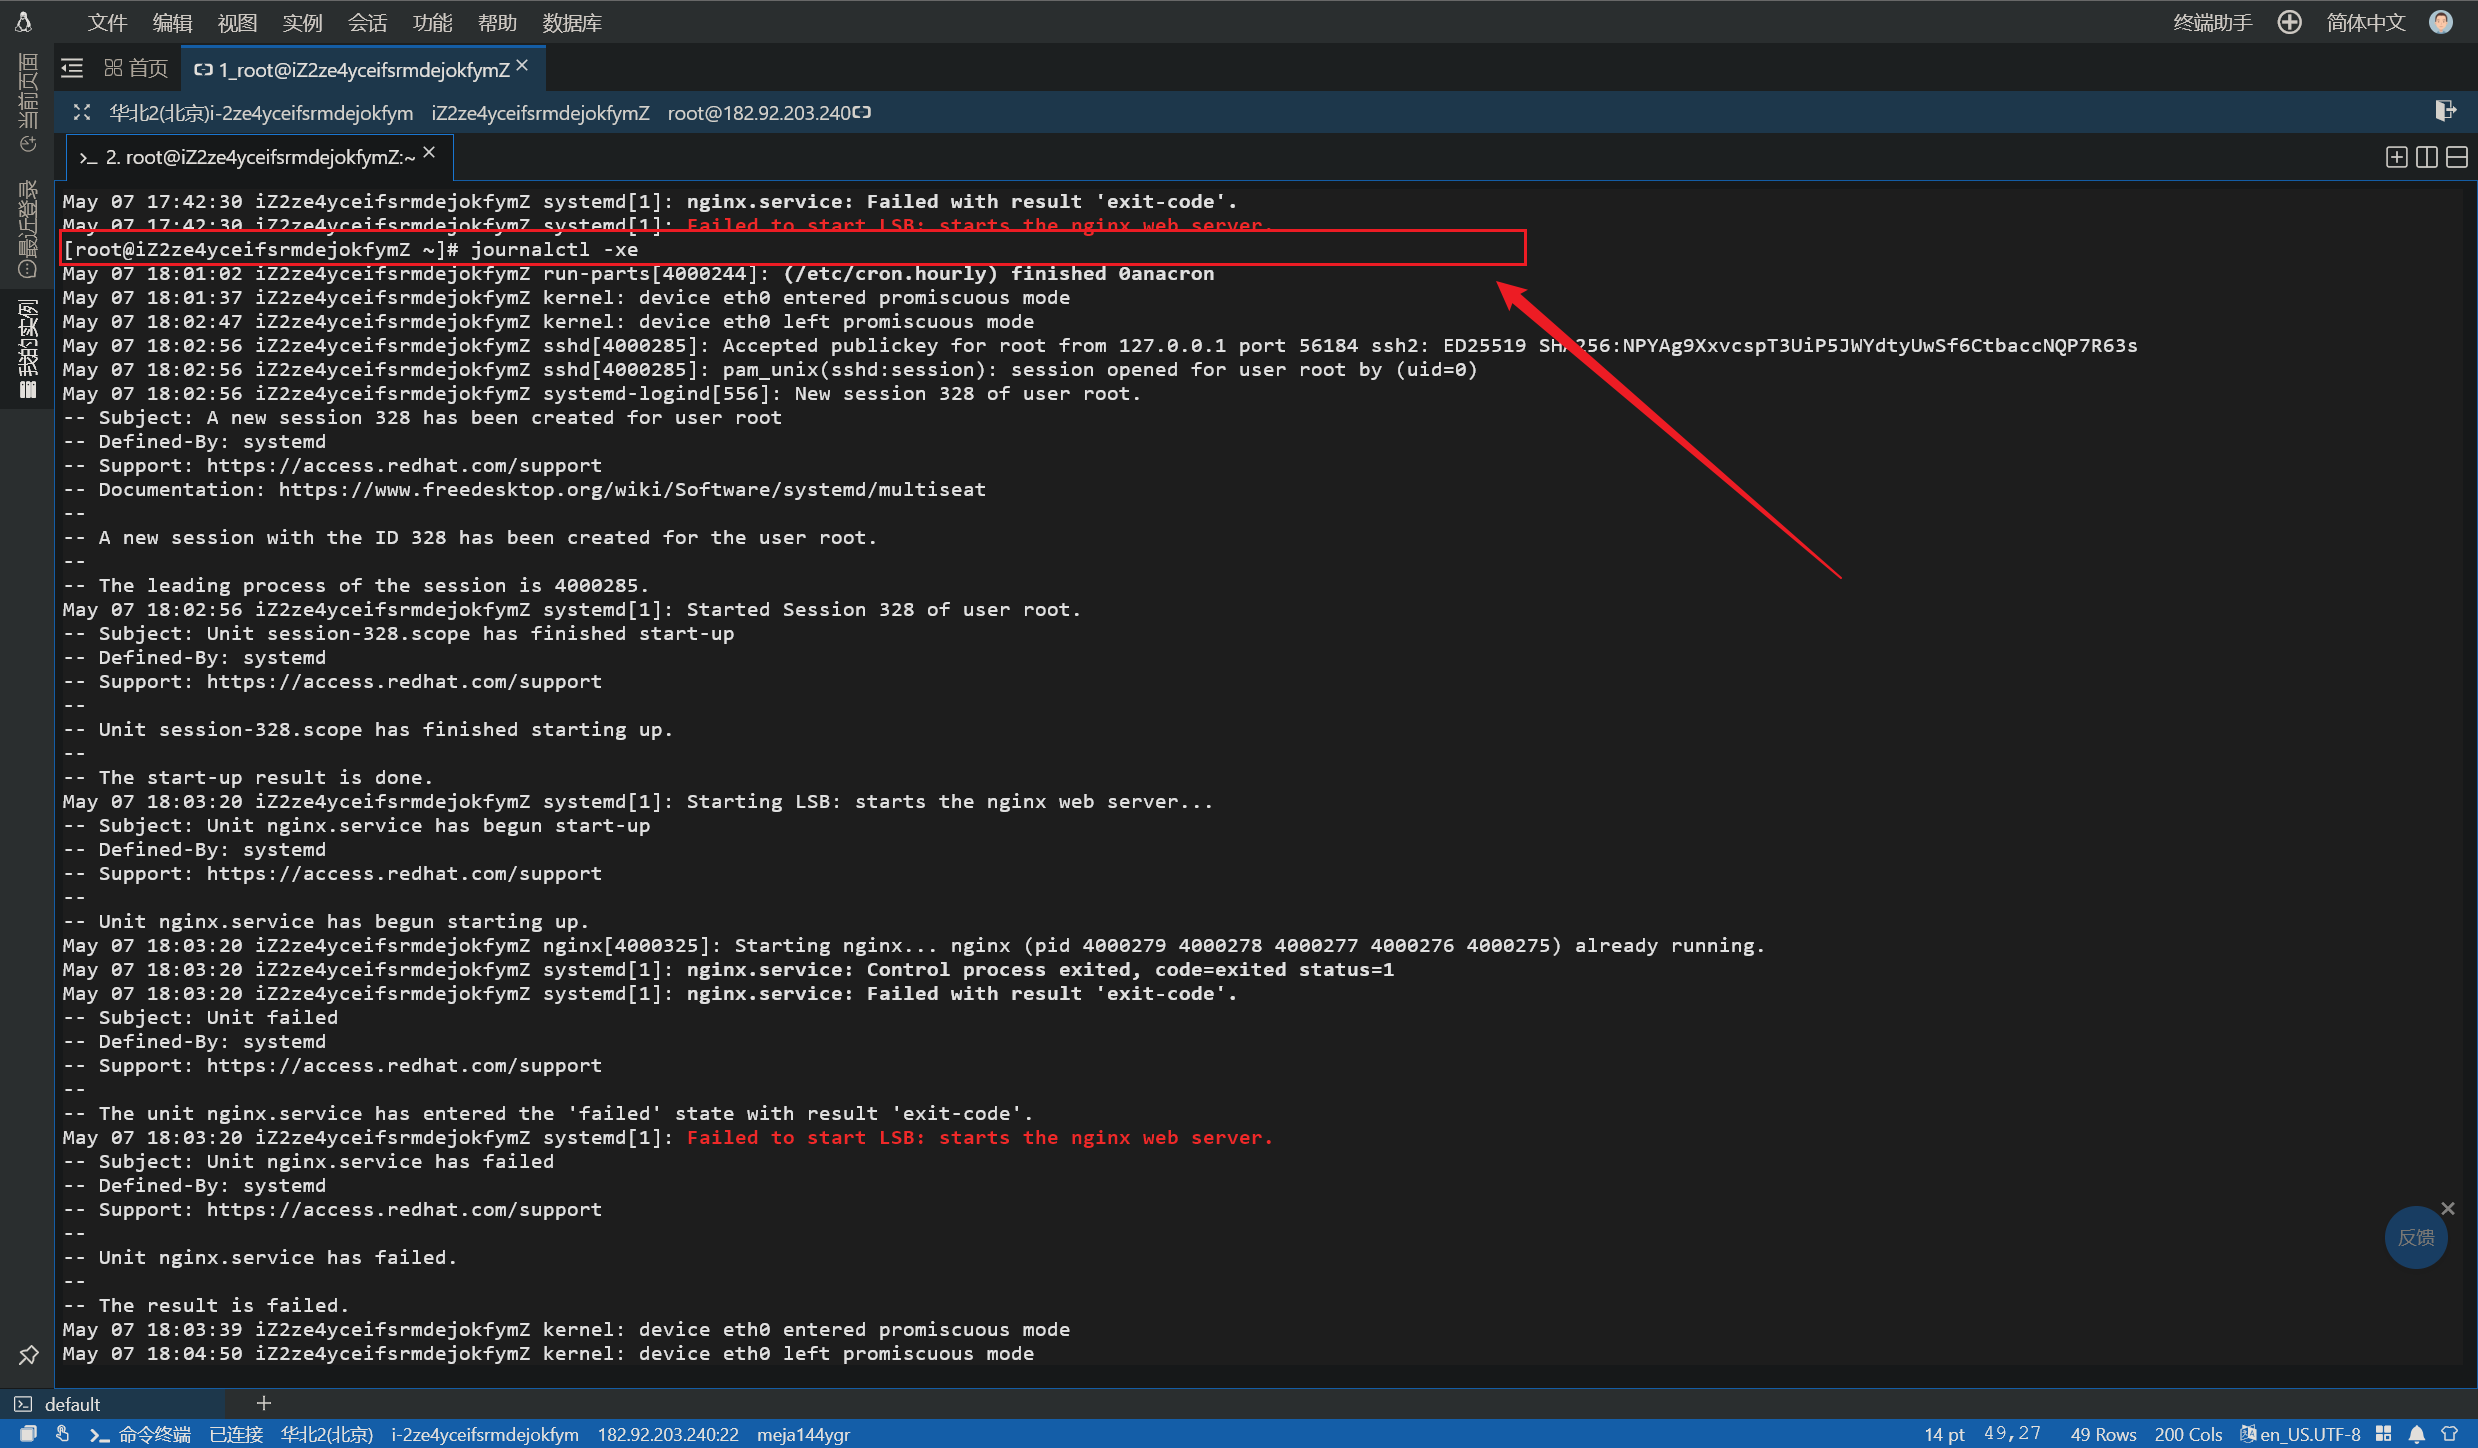
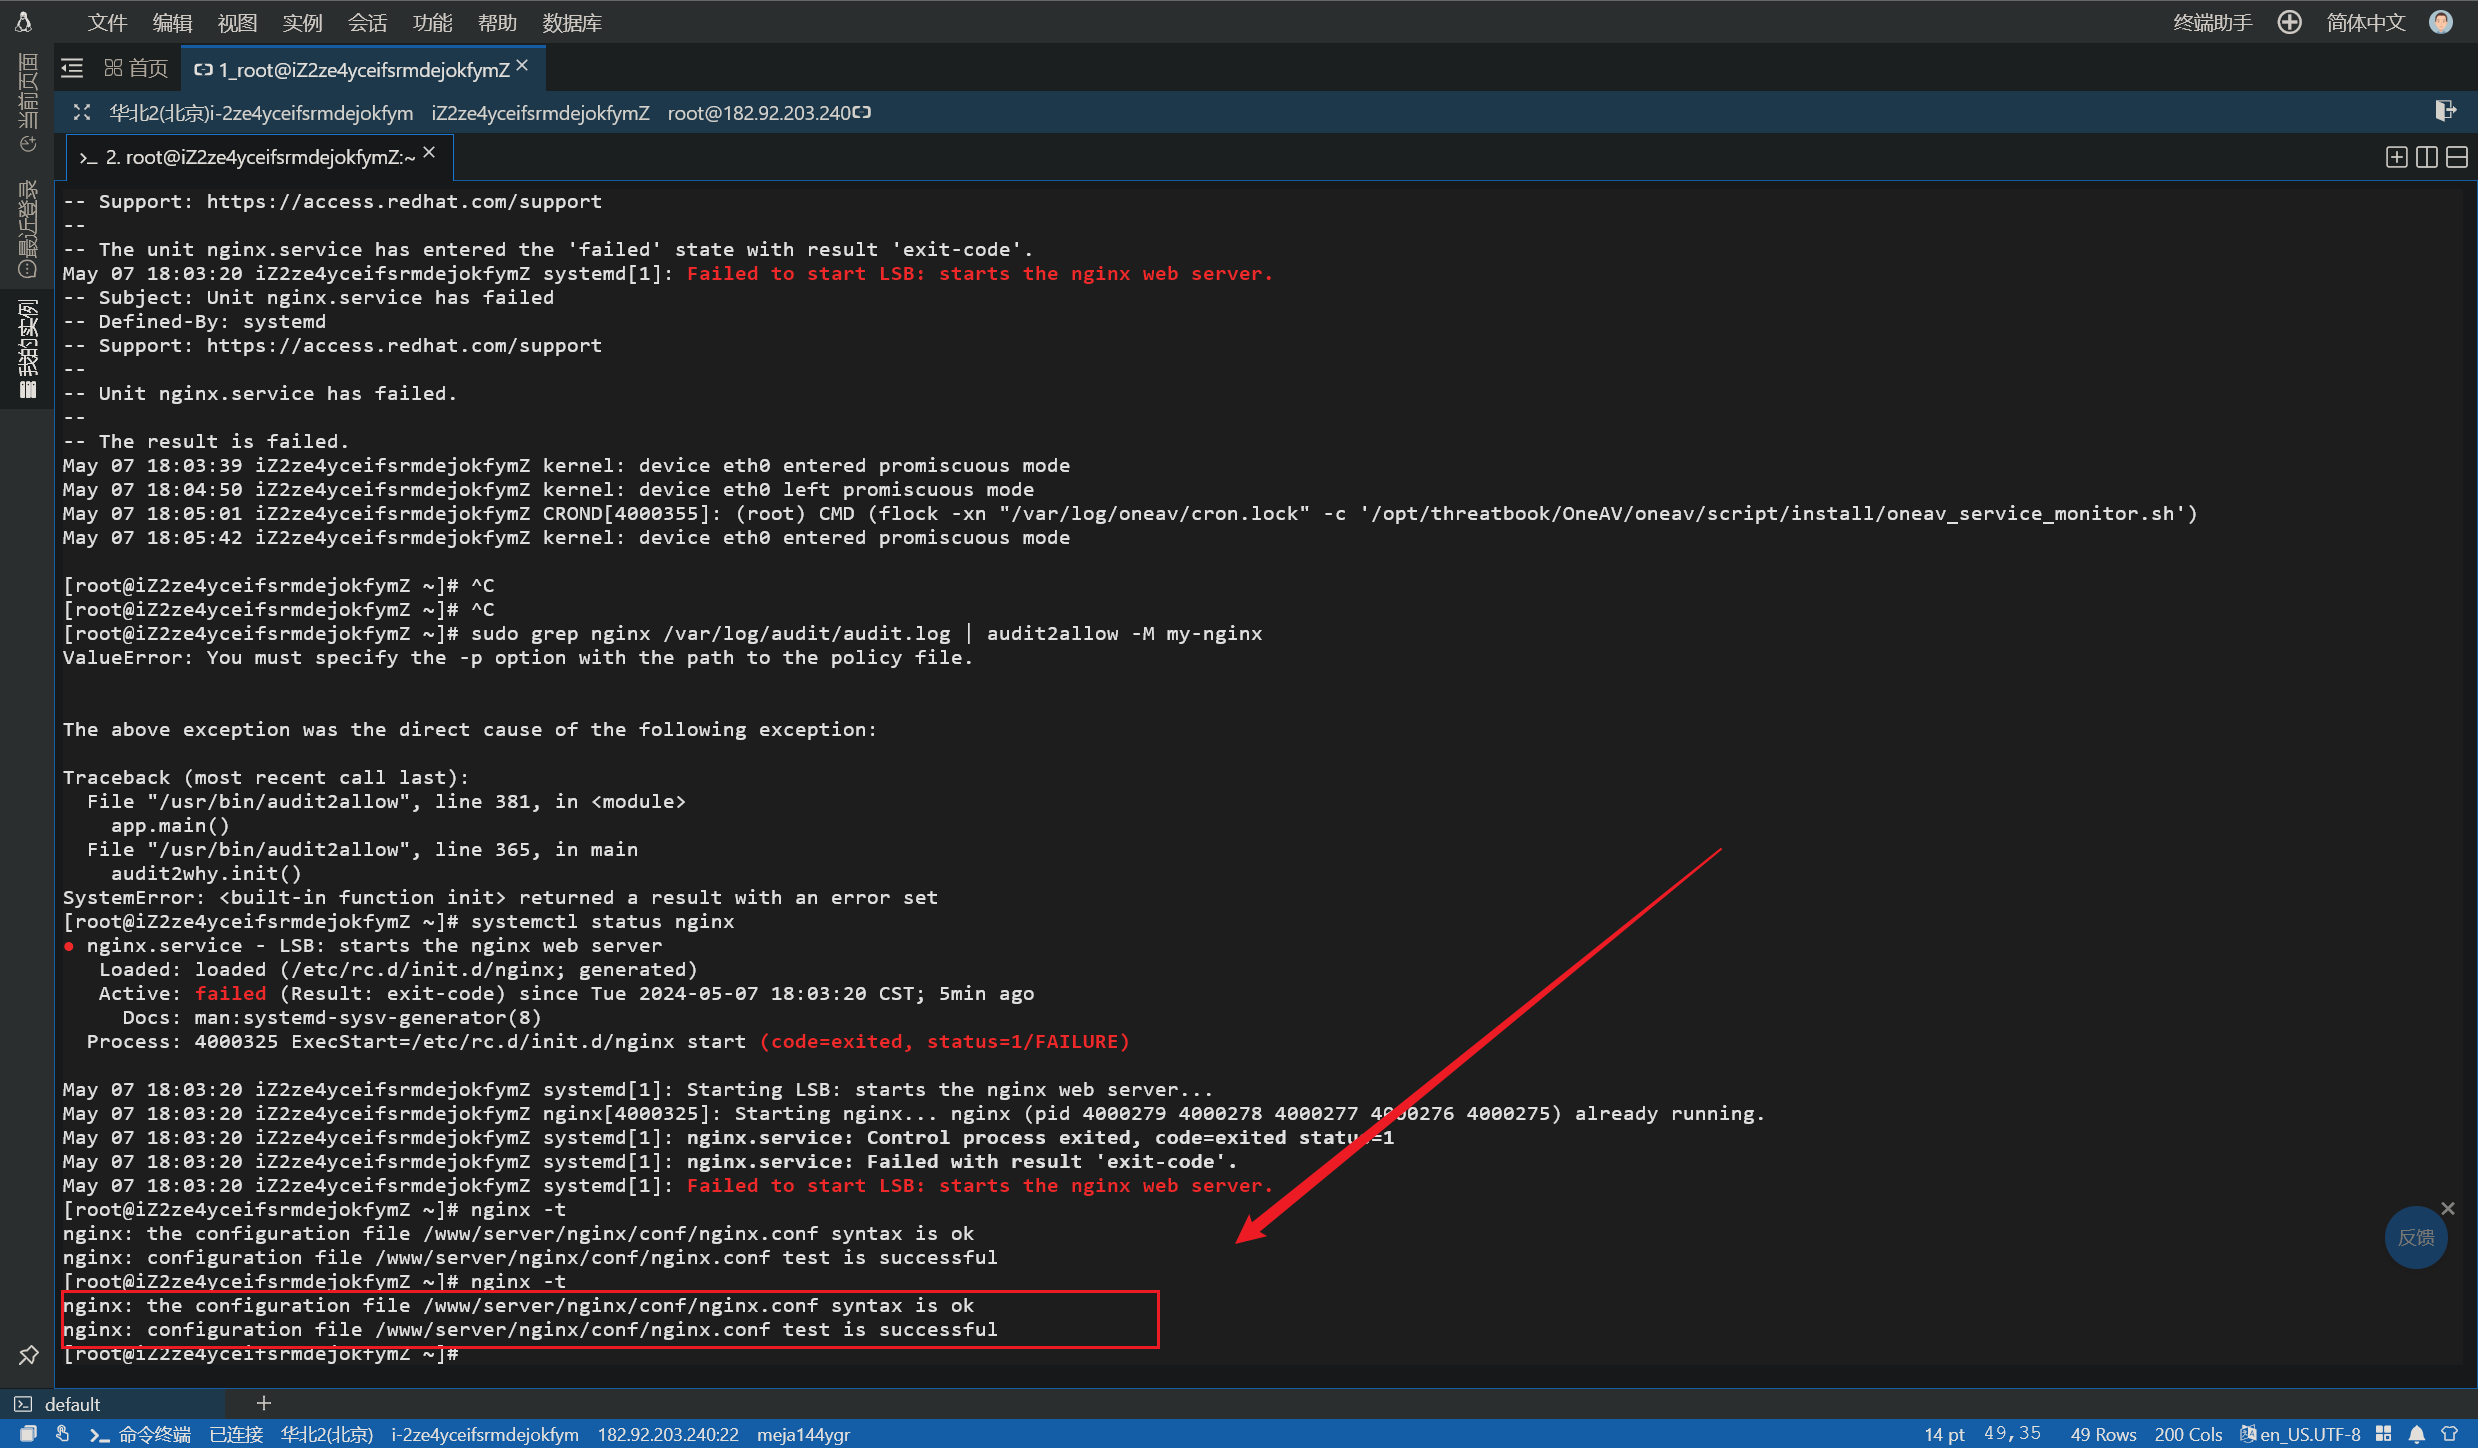
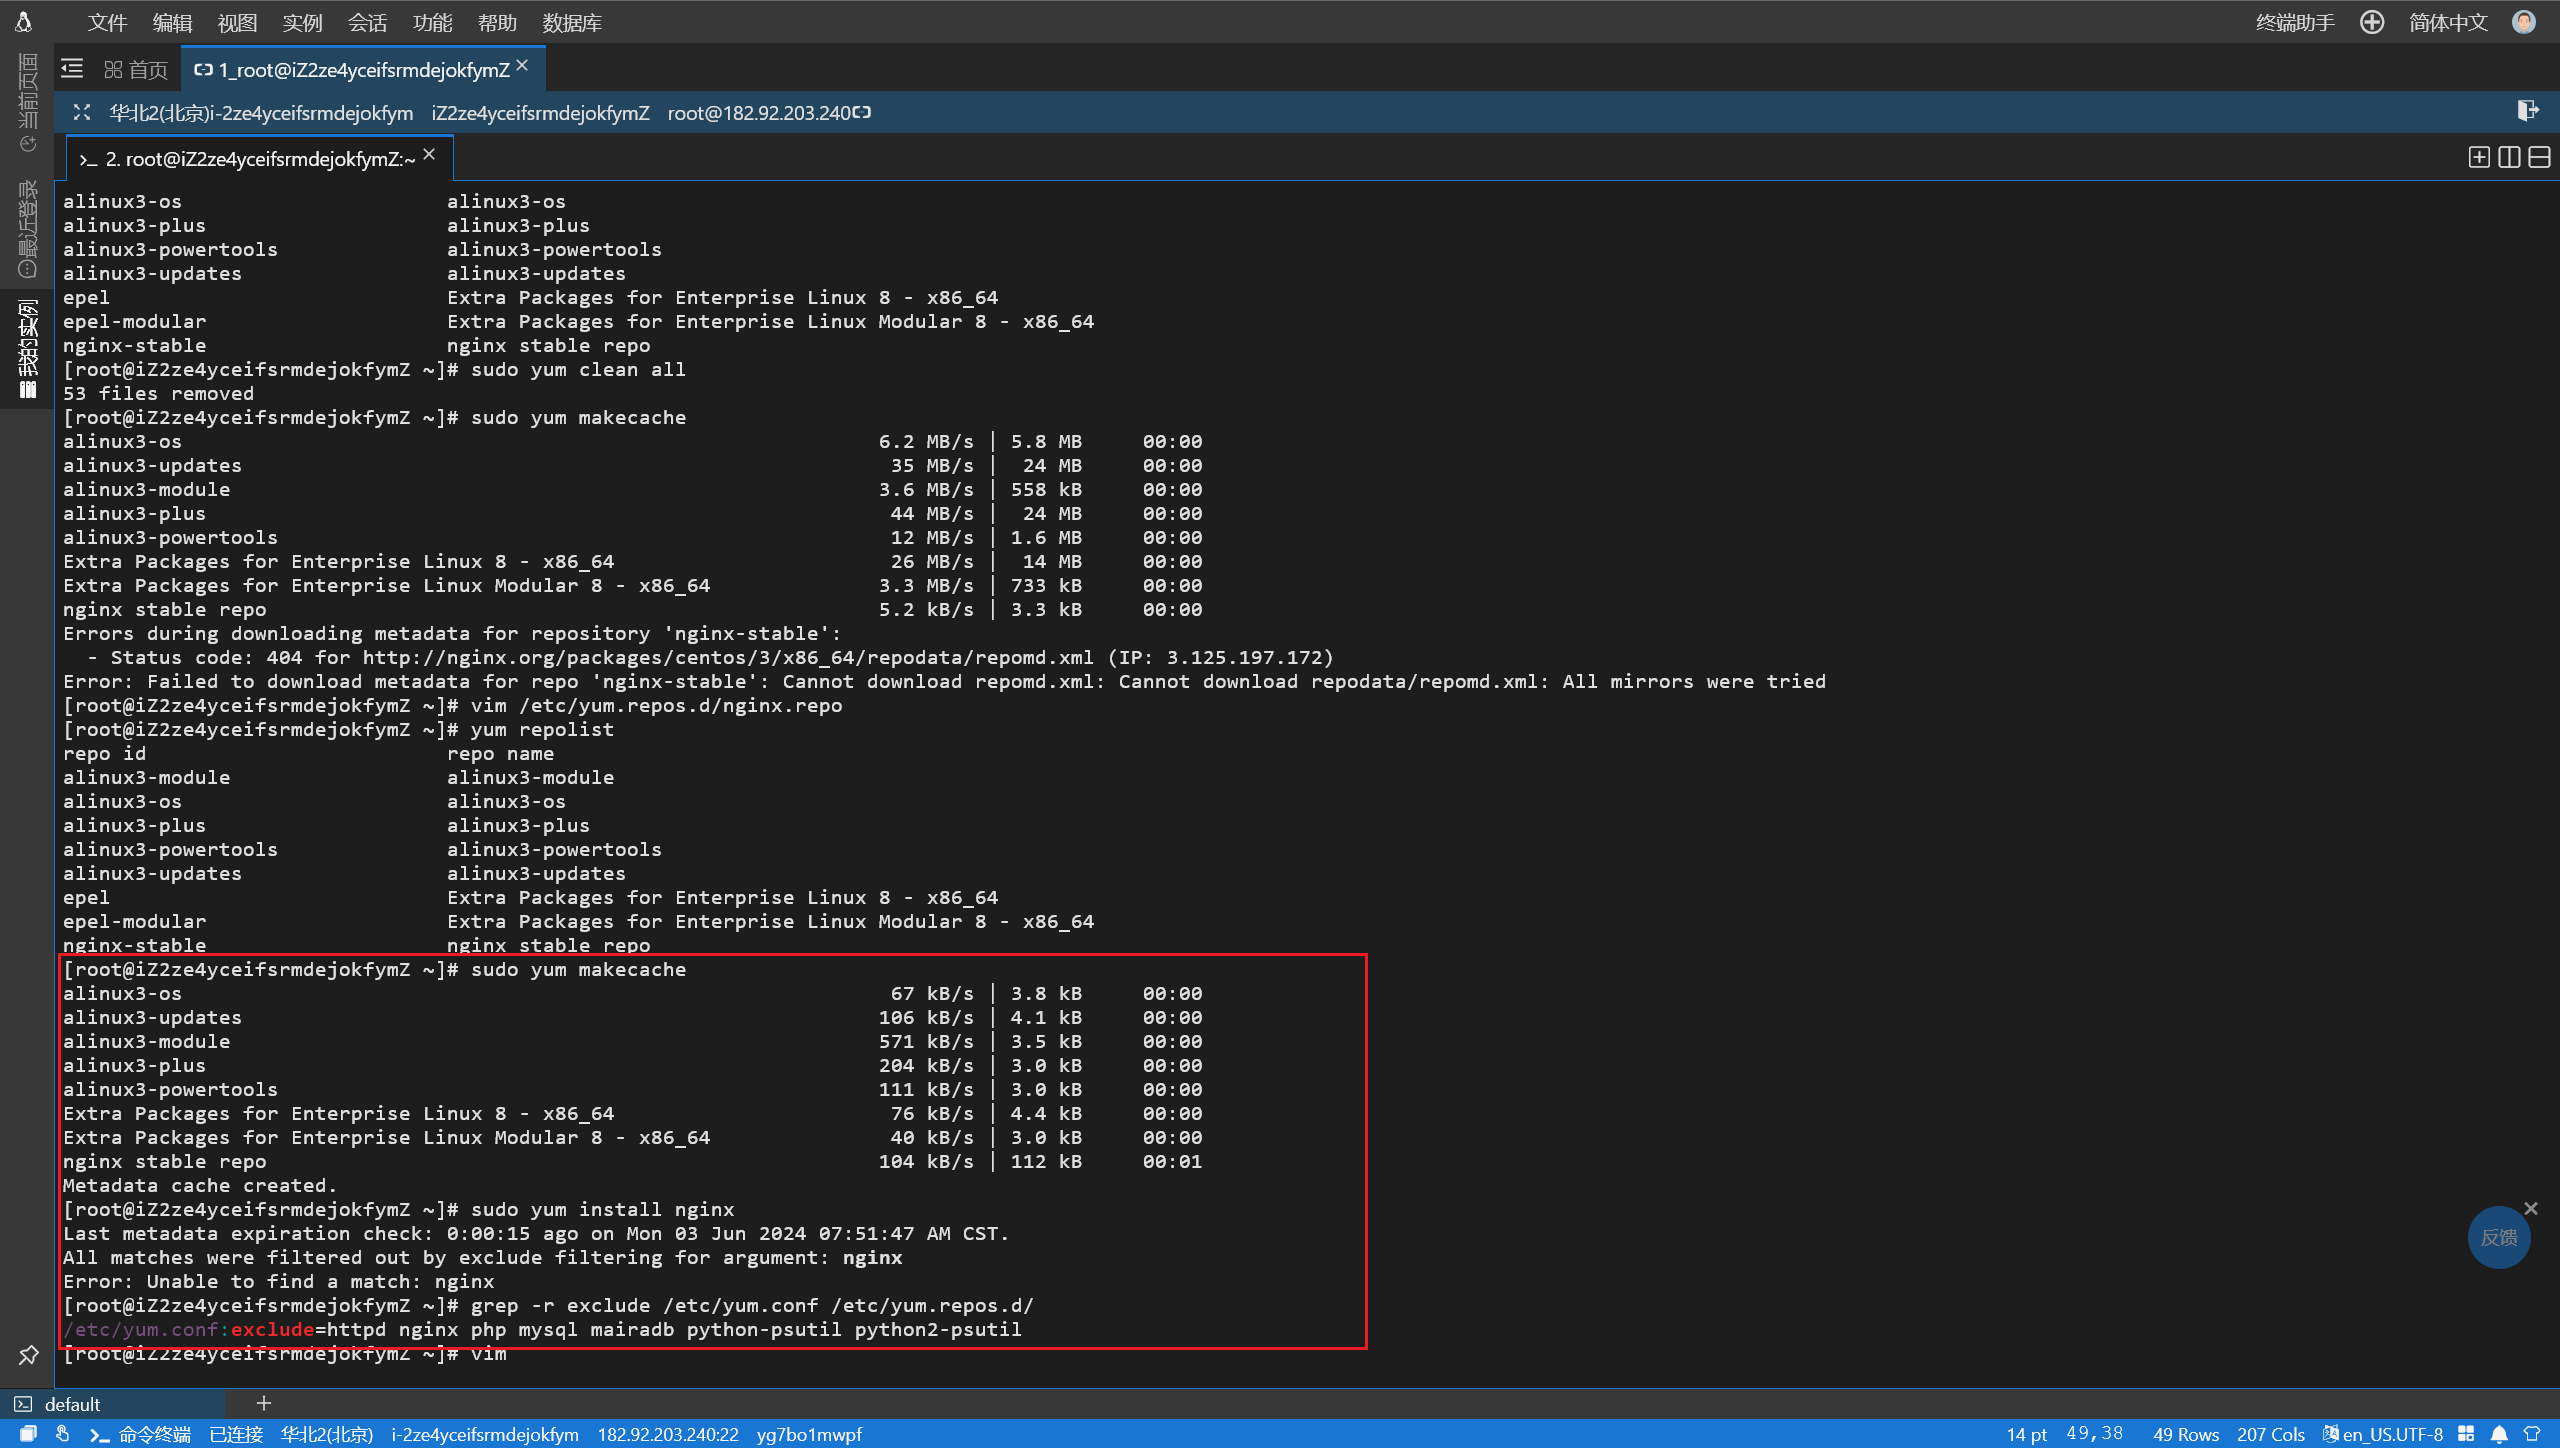
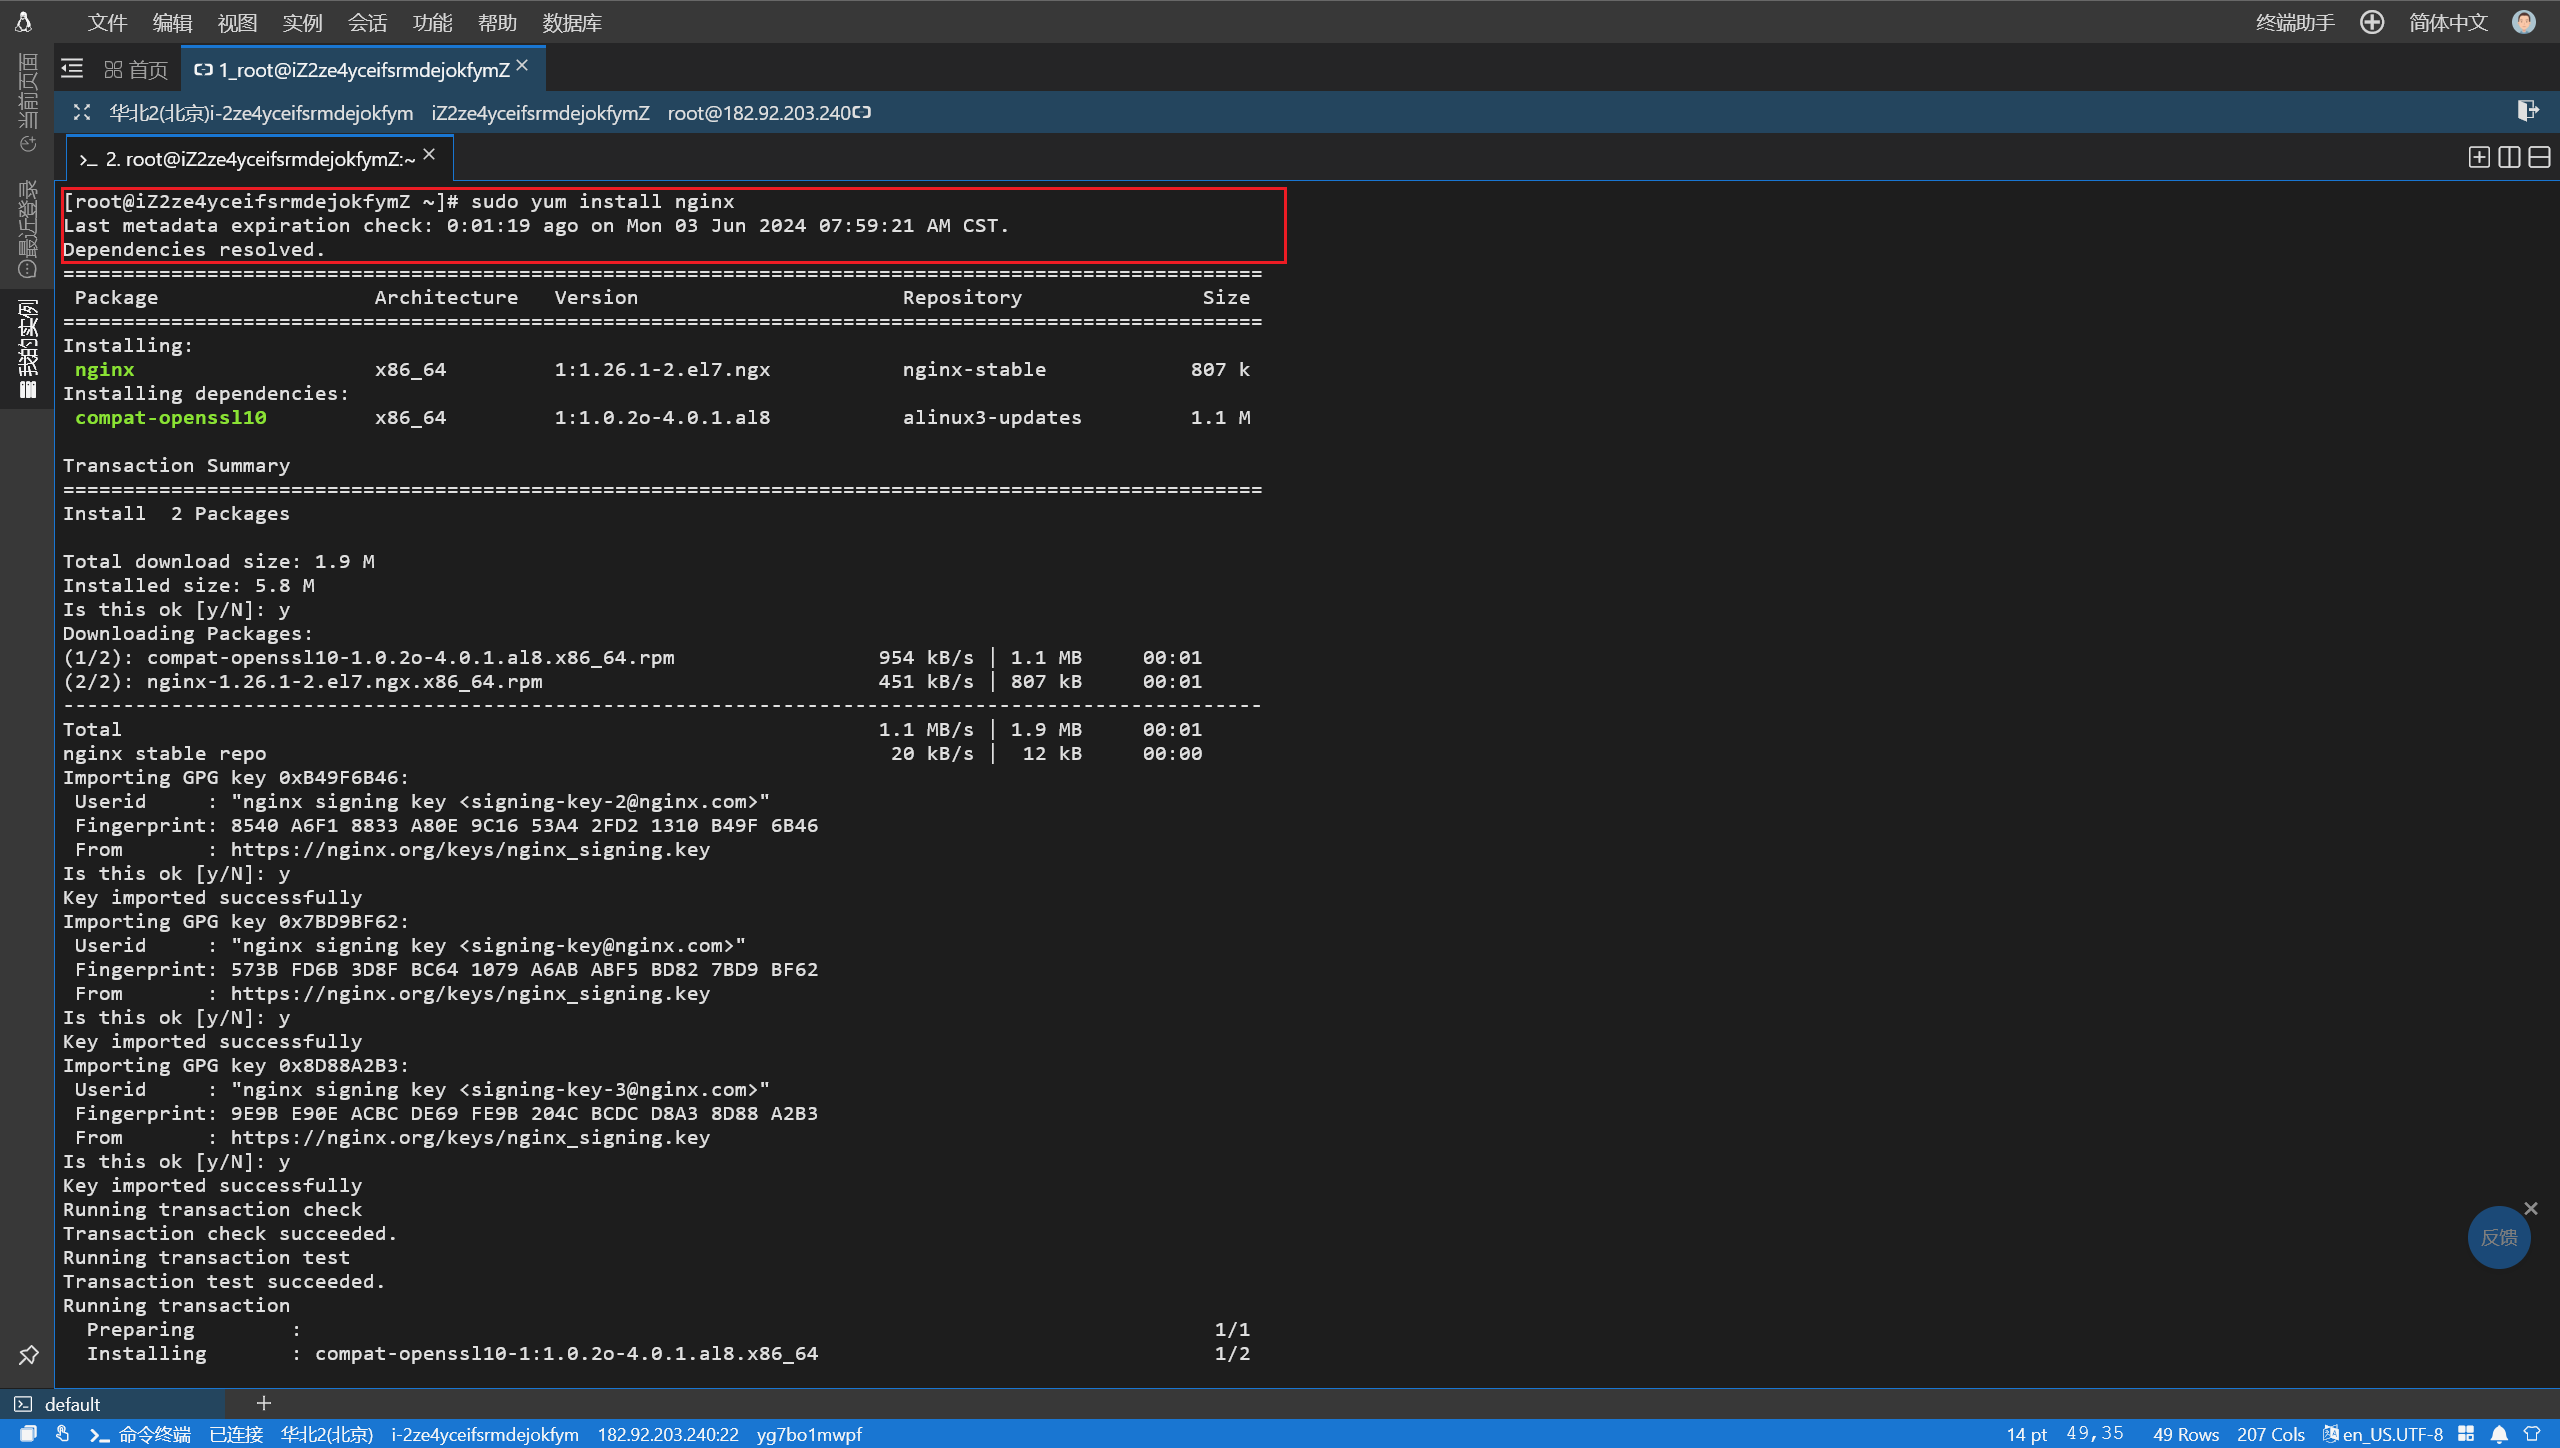
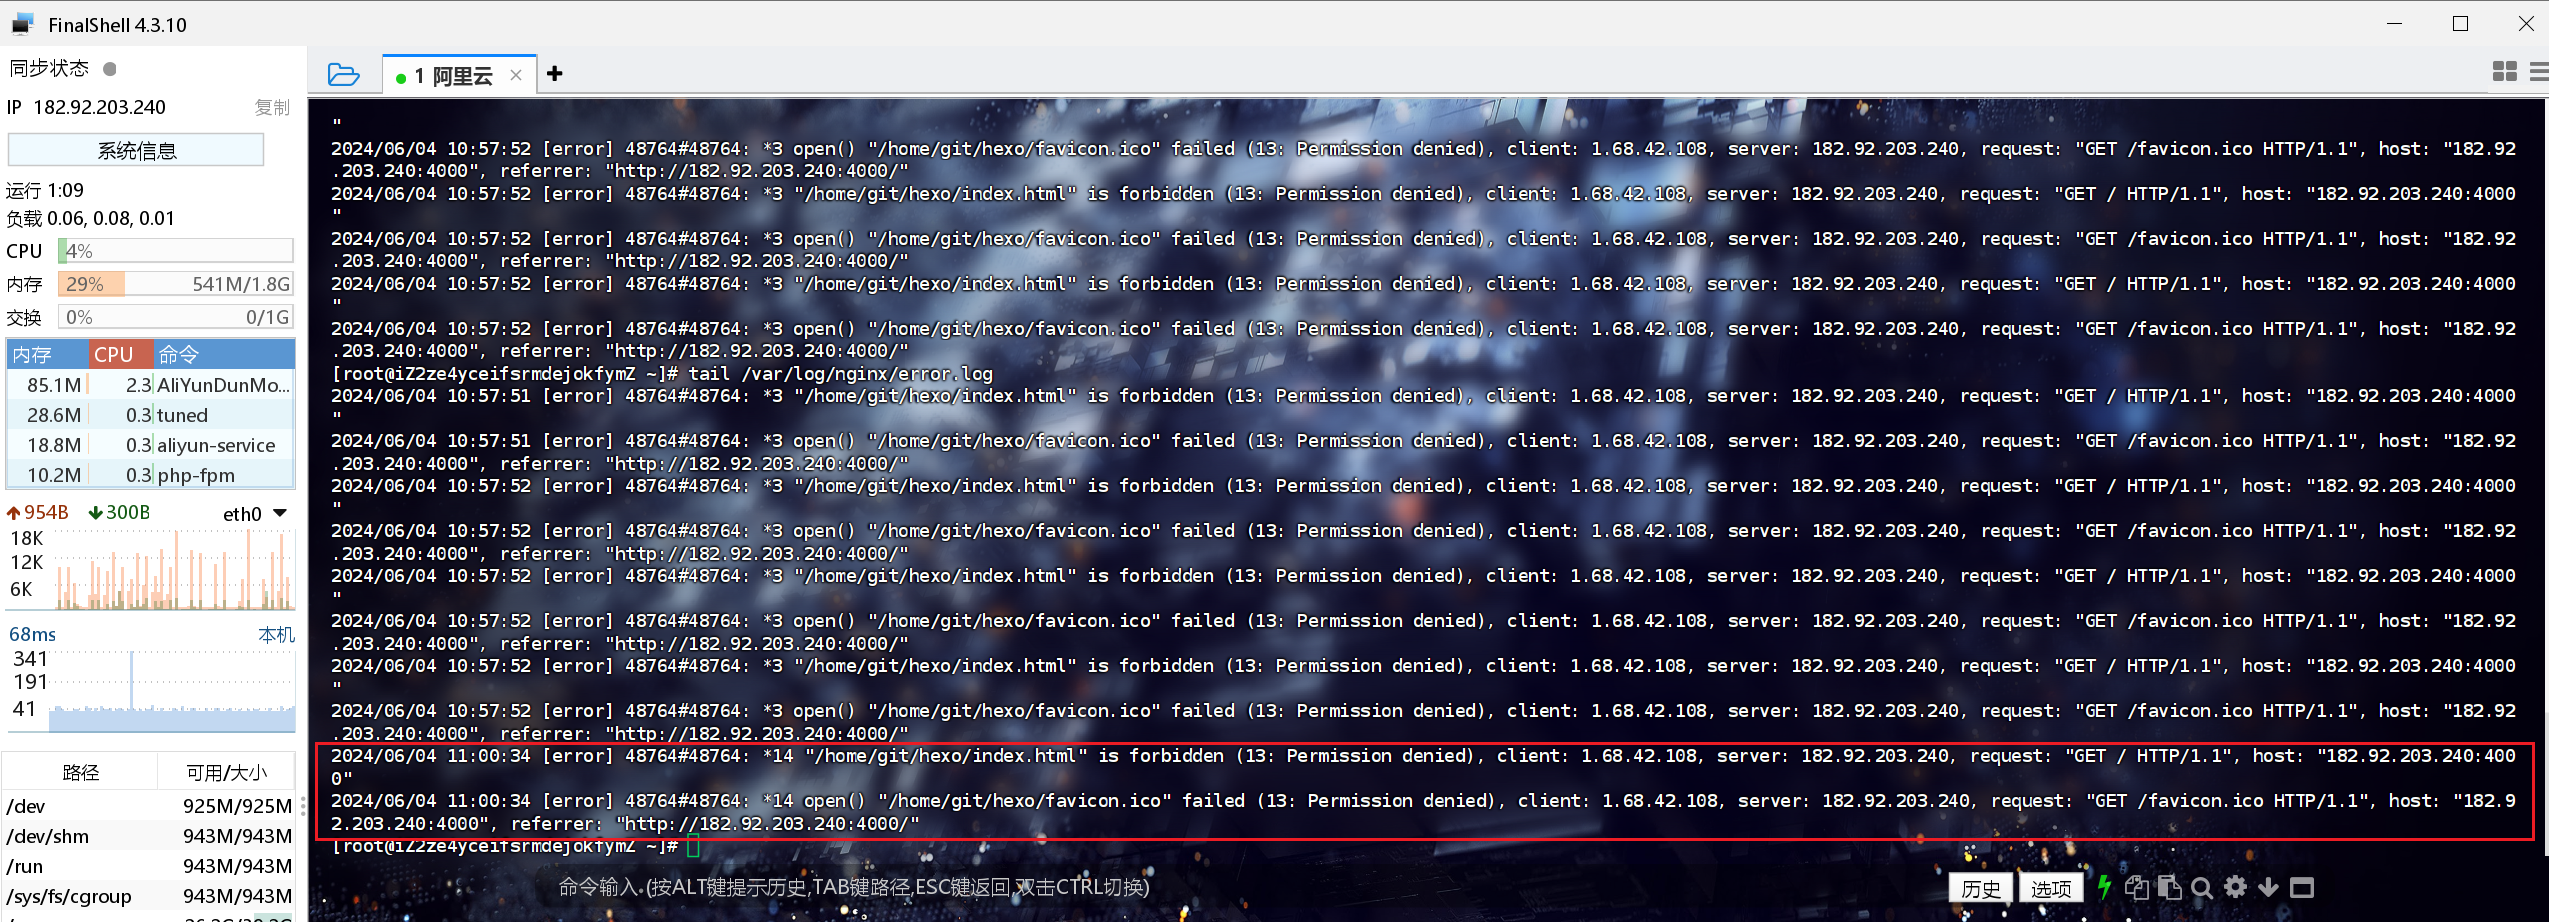
Nginx 启动报错,卸载重新安装还是一样。
Linux 启动 nginx 失败_linux nginx 无法启动-CSDN 博客
1 | |
1 | |
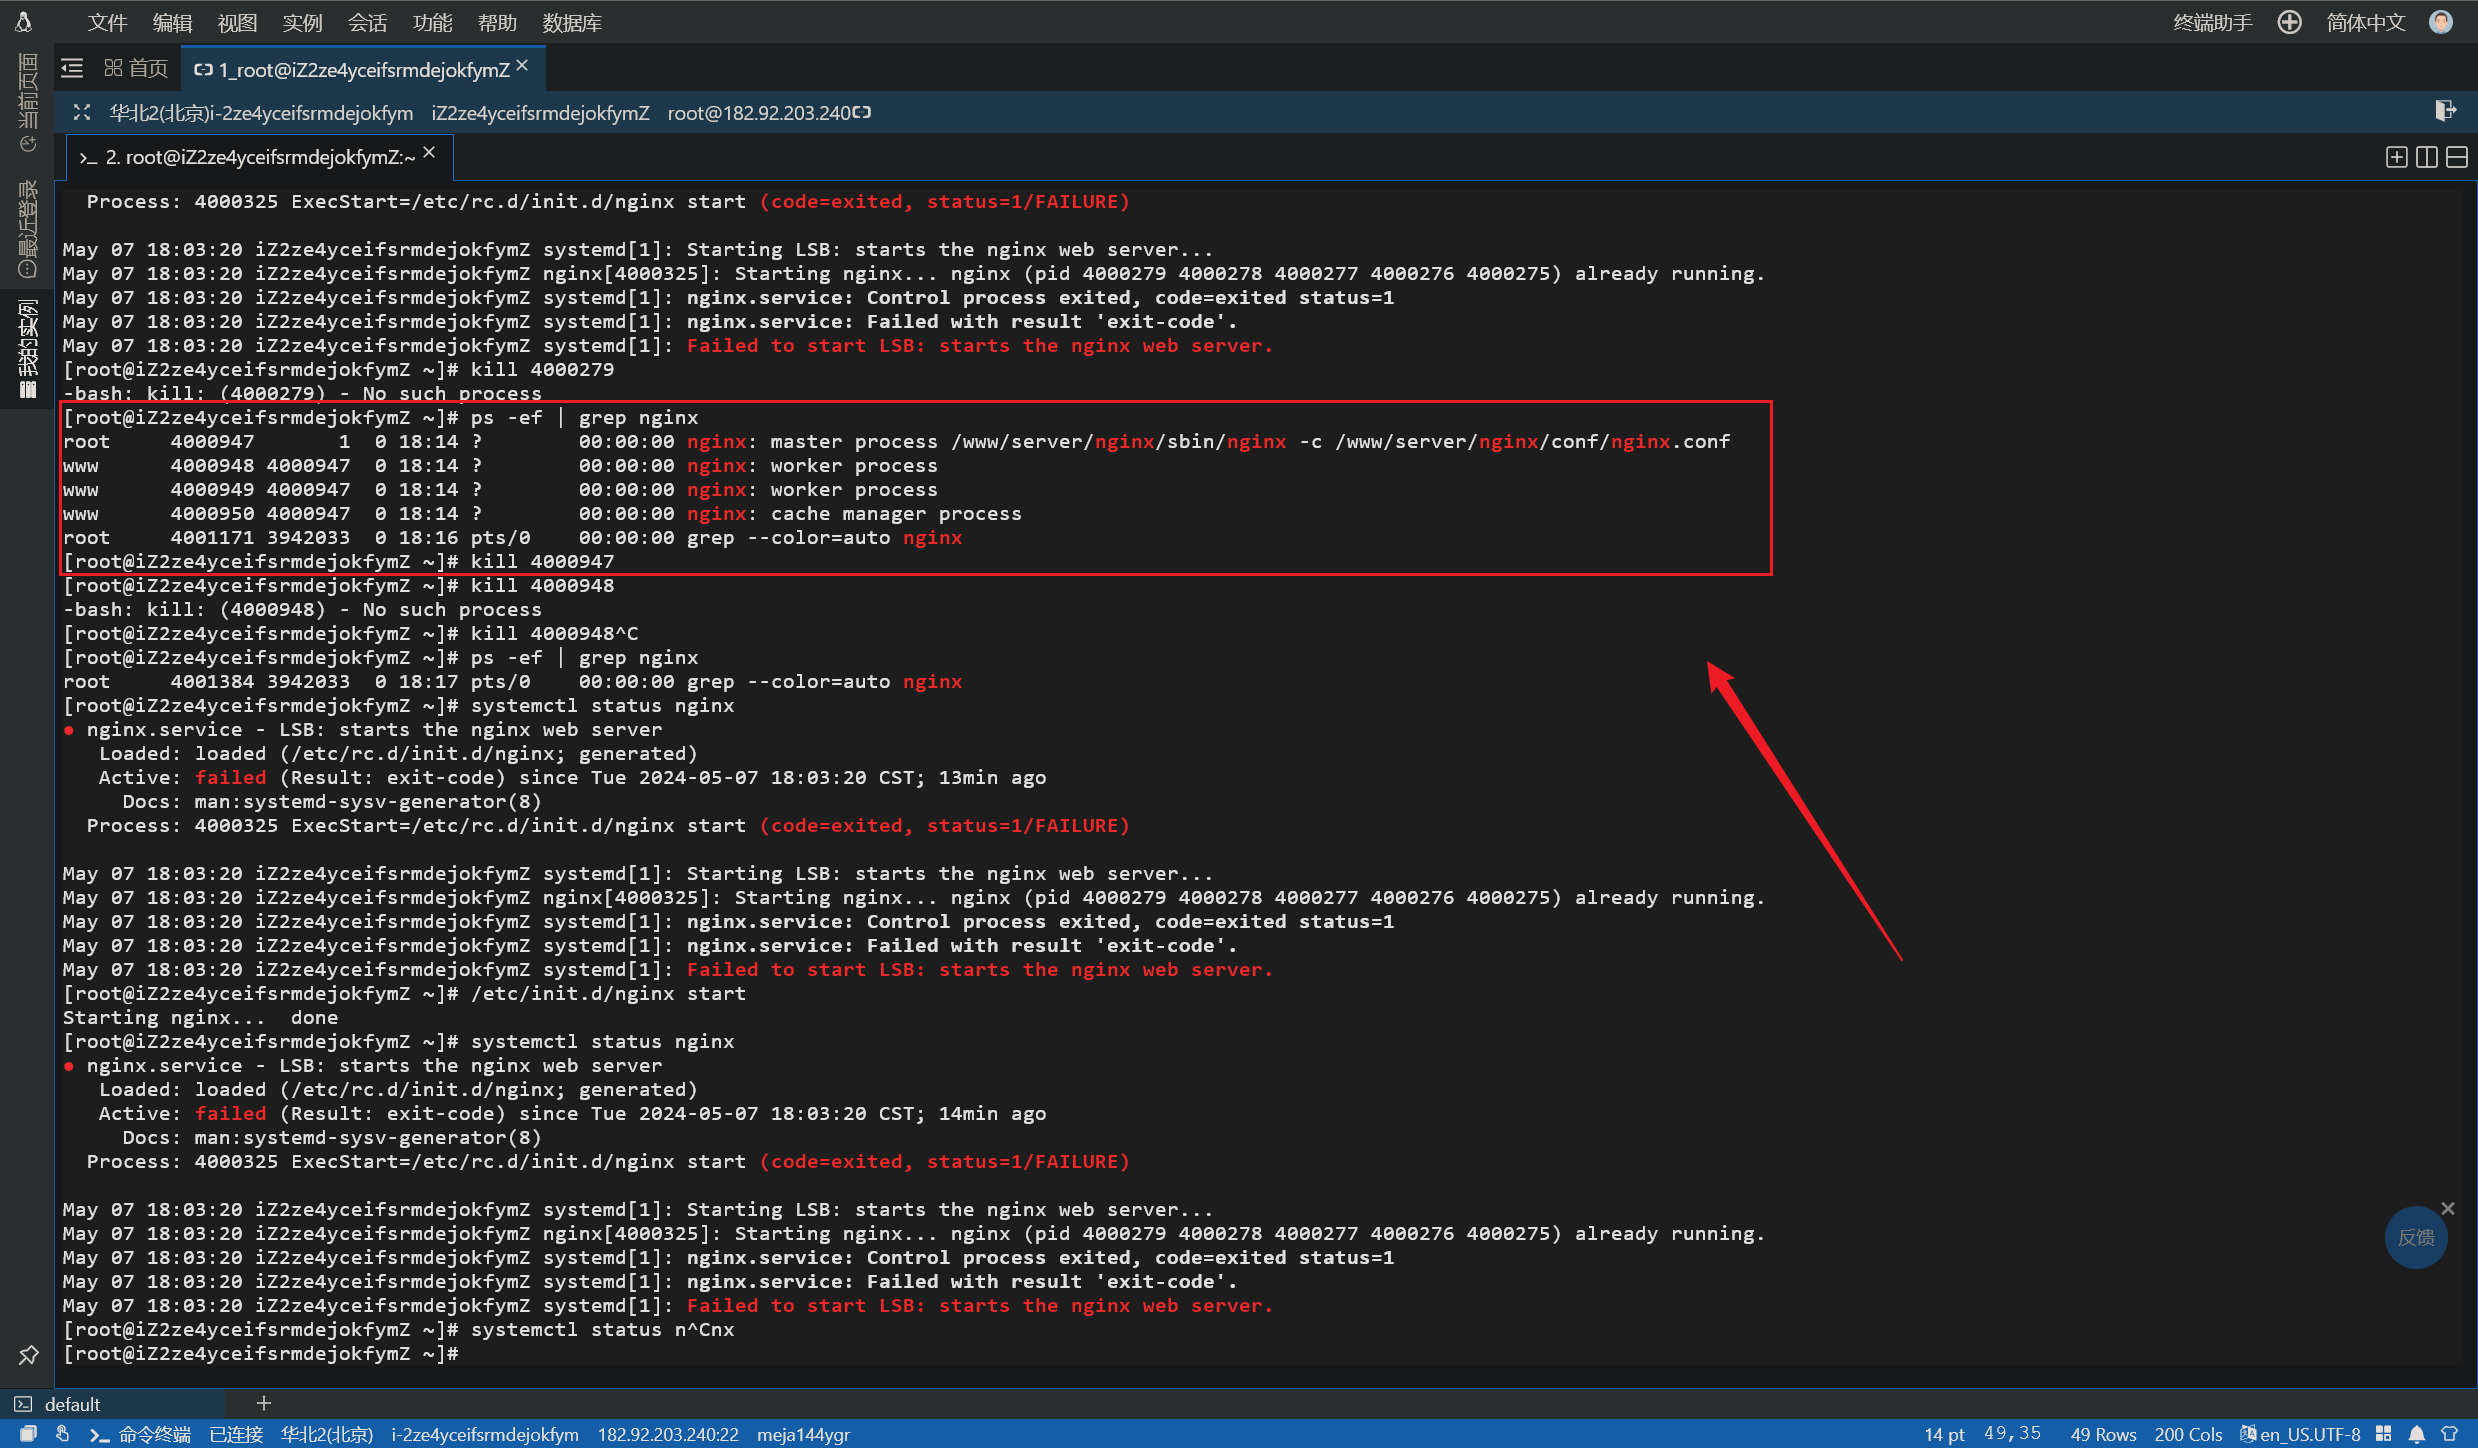
奇了怪了,端口未被占用,配置文件也无误,为什么还是启动不了呢,我越发觉得有意思起来了。
诶?
突然显示服务器连接失败,我又重新远程登录进来:依次执行五步操作:
1 | |
1 | |
1 | |
1 | |
1 | |
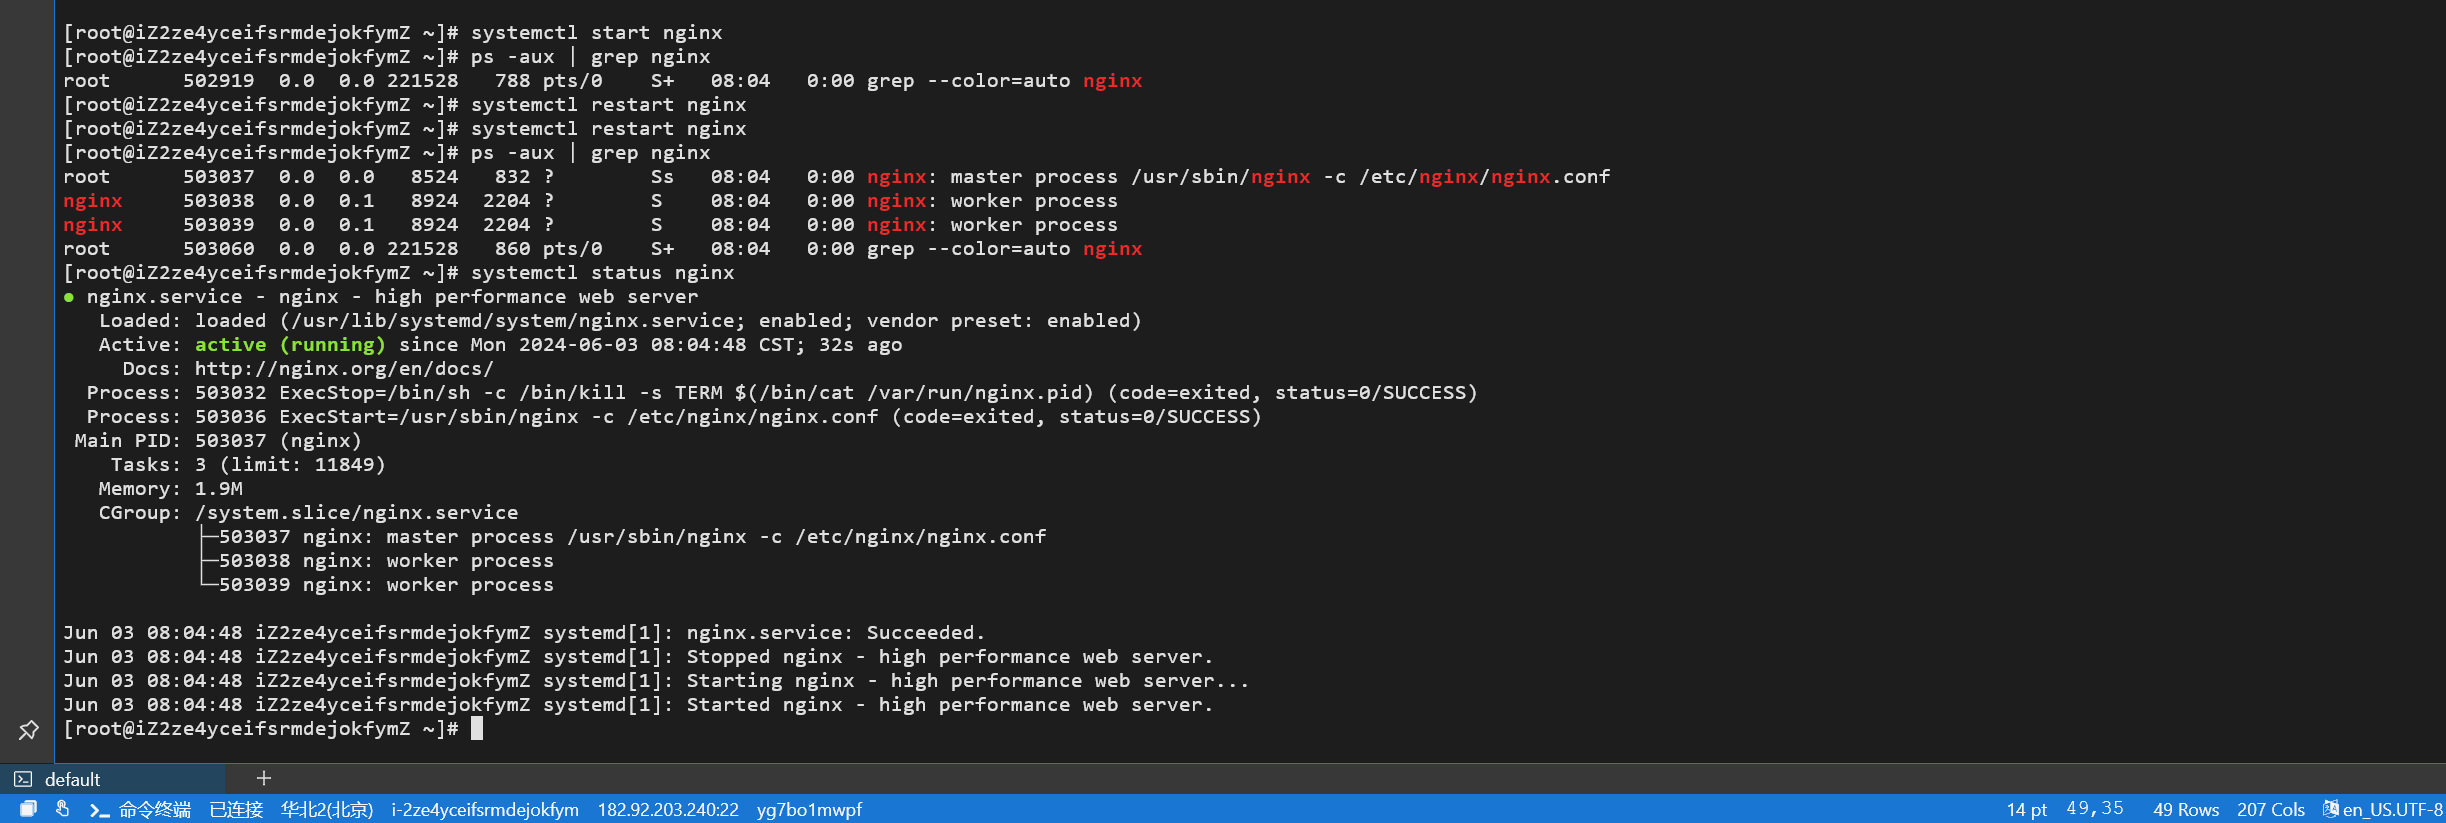
执行完这五步,在此查看 Nginx 状态,发现竟然启动成功了。
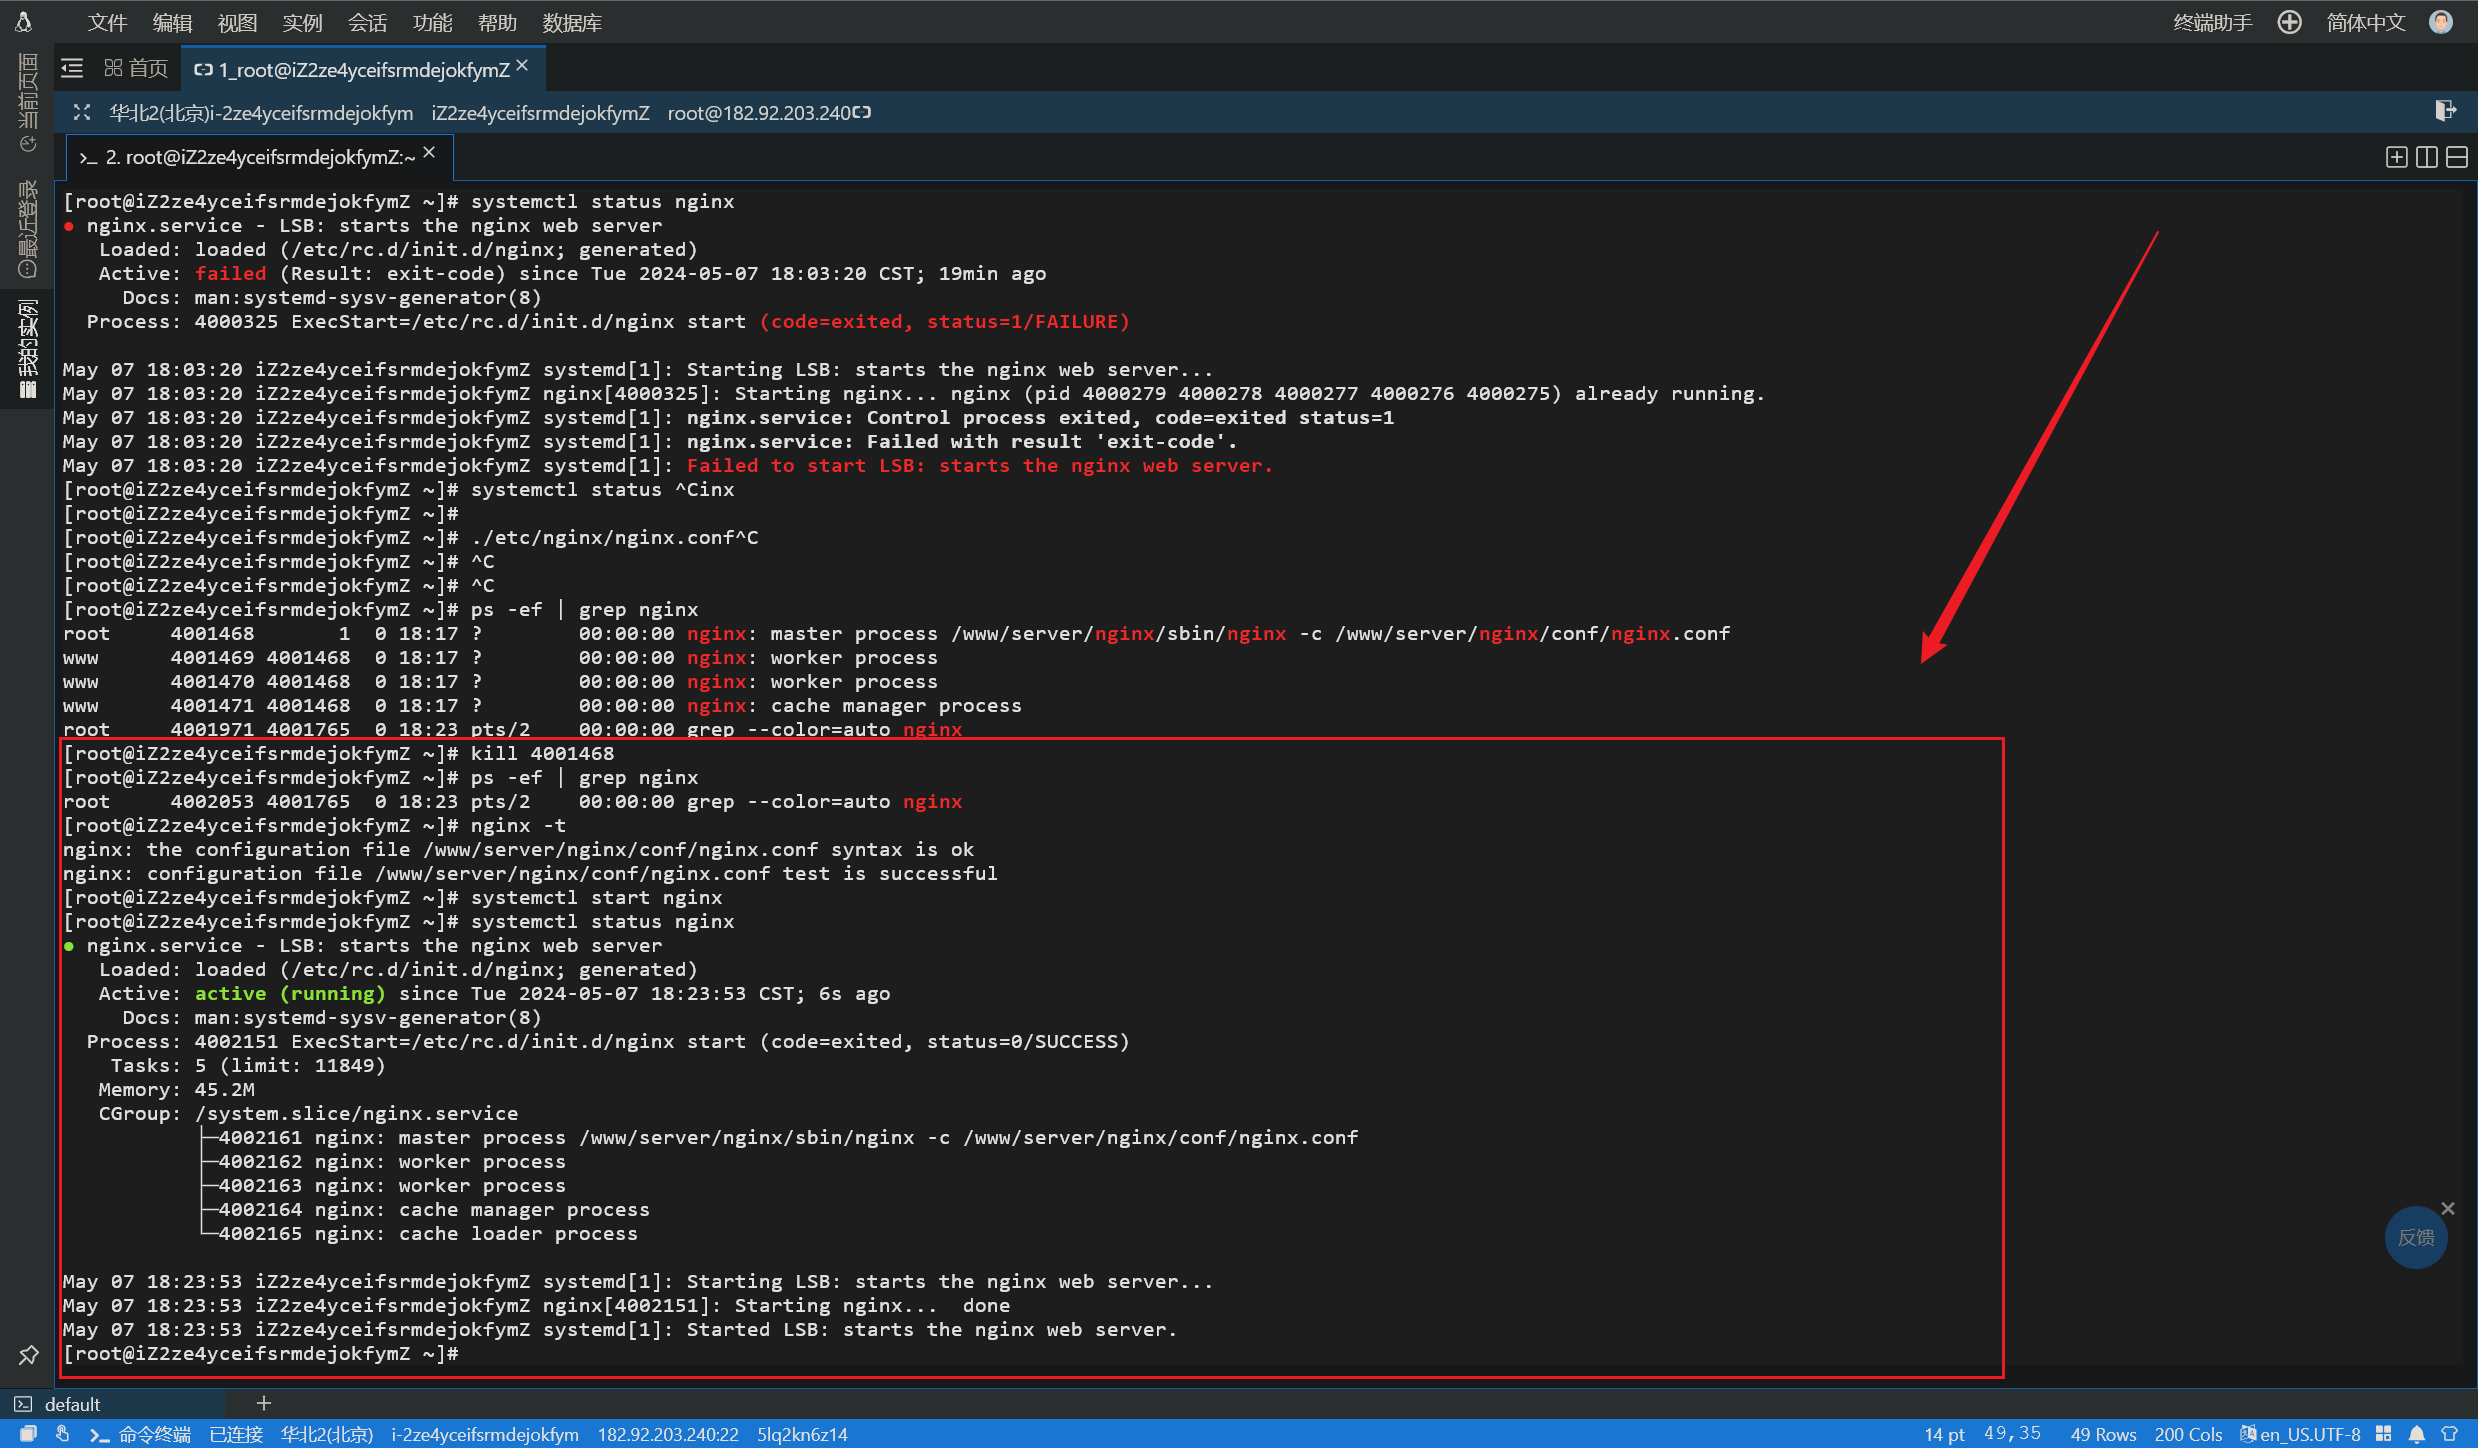
有点奇怪,难道是这个服务器太久没用了,需要时间磨合嘛。不管怎么说,Nginx 起来了,今天晚上回去研究下怎么用云服务器部署个人博客网站。
2024 年 6 月 1 日
【一篇学会】Nginx 静态资源部署保姆级教程_nginx 部署静态资源-CSDN 博客
Nginx 静态资源服务的配置-腾讯云开发者社区-腾讯云 (tencent.com)
1 | |
8 分钟用 Nginx 搭建一个自己的网站_哔哩哔哩_bilibili
Linux 使用 nginx 部署静态网页 - WindSnowLi - 博客园 (cnblogs.com)
手把手教你搭建静态/博客网站 | 起凡 Code 闲聊 (jarcheng.top)
跟着网上的教程搞了一下午,就是部署不了静态页面,甚至连访问 Nginx 本身都好像有问题,搞不明白,实在是搞不明白。
不管怎么说,今晚我就死磕这个 Nginx 了,多少个晚上都像现在这样把它放过,所以到现在都没有学习完成过 Nginx。
2024 年 6 月 2 日
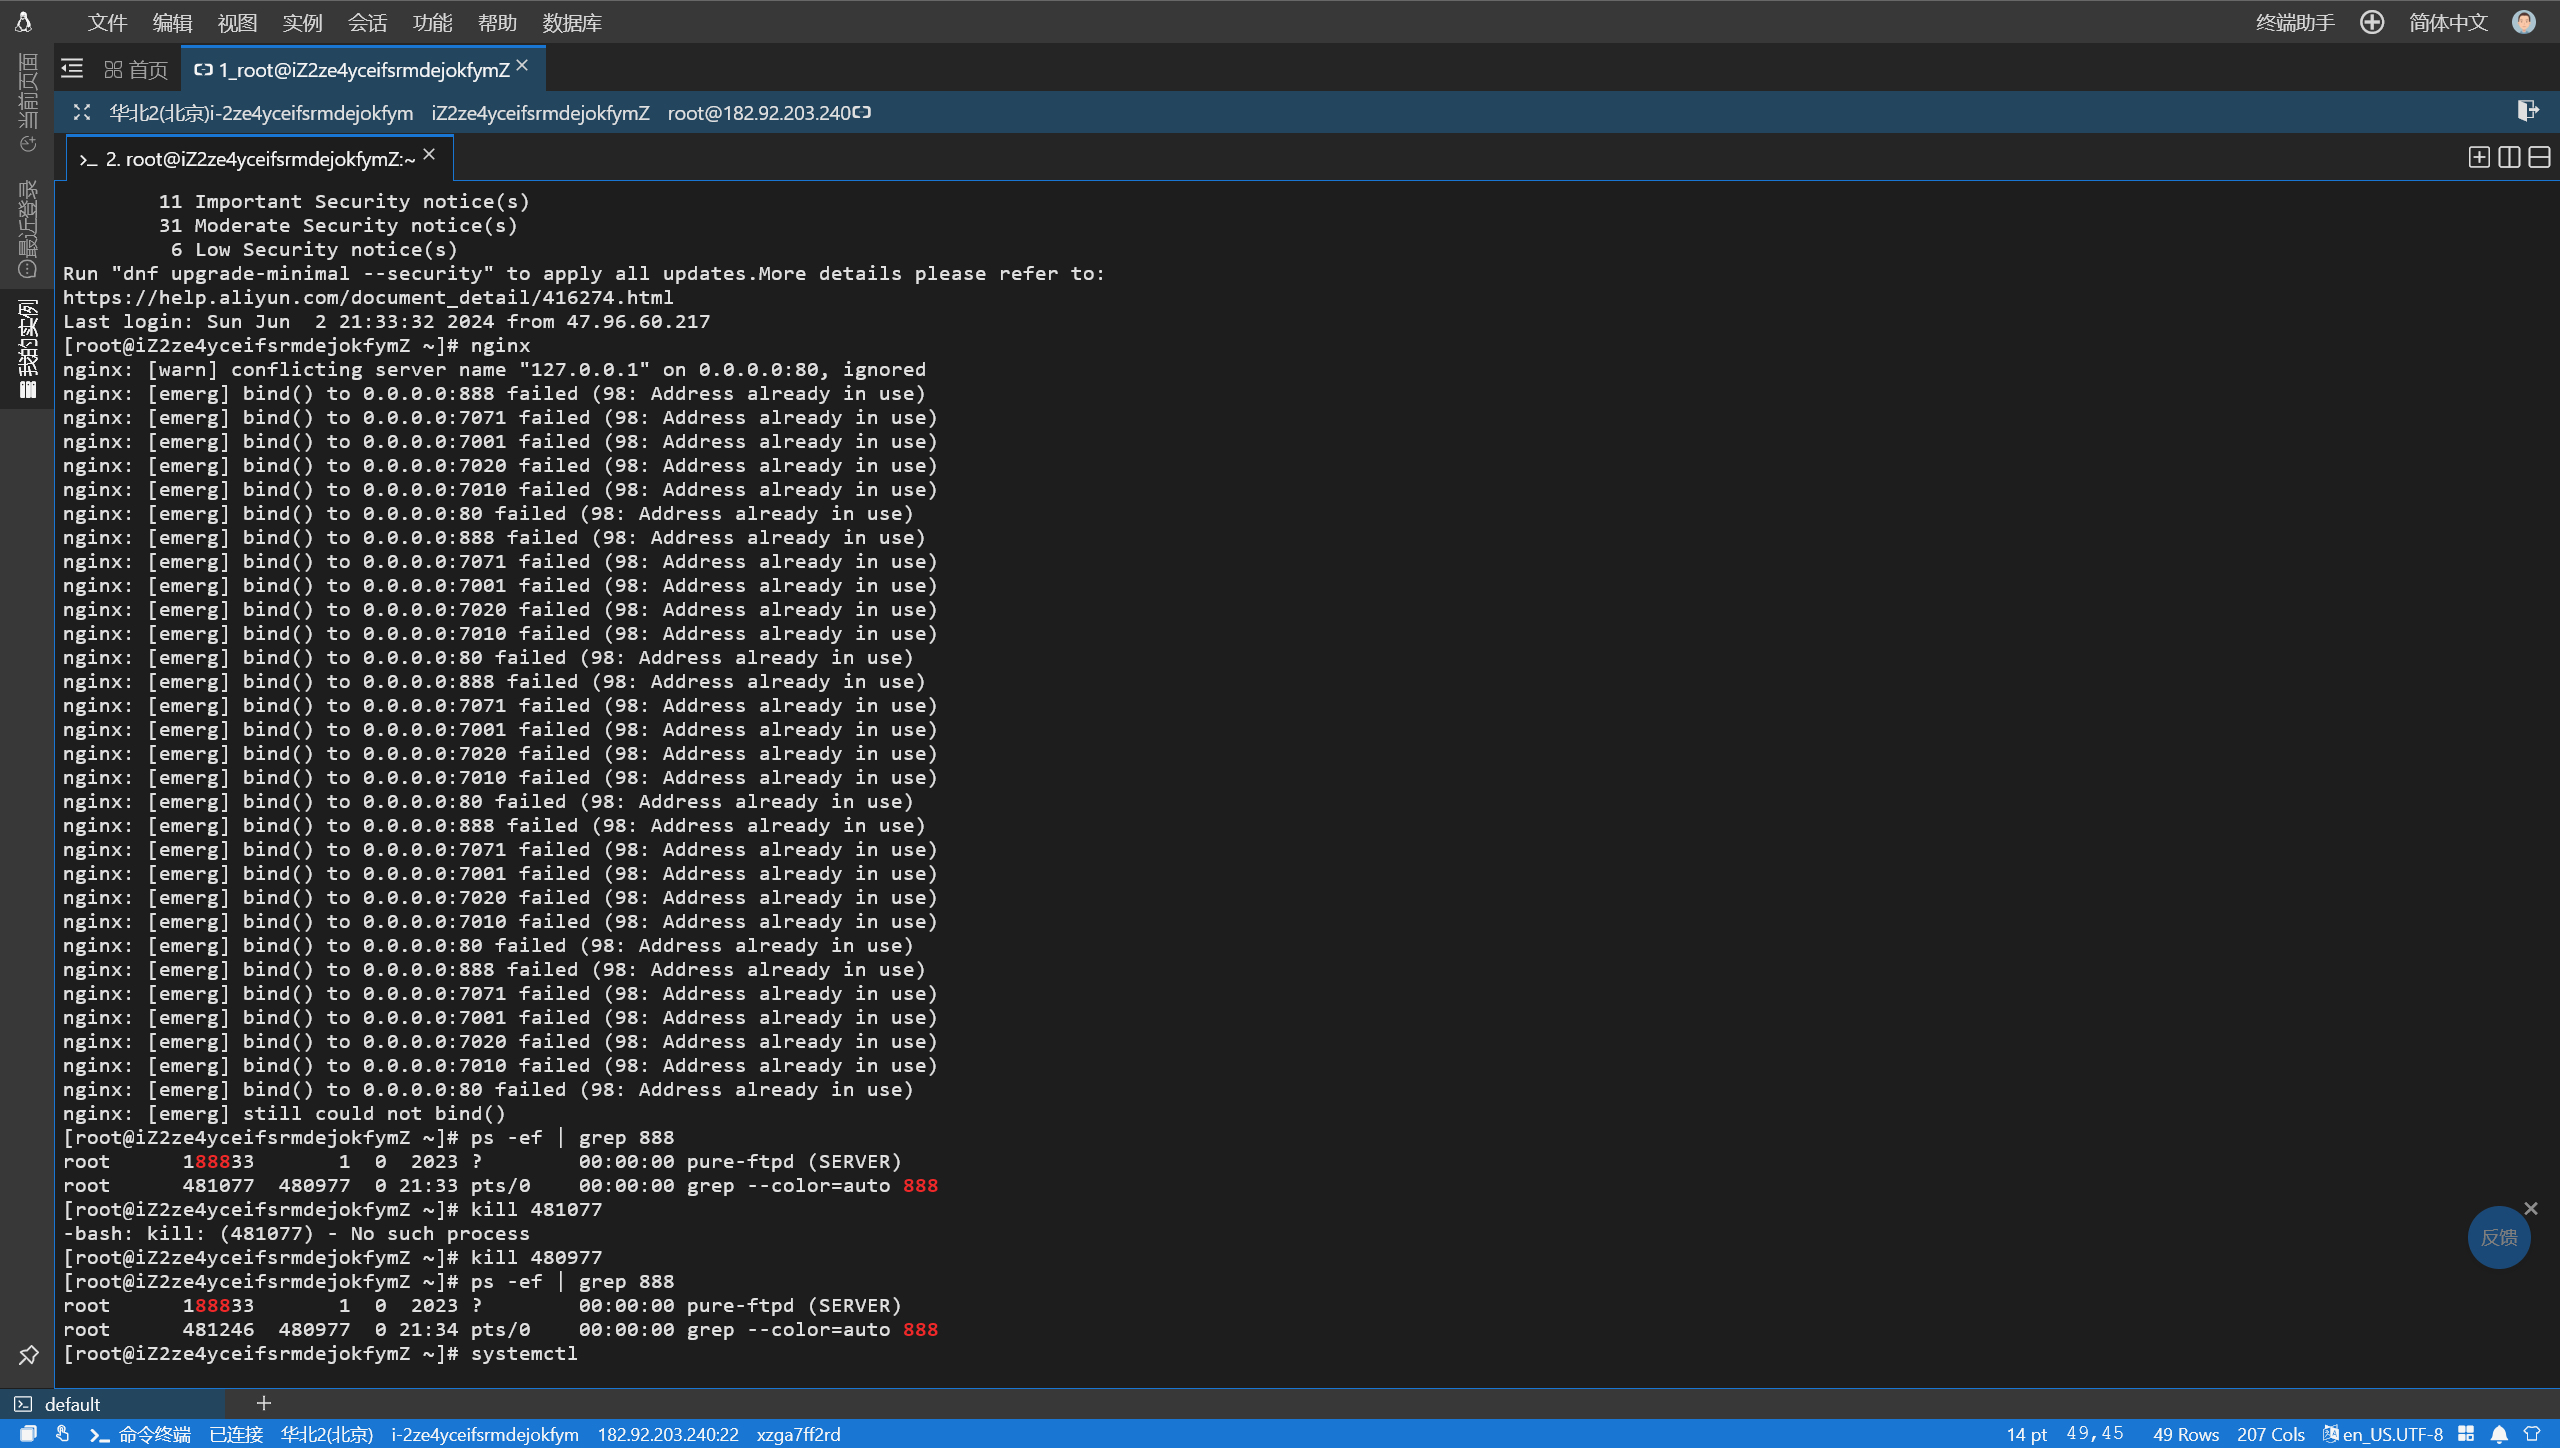
[root@iZ2ze4yceifsrmdejokfymZ ~]# nginx
nginx: [emerg] bind() to 0.0.0.0:7010 failed (98: Unknown error)
nginx: [emerg] bind() to 0.0.0.0:888 failed (98: Unknown error)
nginx: [emerg] bind() to 0.0.0.0:80 failed (98: Unknown error)
nginx: [emerg] bind() to 0.0.0.0:7071 failed (98: Unknown error)
nginx: [emerg] bind() to 0.0.0.0:7001 failed (98: Unknown error)
nginx: [emerg] bind() to 0.0.0.0:7020 failed (98: Unknown error)
nginx: [emerg] still could not bind()
[Nginx 重启时提示”nginx: emerg] bind() to 0.0.0.0”解决方法 - 八艾云 (8a.hk)
极简 Nginx 学习 + 使用,点到为止 - 编程导航文章 (code-nav.cn)
1 | |
netstat -tulnp | grep 7010
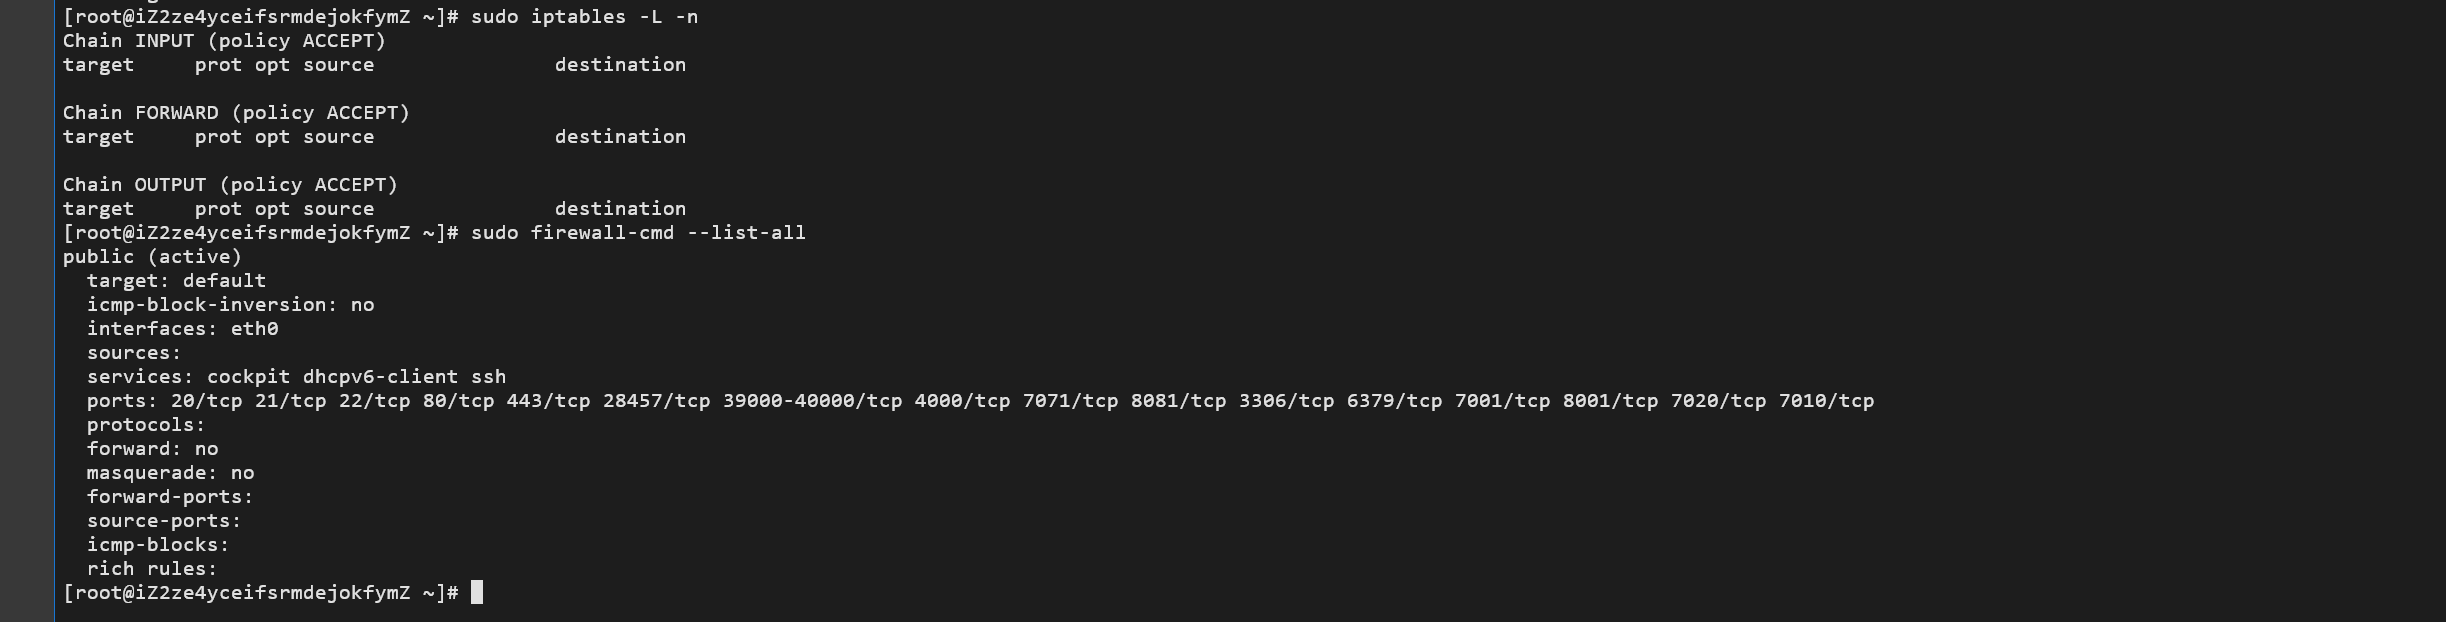
我已经尝试了所有方法,查看冲突端口号、关闭防火墙,修改执行用户,更改文件目录权限,根本部署不了静态页面
3 分钟搞懂阿里云服务器安装 Nginx 并配置静态访问页面_阿里云服务器如何安装 nginx-CSDN 博客
[nginx: error] invalid PID number “” in “/usr/local/webserver/nginx/logs/nginx.pid”-CSDN 博客
1 | |
搞不定,一夜回到解放前。
Nginx 部署与静态 html_nginx 部署 html-CSDN 博客
【Linux 报错】登陆 mysql 用户报错 This account is currently not available._mysql:x:1001:-CSDN 博客
2024 年 6 月 3 日
Linux 实现 Nginx 的安装与部署并实现 html 静态资源访问_linux nginx html-CSDN 博客
1 | |
1 | |

1 | |
1 | |
1 | |
1 | |
1 | |

1 | |
nginx 服务器搭建好但是浏览器却无法访问原因排查_nginx 配置好了 网站还是访问不了-CSDN 博客
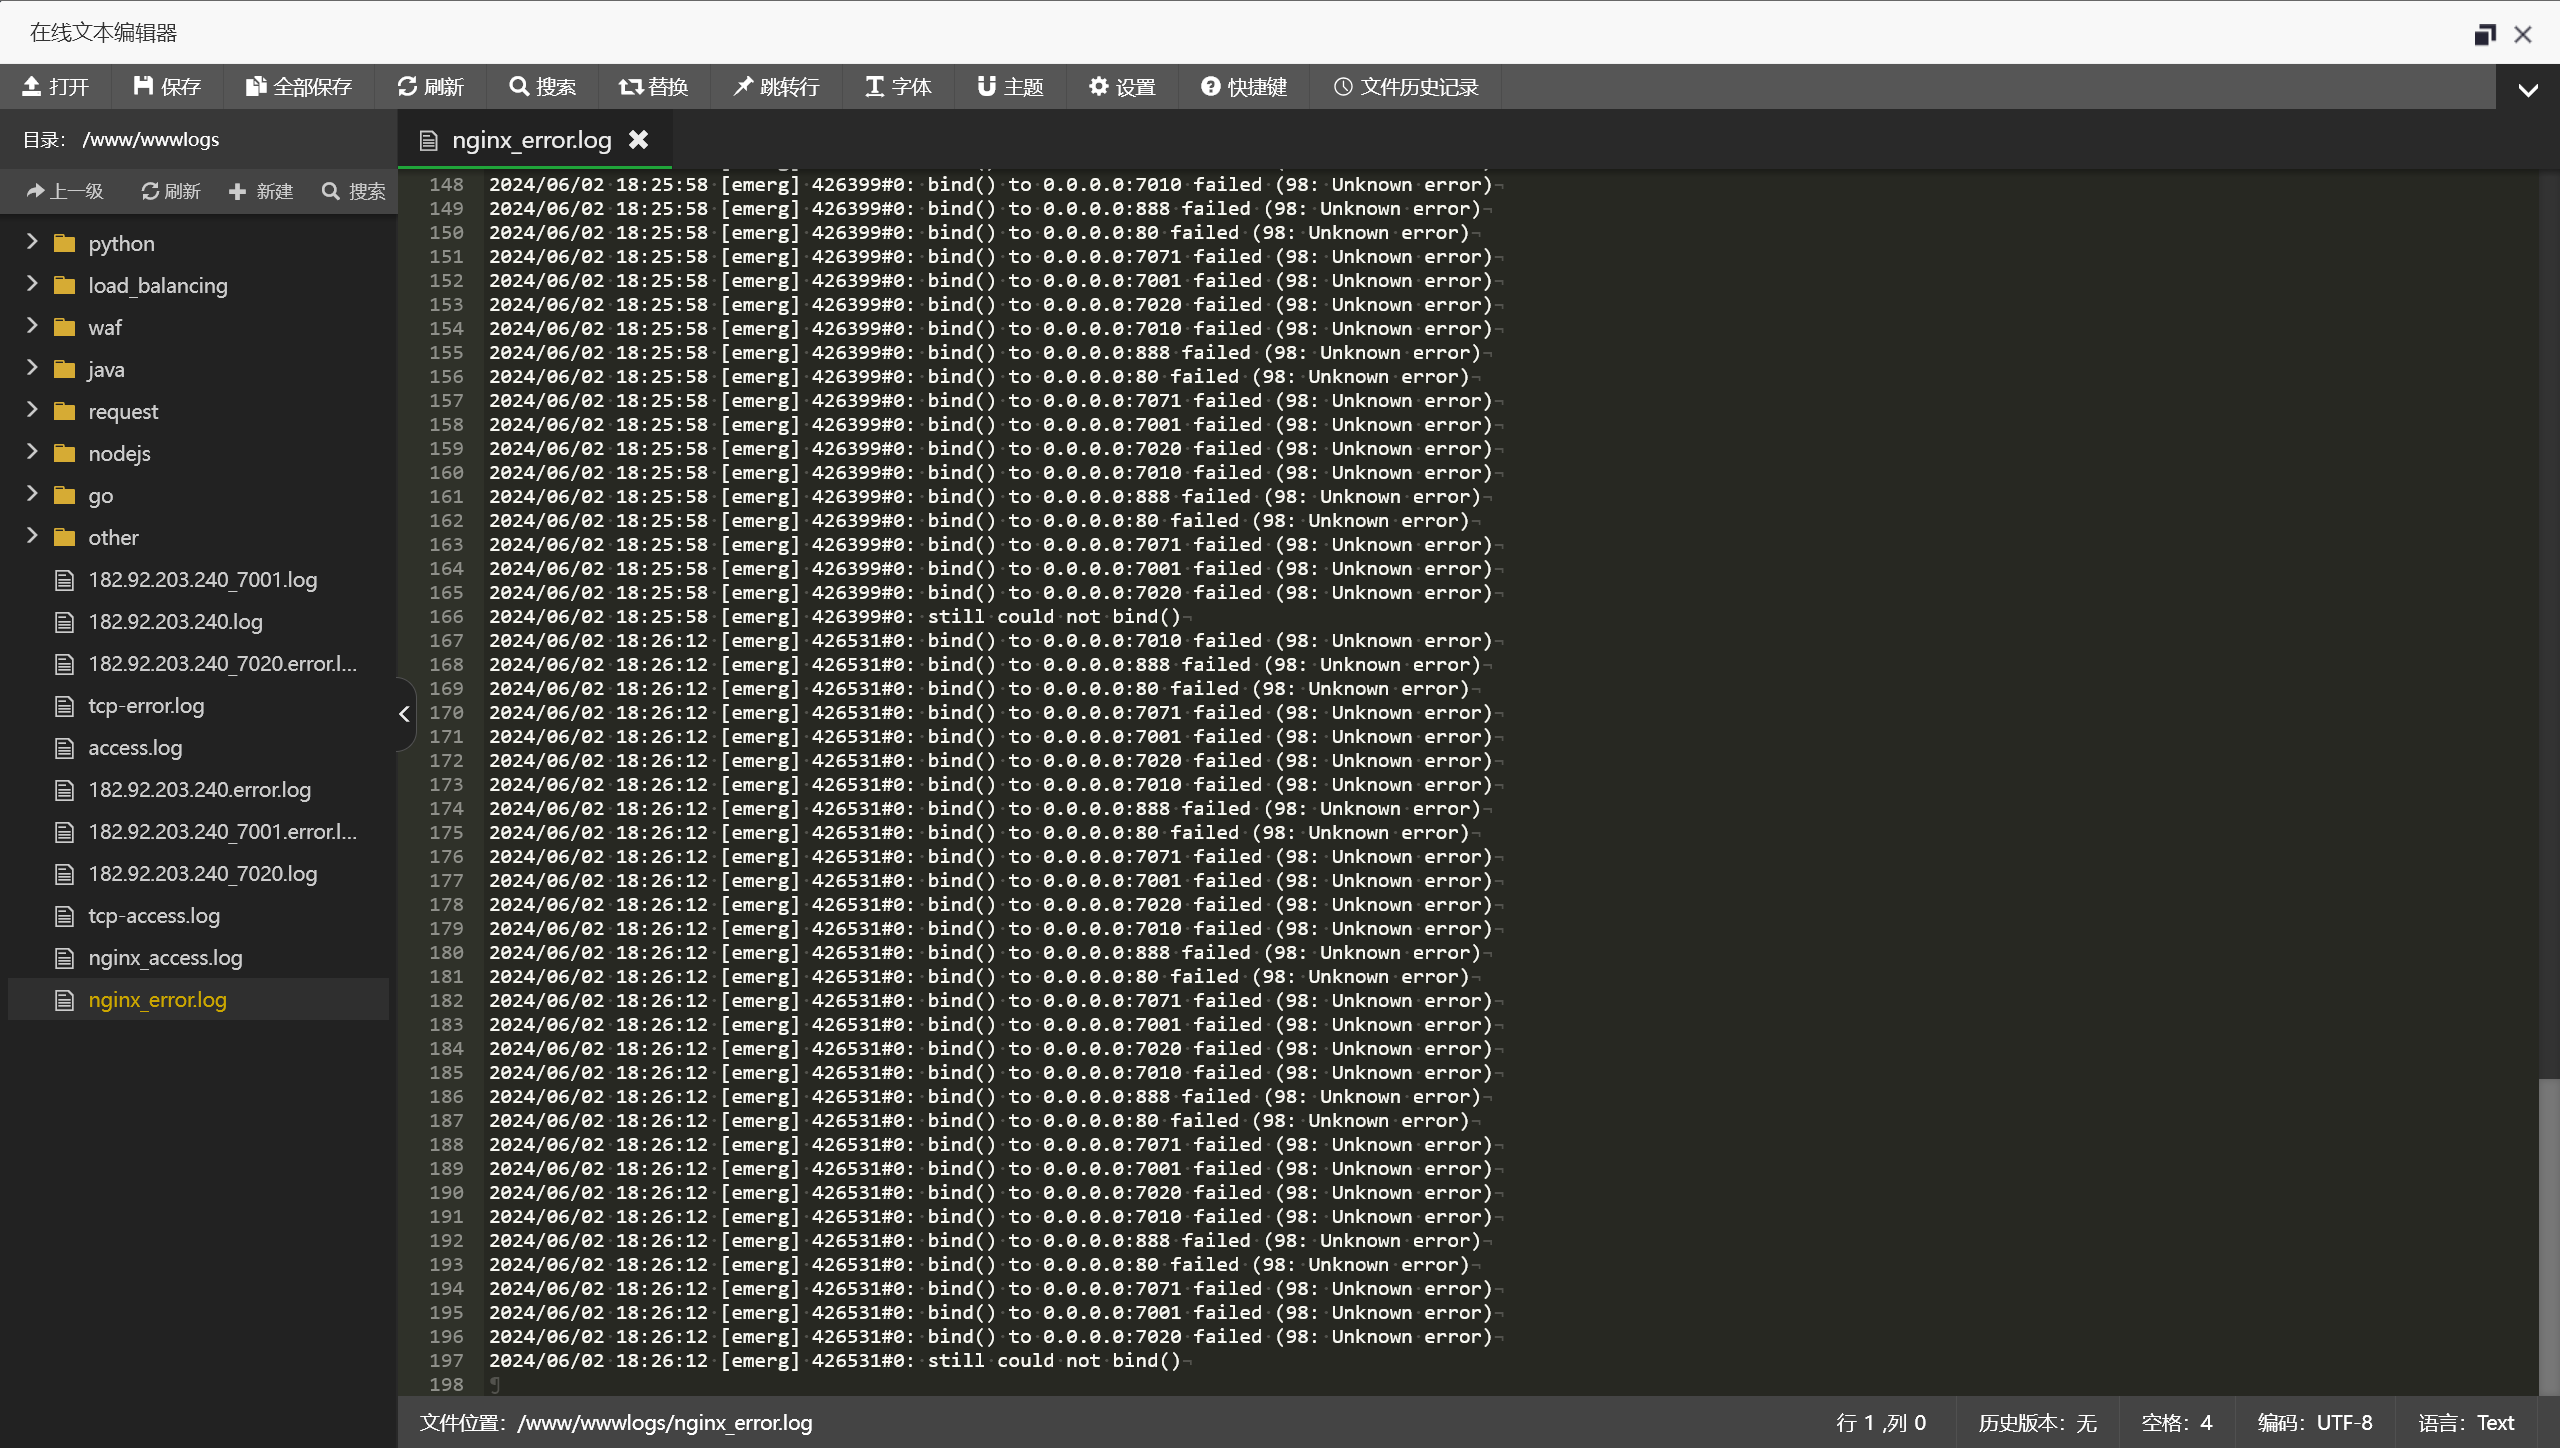
这几天里报错最恶心的还是这条:
1 | |
最后是在宝塔面板卸载重装以后才解决的,现在也不知道什么原因。
还是很有收获的,学到了许多其他新知识。
2024 年 6 月 4 日
linux 怎么快速卸载并安装 node 环境 - Jun_ct - 博客园 (cnblogs.com)
yum、apt-get、wget 的区别_yum wget-CSDN 博客
wget、yum、rpm、apt-get 区别「建议收藏」-腾讯云开发者社区-腾讯云 (tencent.com)
云服务器部署静态博客站点,搞了一上午,代码推送不上去,Nginx 也起不来了。
运维排查篇 | 访问 nginx 出现 403 错误 - 知乎 (zhihu.com)

过了一个小时再尝试,静态代码文件就能推送上去了。杀死已经启动的 Nginx 进程,也能成功启动 Nginx 了。
部署成功:Memory’s blog
一条龙服务
2024 年 6 月 4 日
- 本地环境准备(安装 Node、Git 和 Hexo):使用 Hexo 搭建个人博客并部署到云服务器 - Cheyaoyao - 博客园 (cnblogs.com)
- 服务端环境准备(购买云服务器、Nginx 环境配置、Node 环境配置、Git 环境配置):
- 部署(部署 Hexo 博客到服务端 Git 仓库):使用 Hexo 搭建个人博客并部署到云服务器 - Cheyaoyao - 博客园 (cnblogs.com)
Node 环境的安装直接放在这里,没有找到合适的博客:
linux 安装 nodejs yum
在 Linux 系统中,您可以使用 Yum 包管理器来安装 Node.js。以下是一个基本的步骤和示例代码,用于通过 Yum 安装 Node.js:
- 首先,您需要确保您的系统中已经安装了 Node.js 的官方 Yum 仓库。如果尚未安装,您可以通过运行以下命令来添加 Node.js 的仓库:
1 | |

这个命令会将 Node.js 14.x 的仓库添加到您的系统中。如果您想安装其他版本的 Node.js,只需将setup_14.x中的数字更改为所需的 Node.js 版本即可。
- 接下来,您可以使用 Yum 安装 Node.js:
1 | |
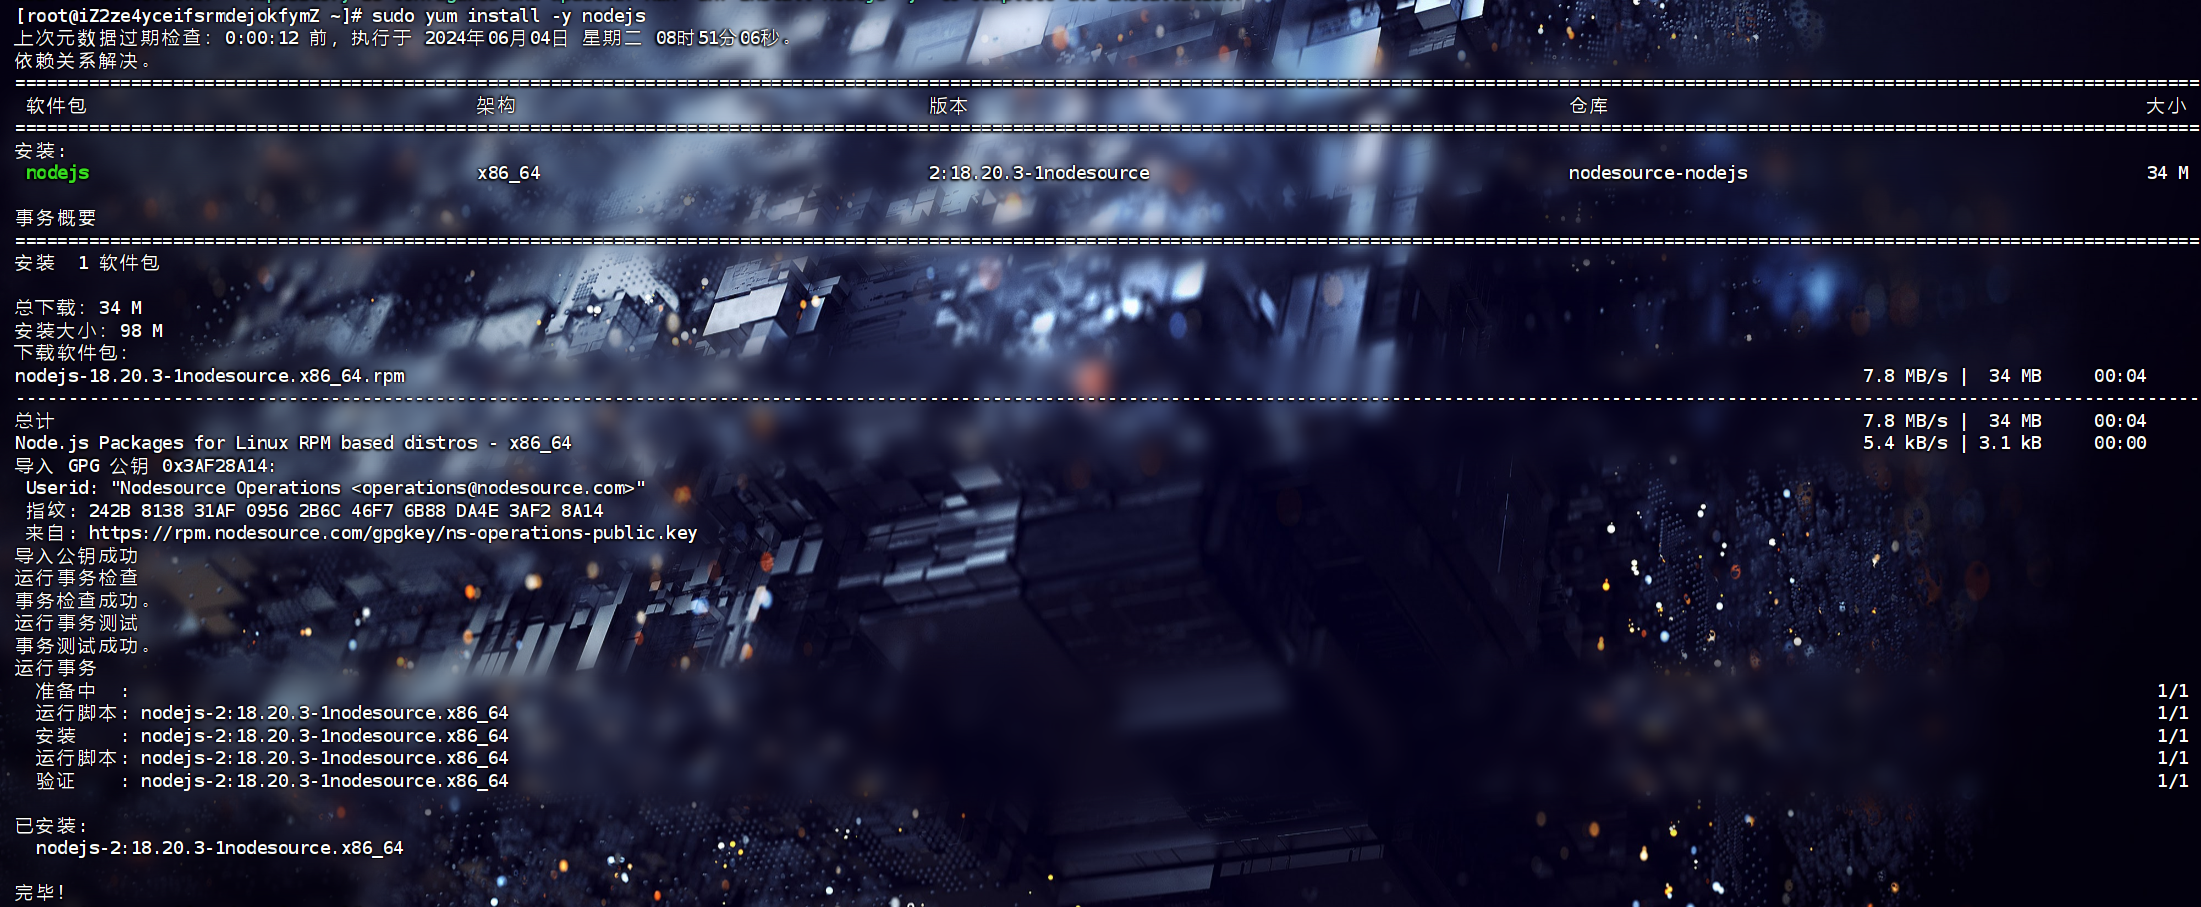
这个命令会从刚才添加的 Node.js 仓库中安装 Node.js。
- 安装完成后,您可以检查 Node.js 的版本确保安装成功:
1 | |
请注意,上述命令中的 URL 和版本号可能会随着 Node.js 版本更新而变化,请参照 Node.js 官方文档或者 NodeSource 提供的最新安装脚本。
Github 部署 Hexo 博客
2024 年 5 月 10 日
以下一整块都算是踩坑记录,这里就不单拎出来做标题了,下面是 Github 部署博客的详细过程(包括踩坑):
推荐阅读:可能是最好的部署教程:安装 Hexo 博客并部署到 GitHub 或云服务器(细节教程,越过各种坑)-CSDN 博客
在 config.yml 文件下,配置好远程 Github 仓库:
1 | |
一直显示推送错误:
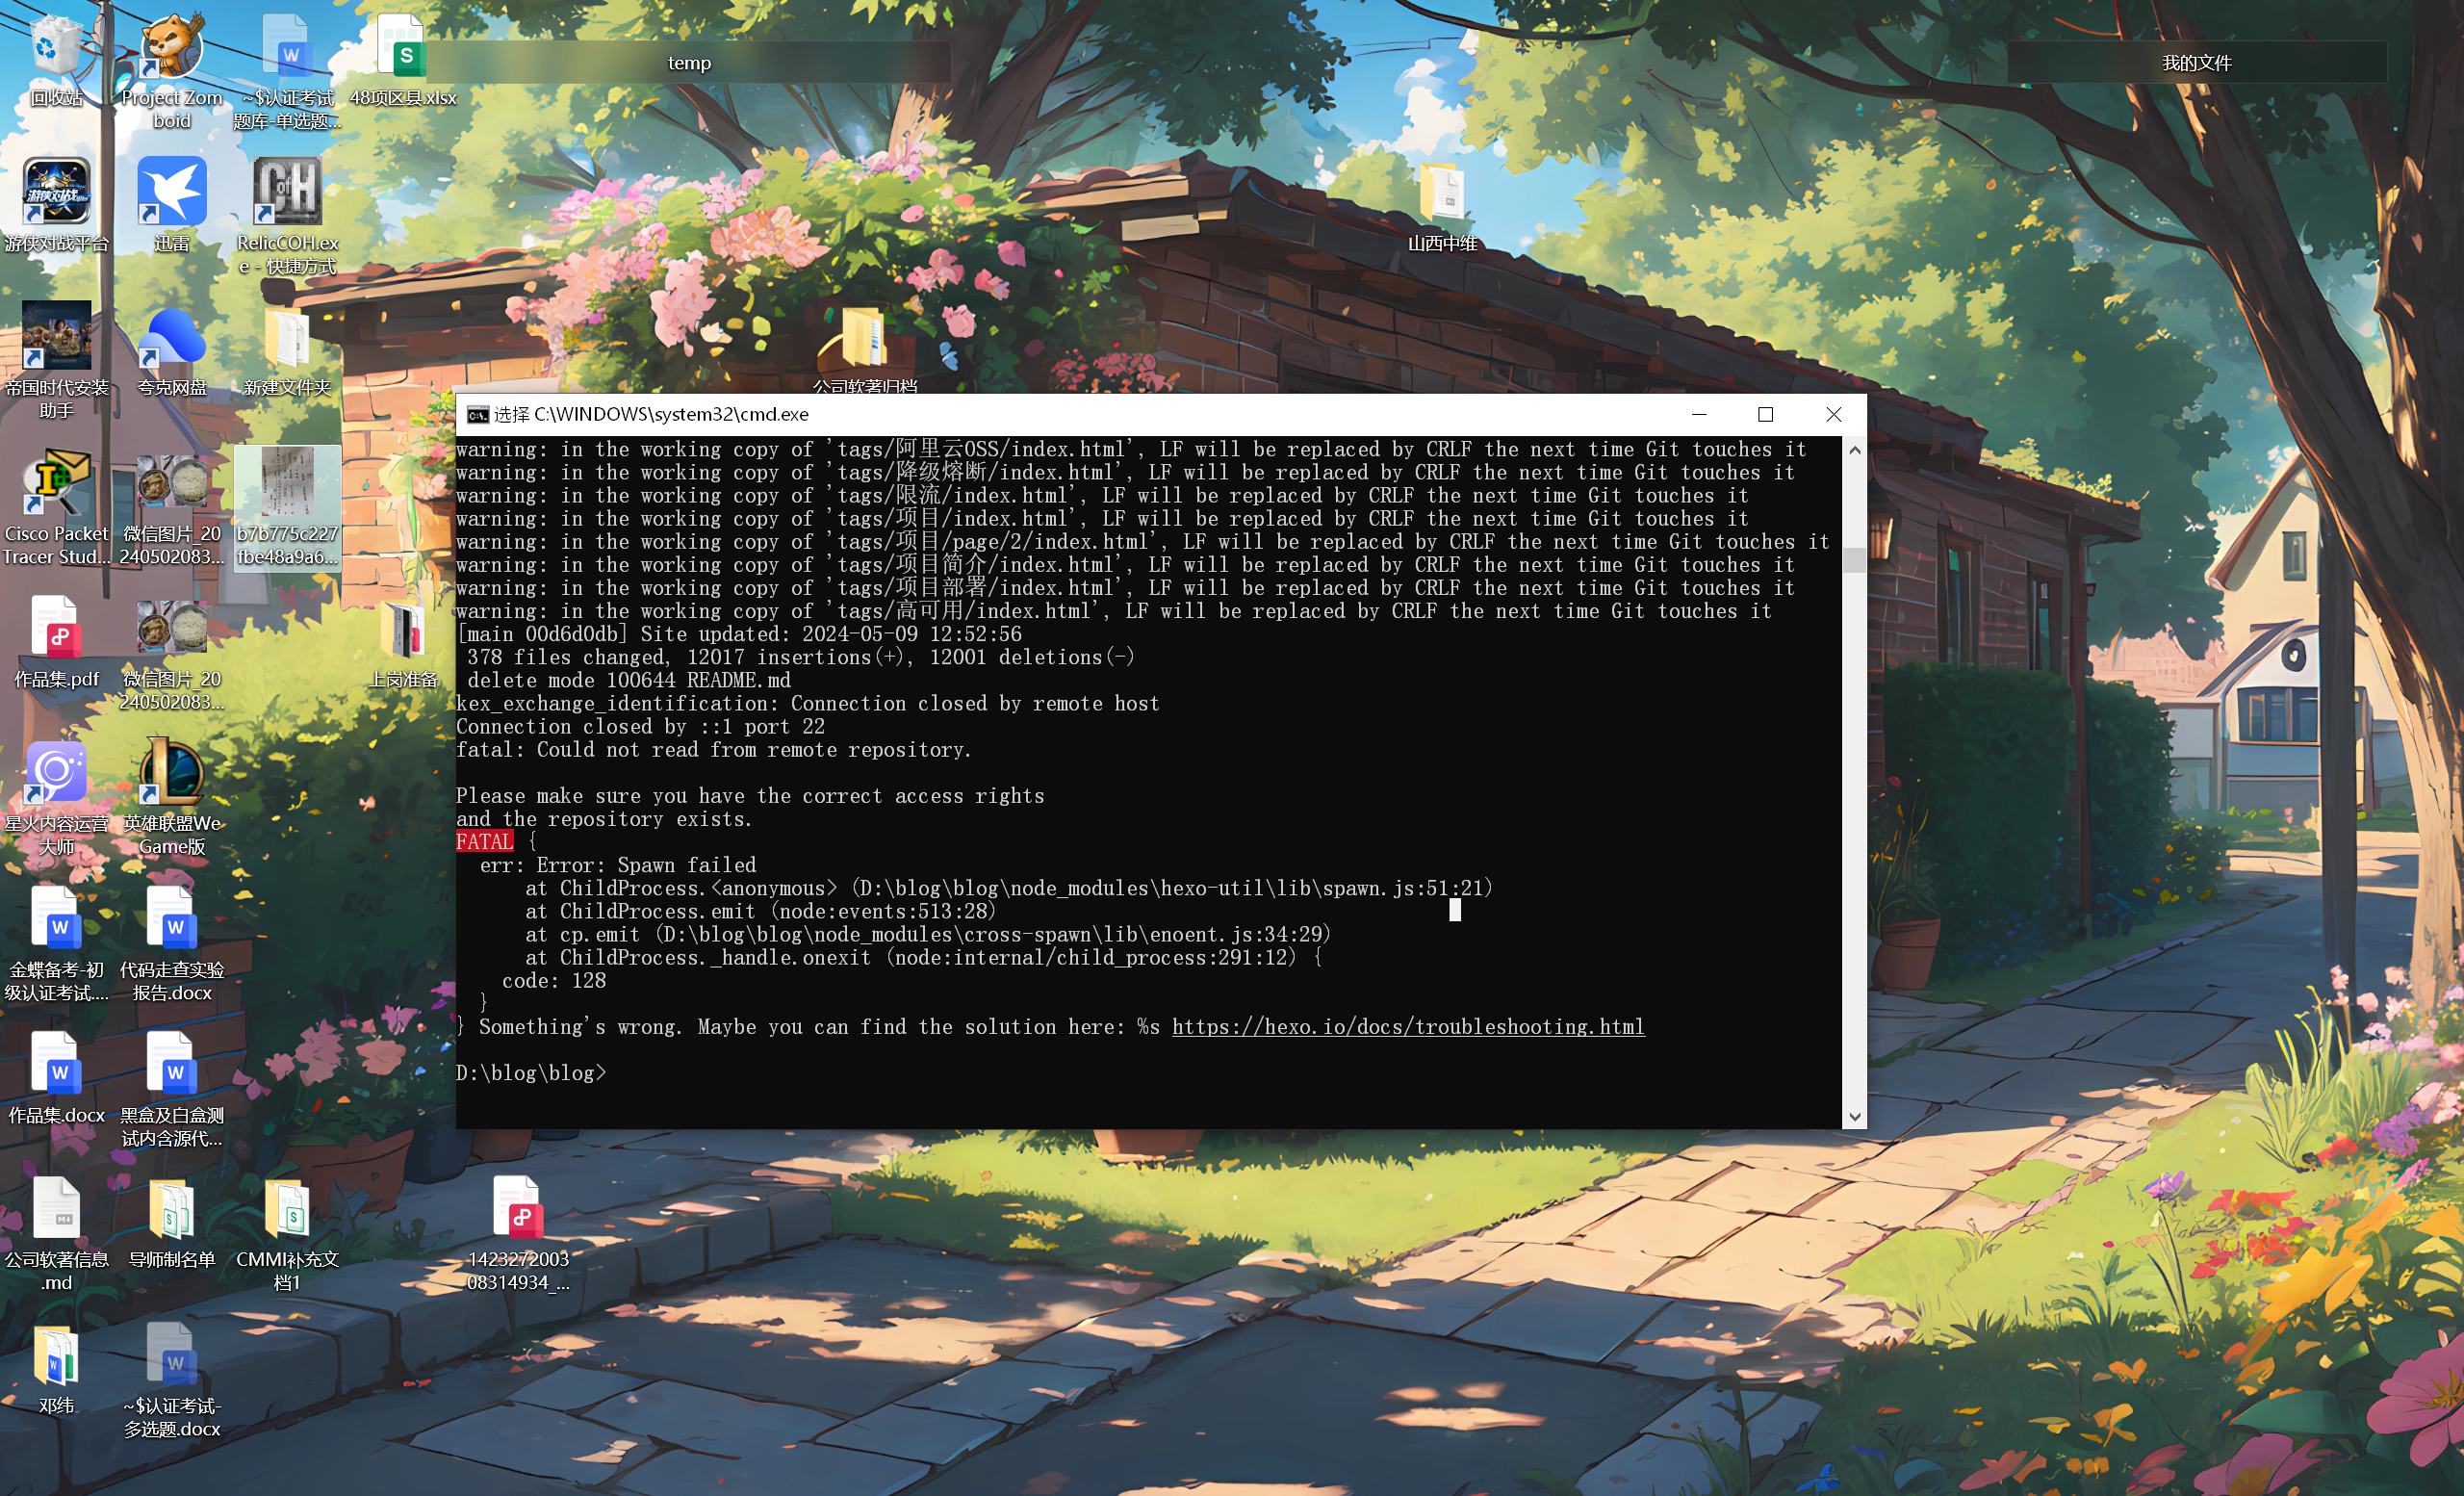
跟着好多博客教程,我正常完成了远程仓库的搭建、 ssh 密钥对的配置,但仍一直出现上面的报错:
测试 Github 是否能正常网络连接:
1 | |
ssh -T git@github kex_exchange_identification: Connection closed by remote host-CSDN 博客
Github 备份代码出现 kex_exchange_identification: Connection closed by remote host - 知乎 (zhihu.com)
[git push 报错 ! remote rejected] master -> master (push declined due to email privacy restrictions)_51CTO 博客_git push 报错 remote rejected
我尝试测试下直接推送 .deploy_git 目录下的文件到 Github,结果这样也不行:
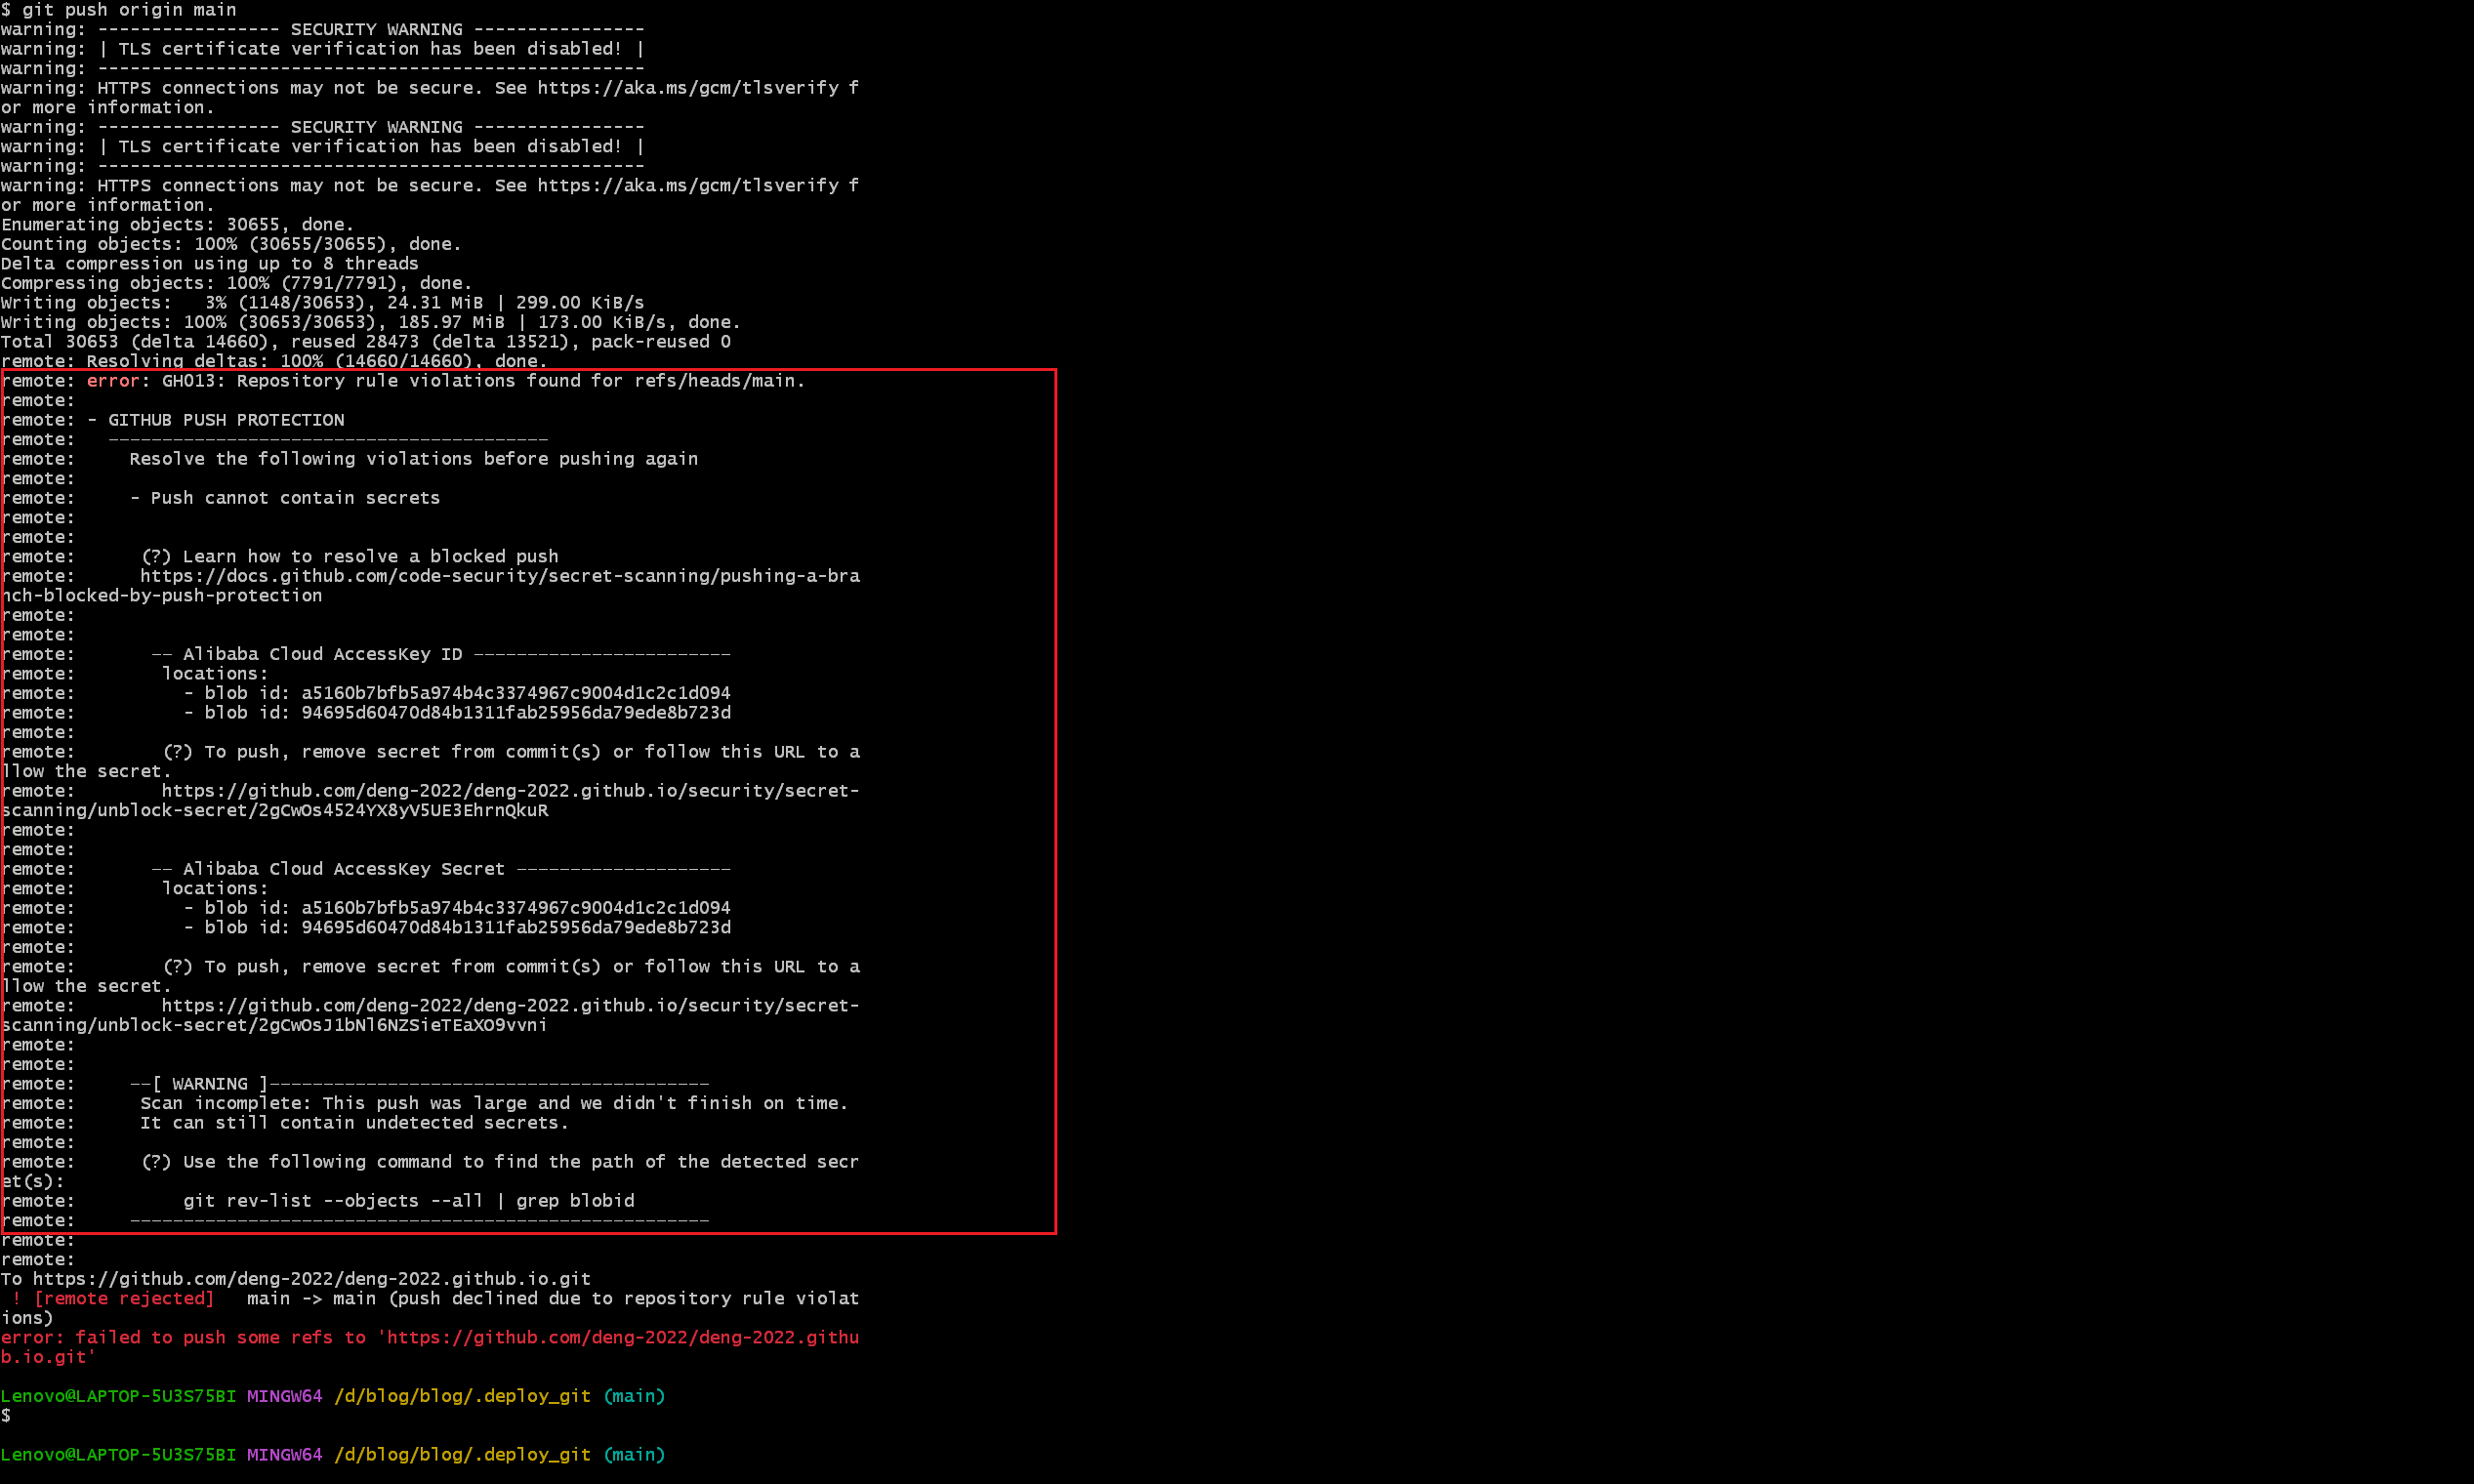
看来不是 Hexo 和 Github 仓库配置问题,而是要推送的代码和文件有问题。这个信息显示这些文件中包含了阿里云 AccessKey,可能会有泄露风险,所以阻止了这次代码推送。
已经过去三天,昨天有阿里云客服打来电话,今天登录后又看到阿里云给我发来了告警信息:
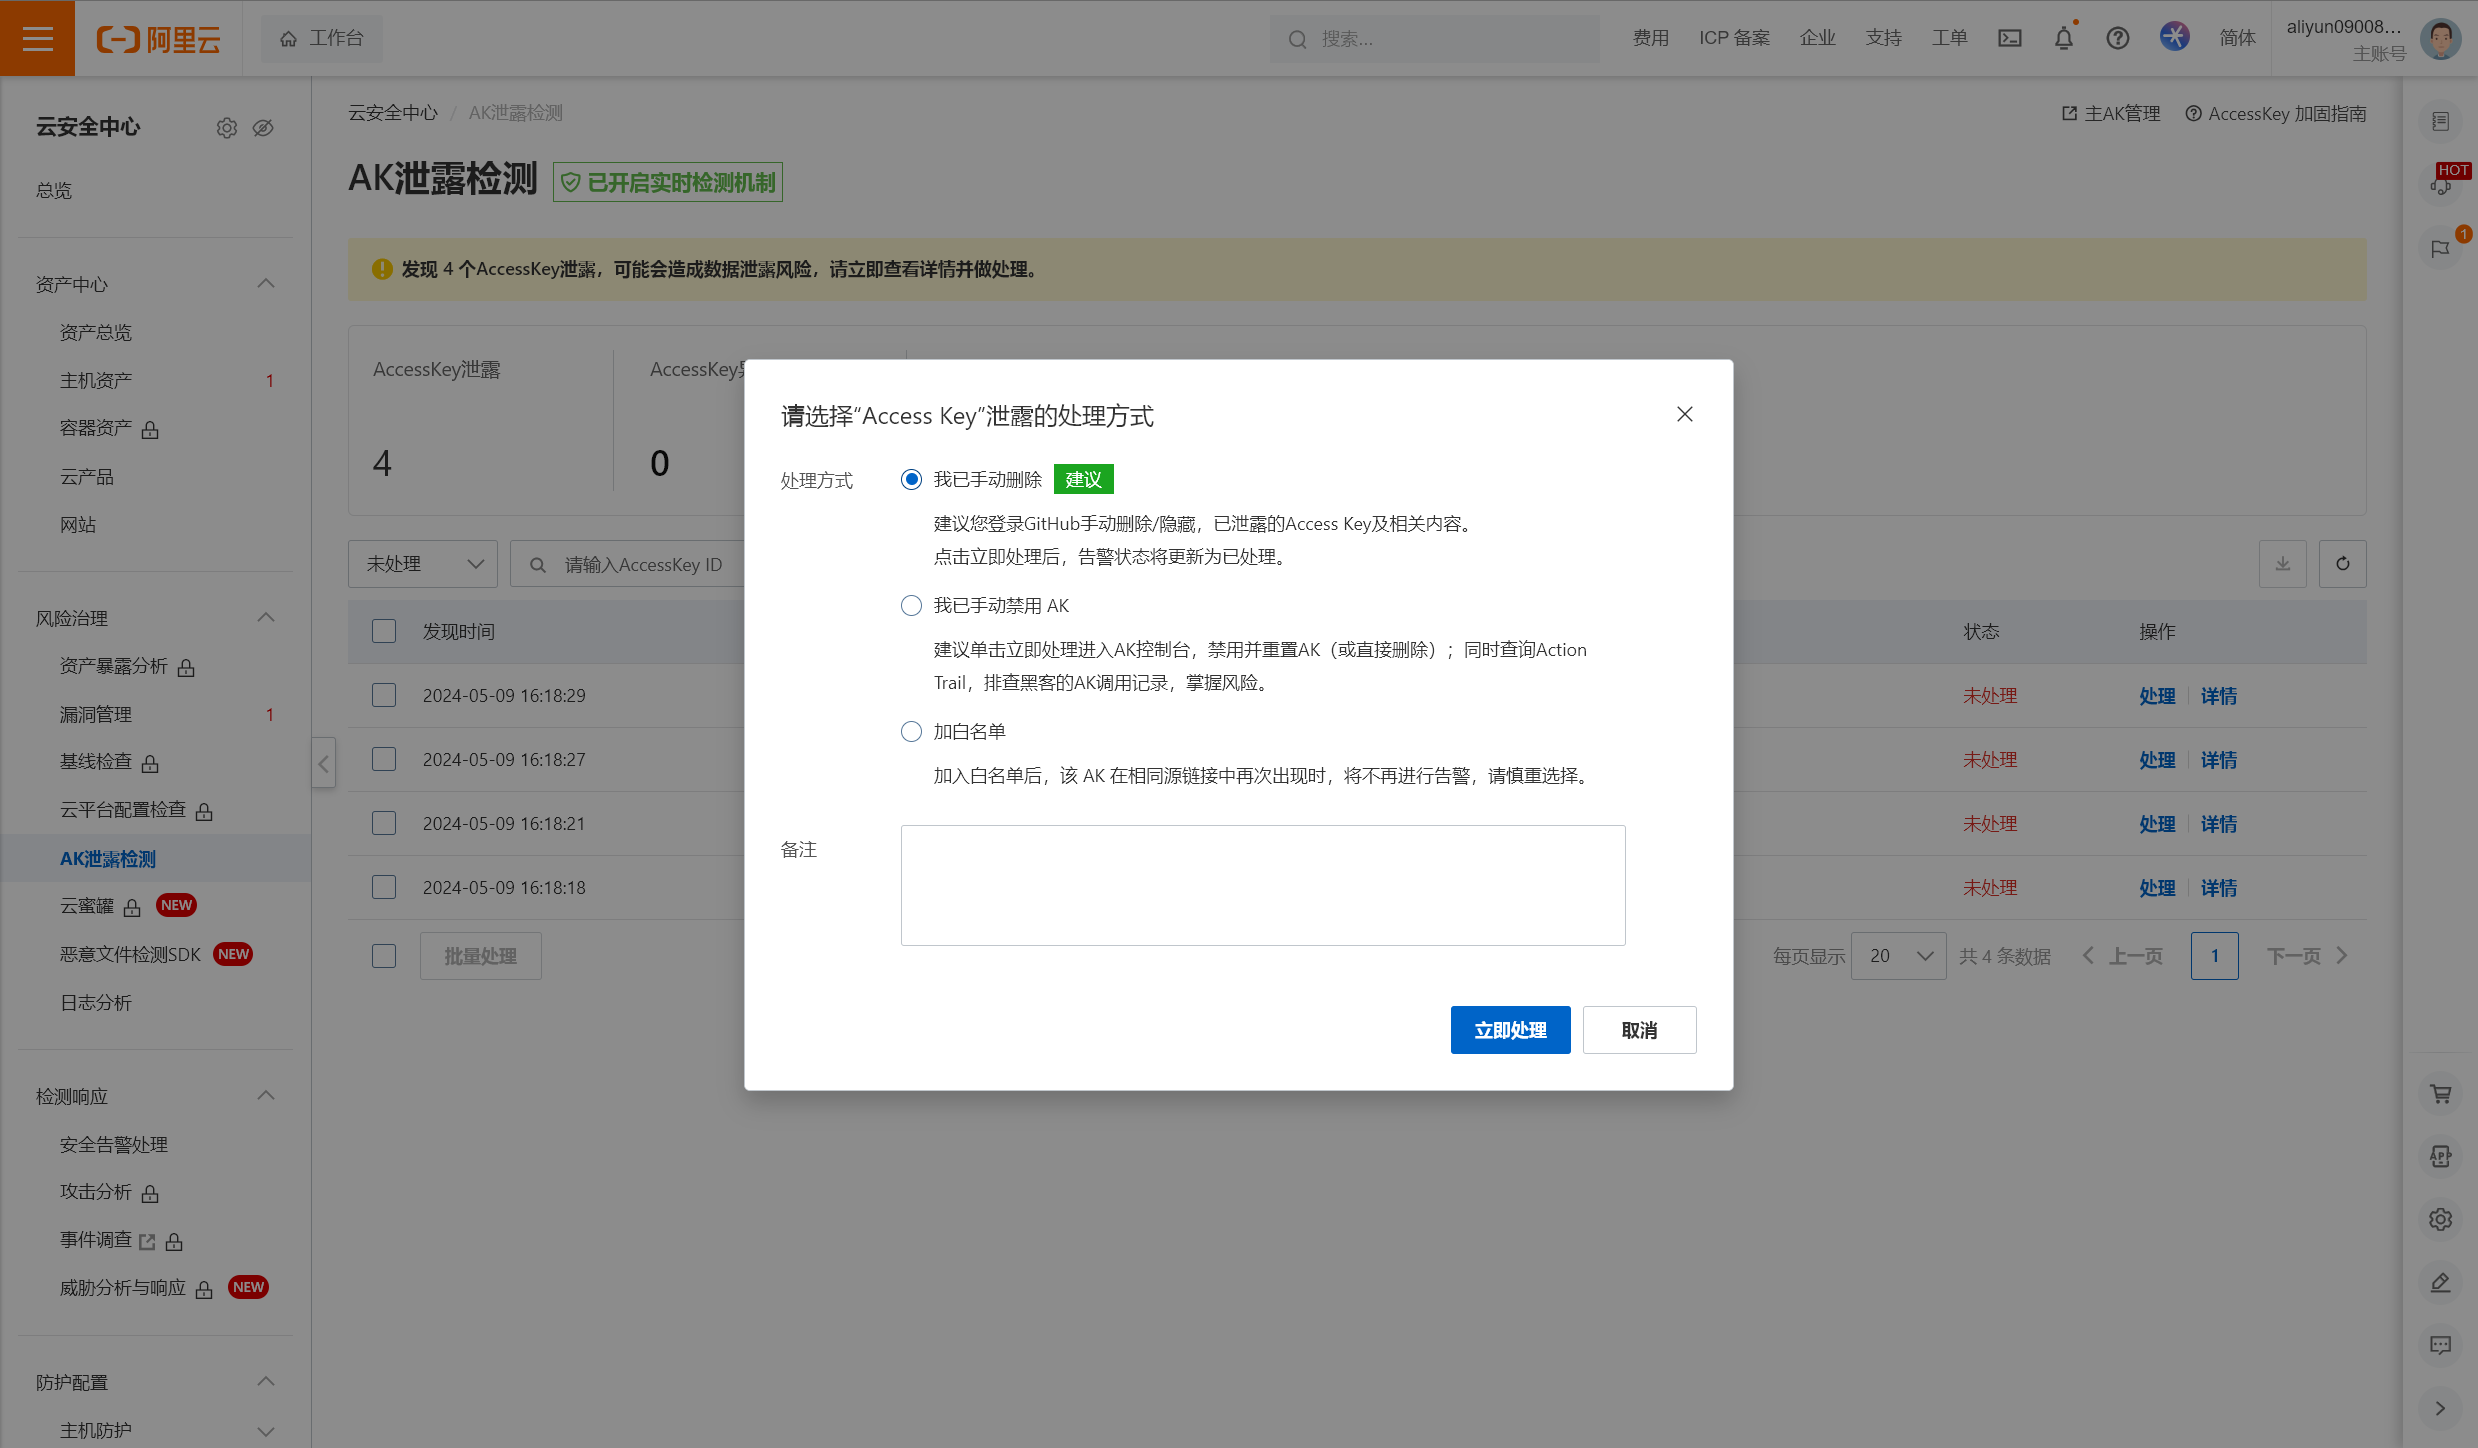
我想起来这是为什么了,那是因为我两天前根据这个博客教程,尝试在云服务器上部署个人博客。
那具体采用什么解决方法呢?早知道先搞 Github 部署了,现在直接推送代码还受到阿里云限制了。
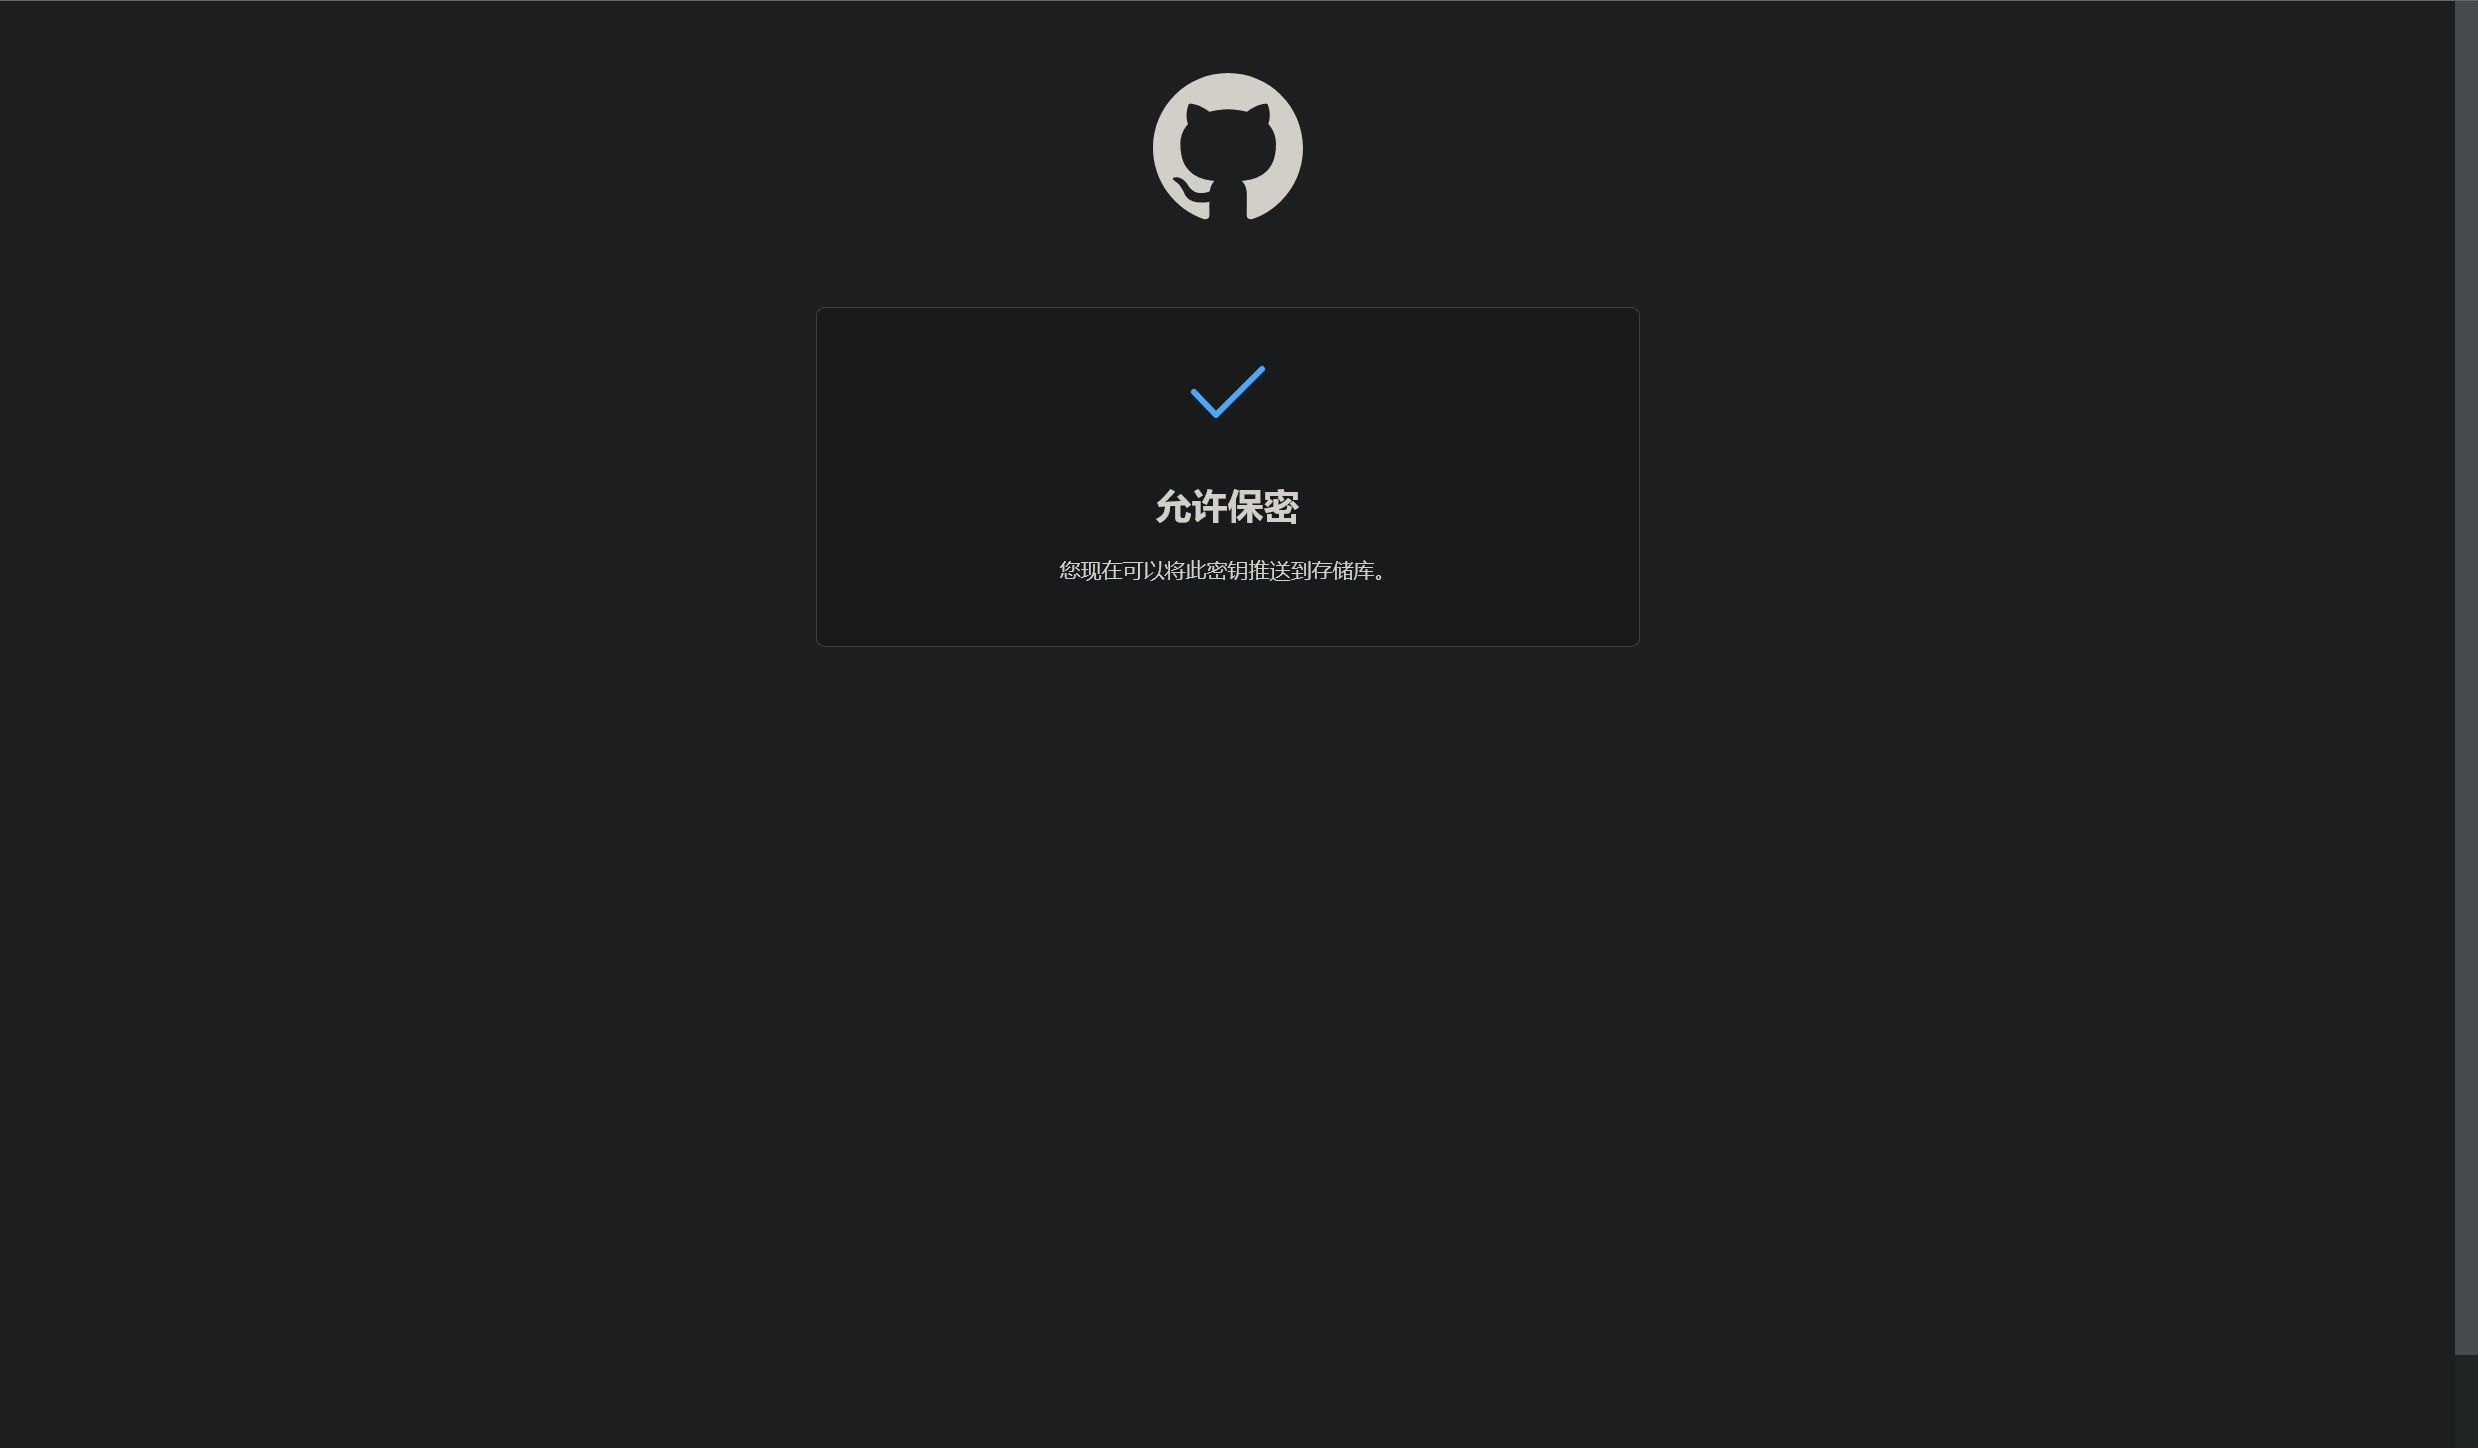
没什么特殊操作,我选了第三项。
不过我忘了多会儿推上去的代码,是昨天下午嘛?刚刚突然发现代码昨天提交成功,现在博客也能正常访问了。

Github 托管博客地址:Memory’s blog (deng-2022.github.io)
AtomGit 托管
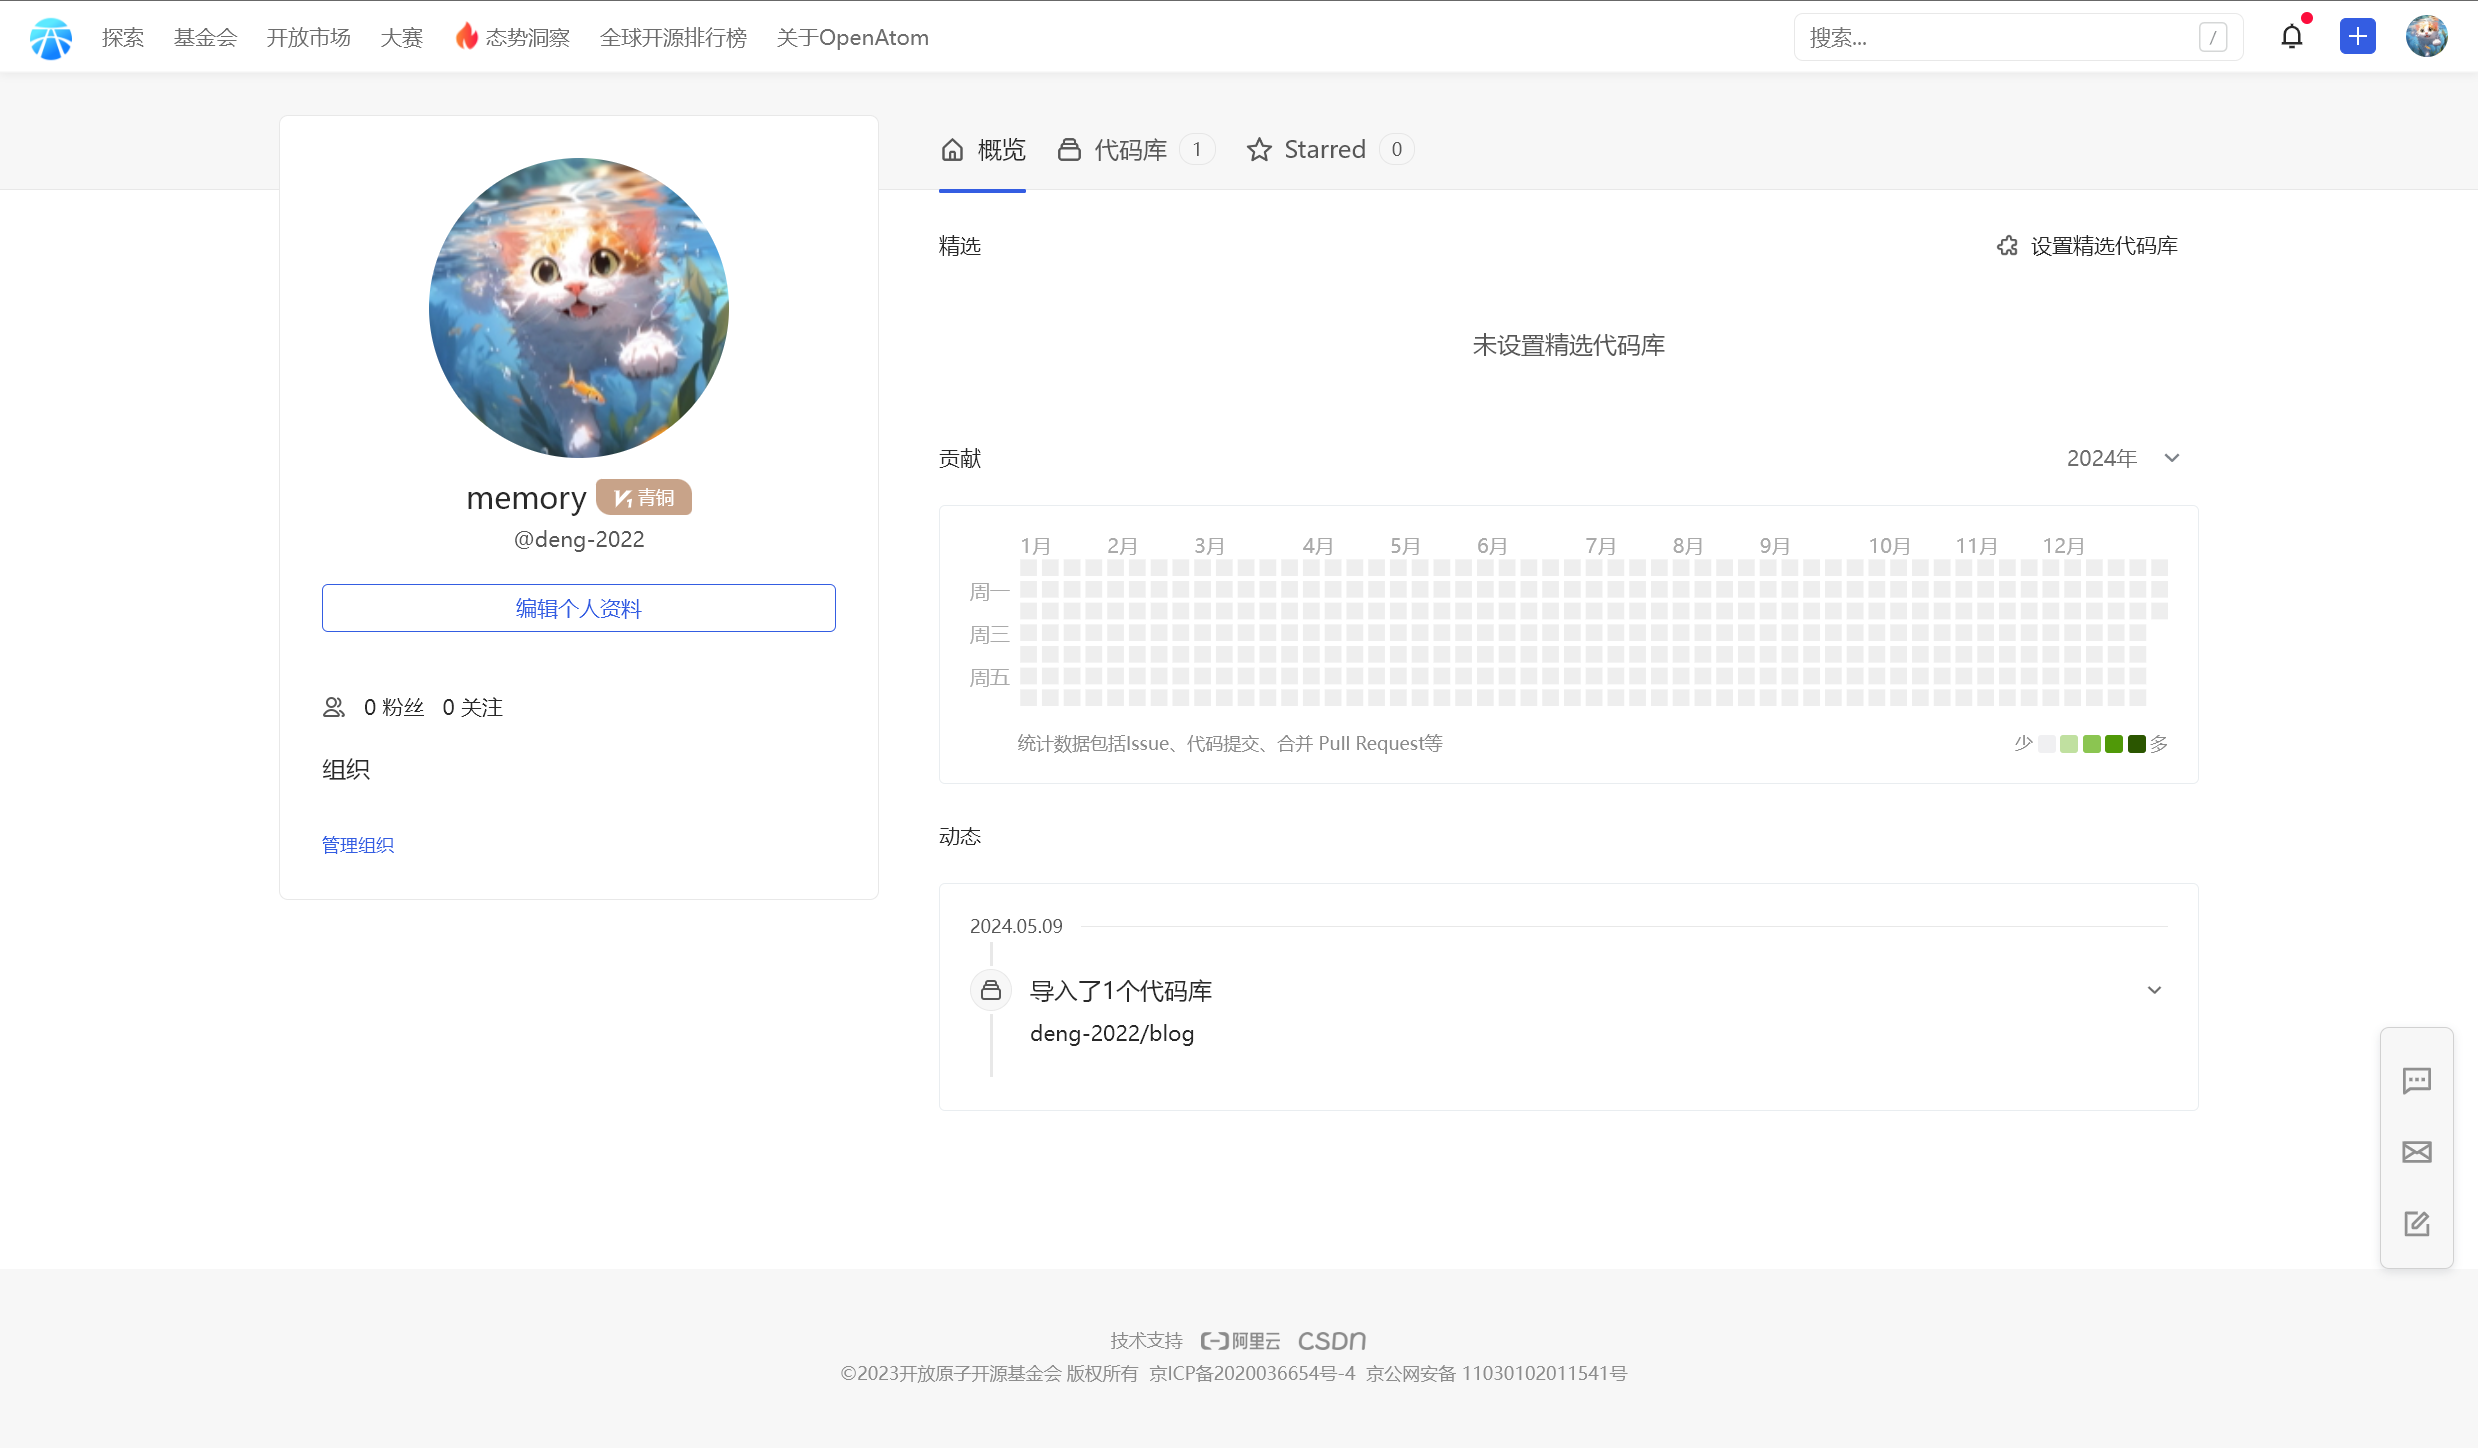
2024 年 5 月 9 日
给大伙推个提供静态托管的平台 AtomGit · Issue #I9NGES · 开源中国/Gitee Feedback - Gitee.com
今天逛 Gitee 开源中国社区,看到了最新有效的 Hexo 静态博客站点托管解决方案,感觉可以尝试一下。
平台网址:开放原子开发者用户中心 (atomgit.com),一个开放开源原子基金会相关平台。

还是很好用的,可以同步 Gitee 账号下的仓库,不过要求输入 Gitee 私人令牌。
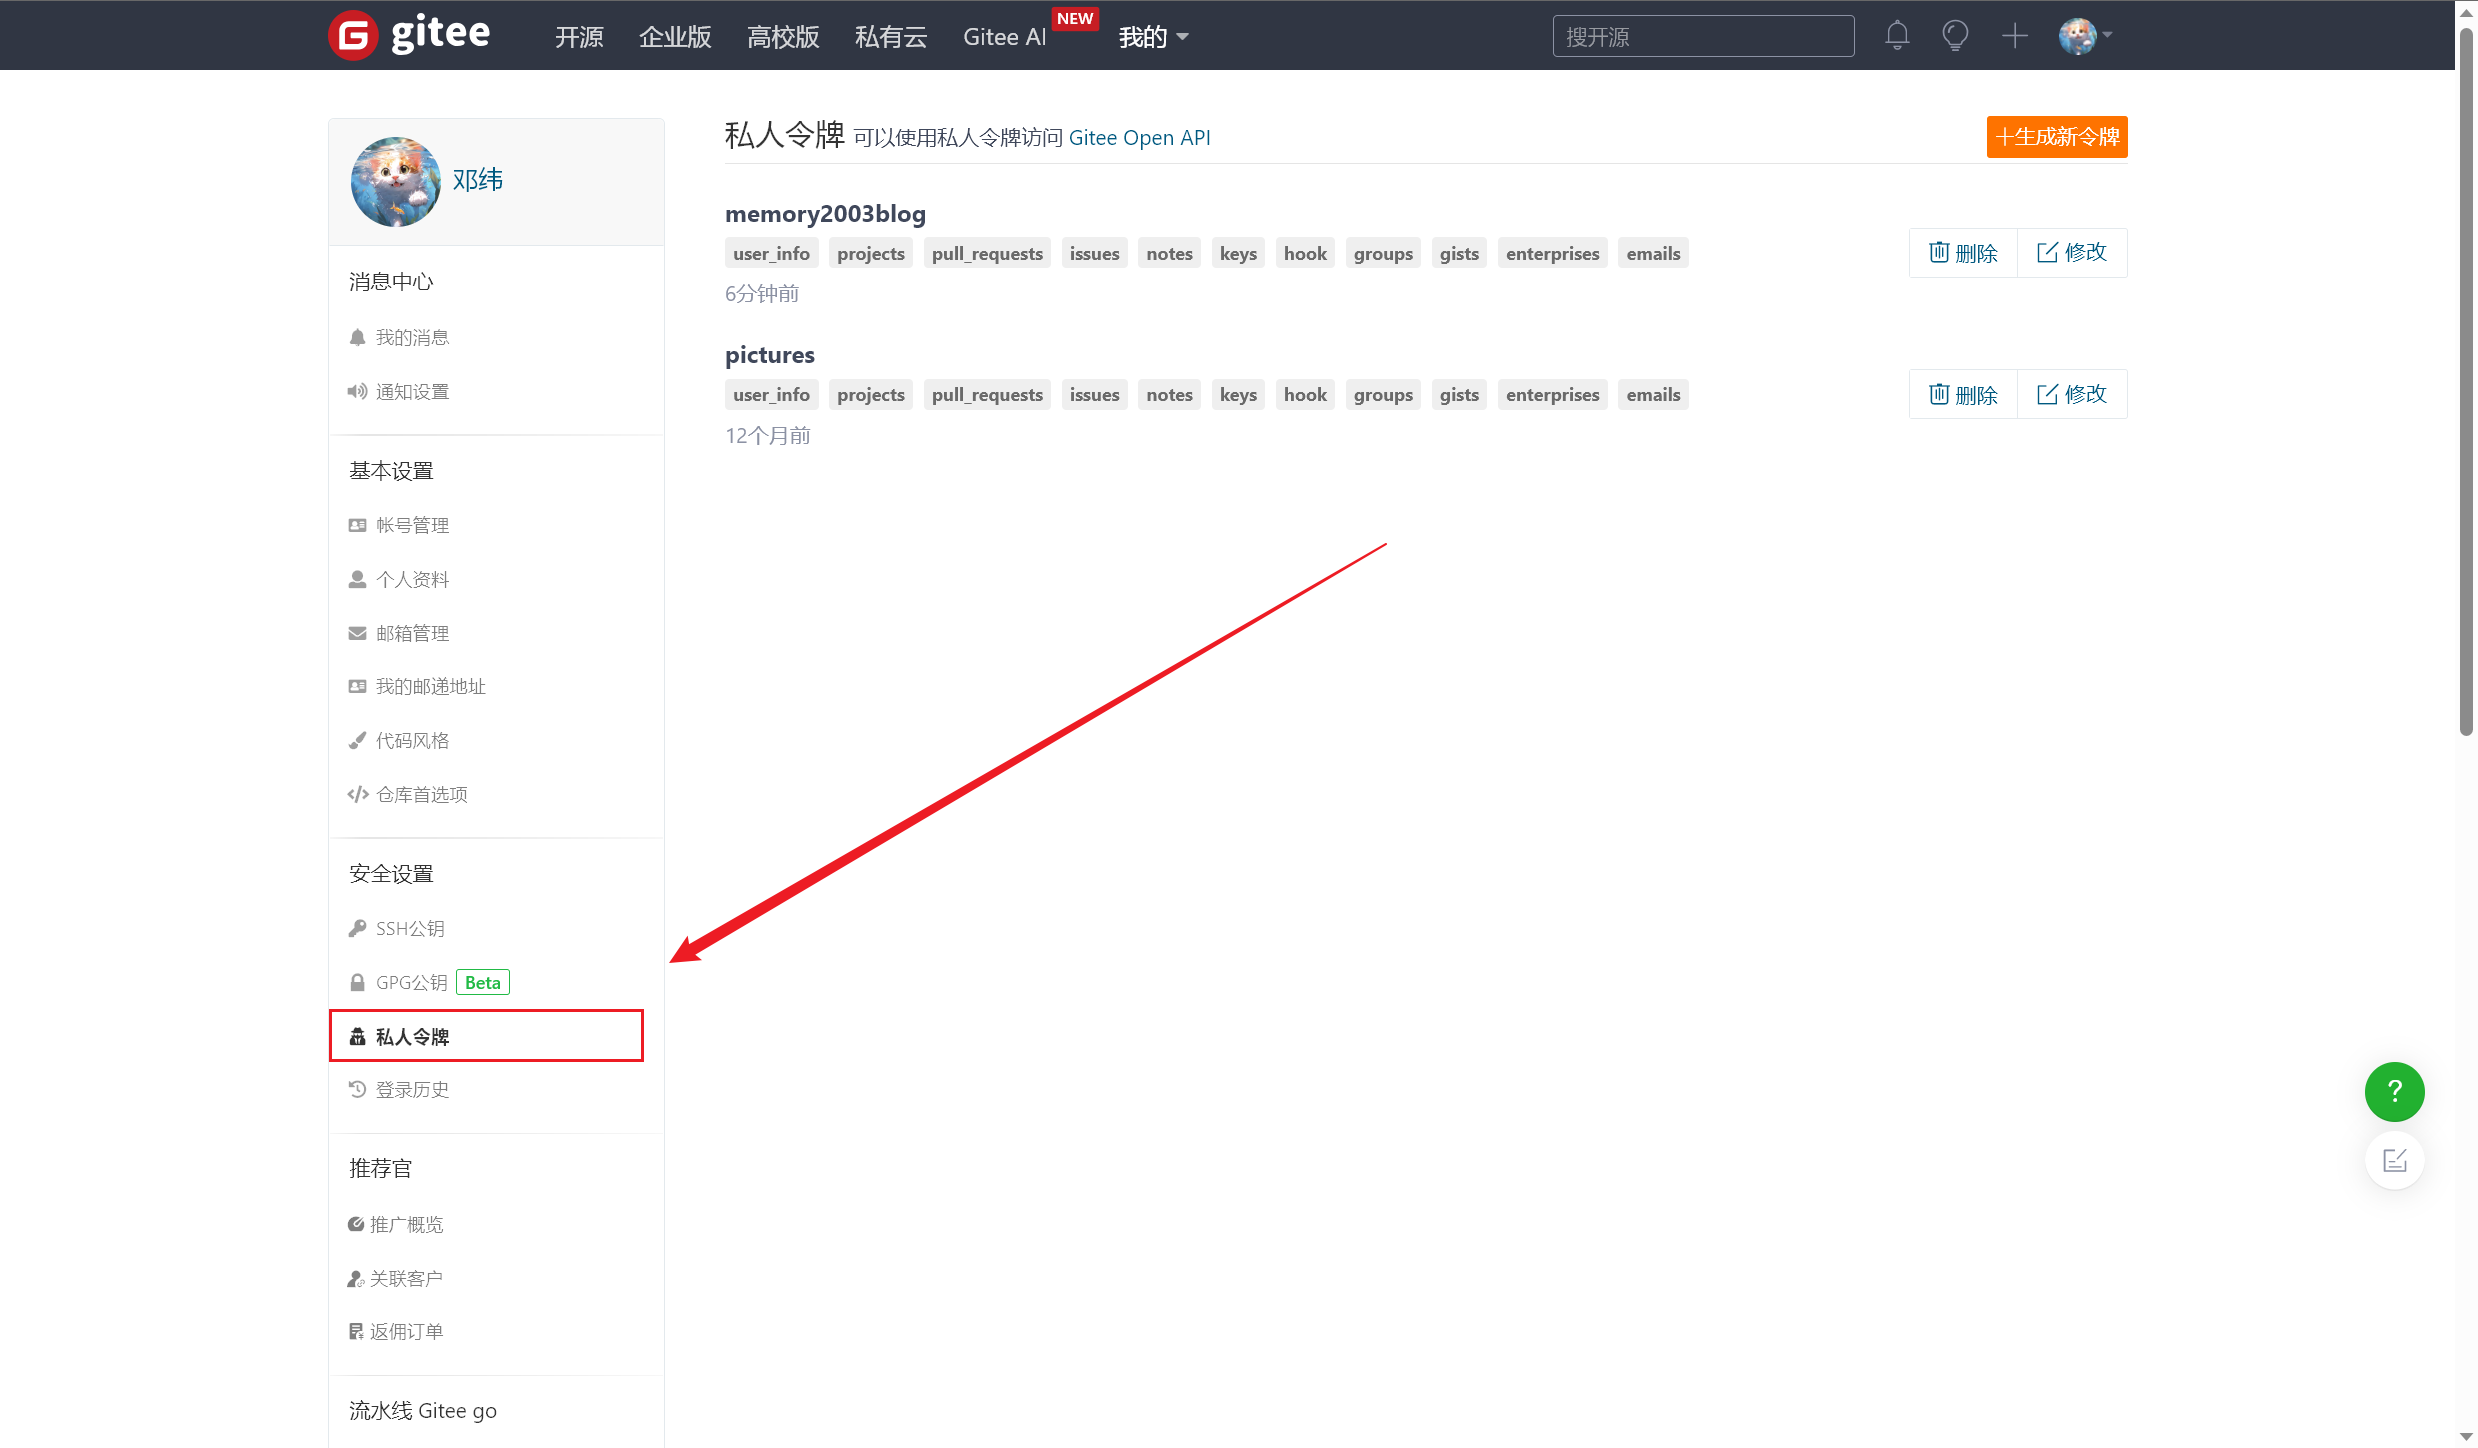
Gitee 创建私人令牌
那么怎么拿到私人令牌呢?
官方提供:仓库镜像管理 ( Gitee <-> Github 双向同步) - Gitee.com
可以看到我去年使用 Gitee 作为图床存储图片时,是进行过这步操作的,只不过连我自己都忘了。
教程很好看懂,步骤写的很明确操作也没难度。拿到唯一的 Gitee 私人令牌(当然可以同时有多个令牌),要妥善保存好。
安装 Pages 服务
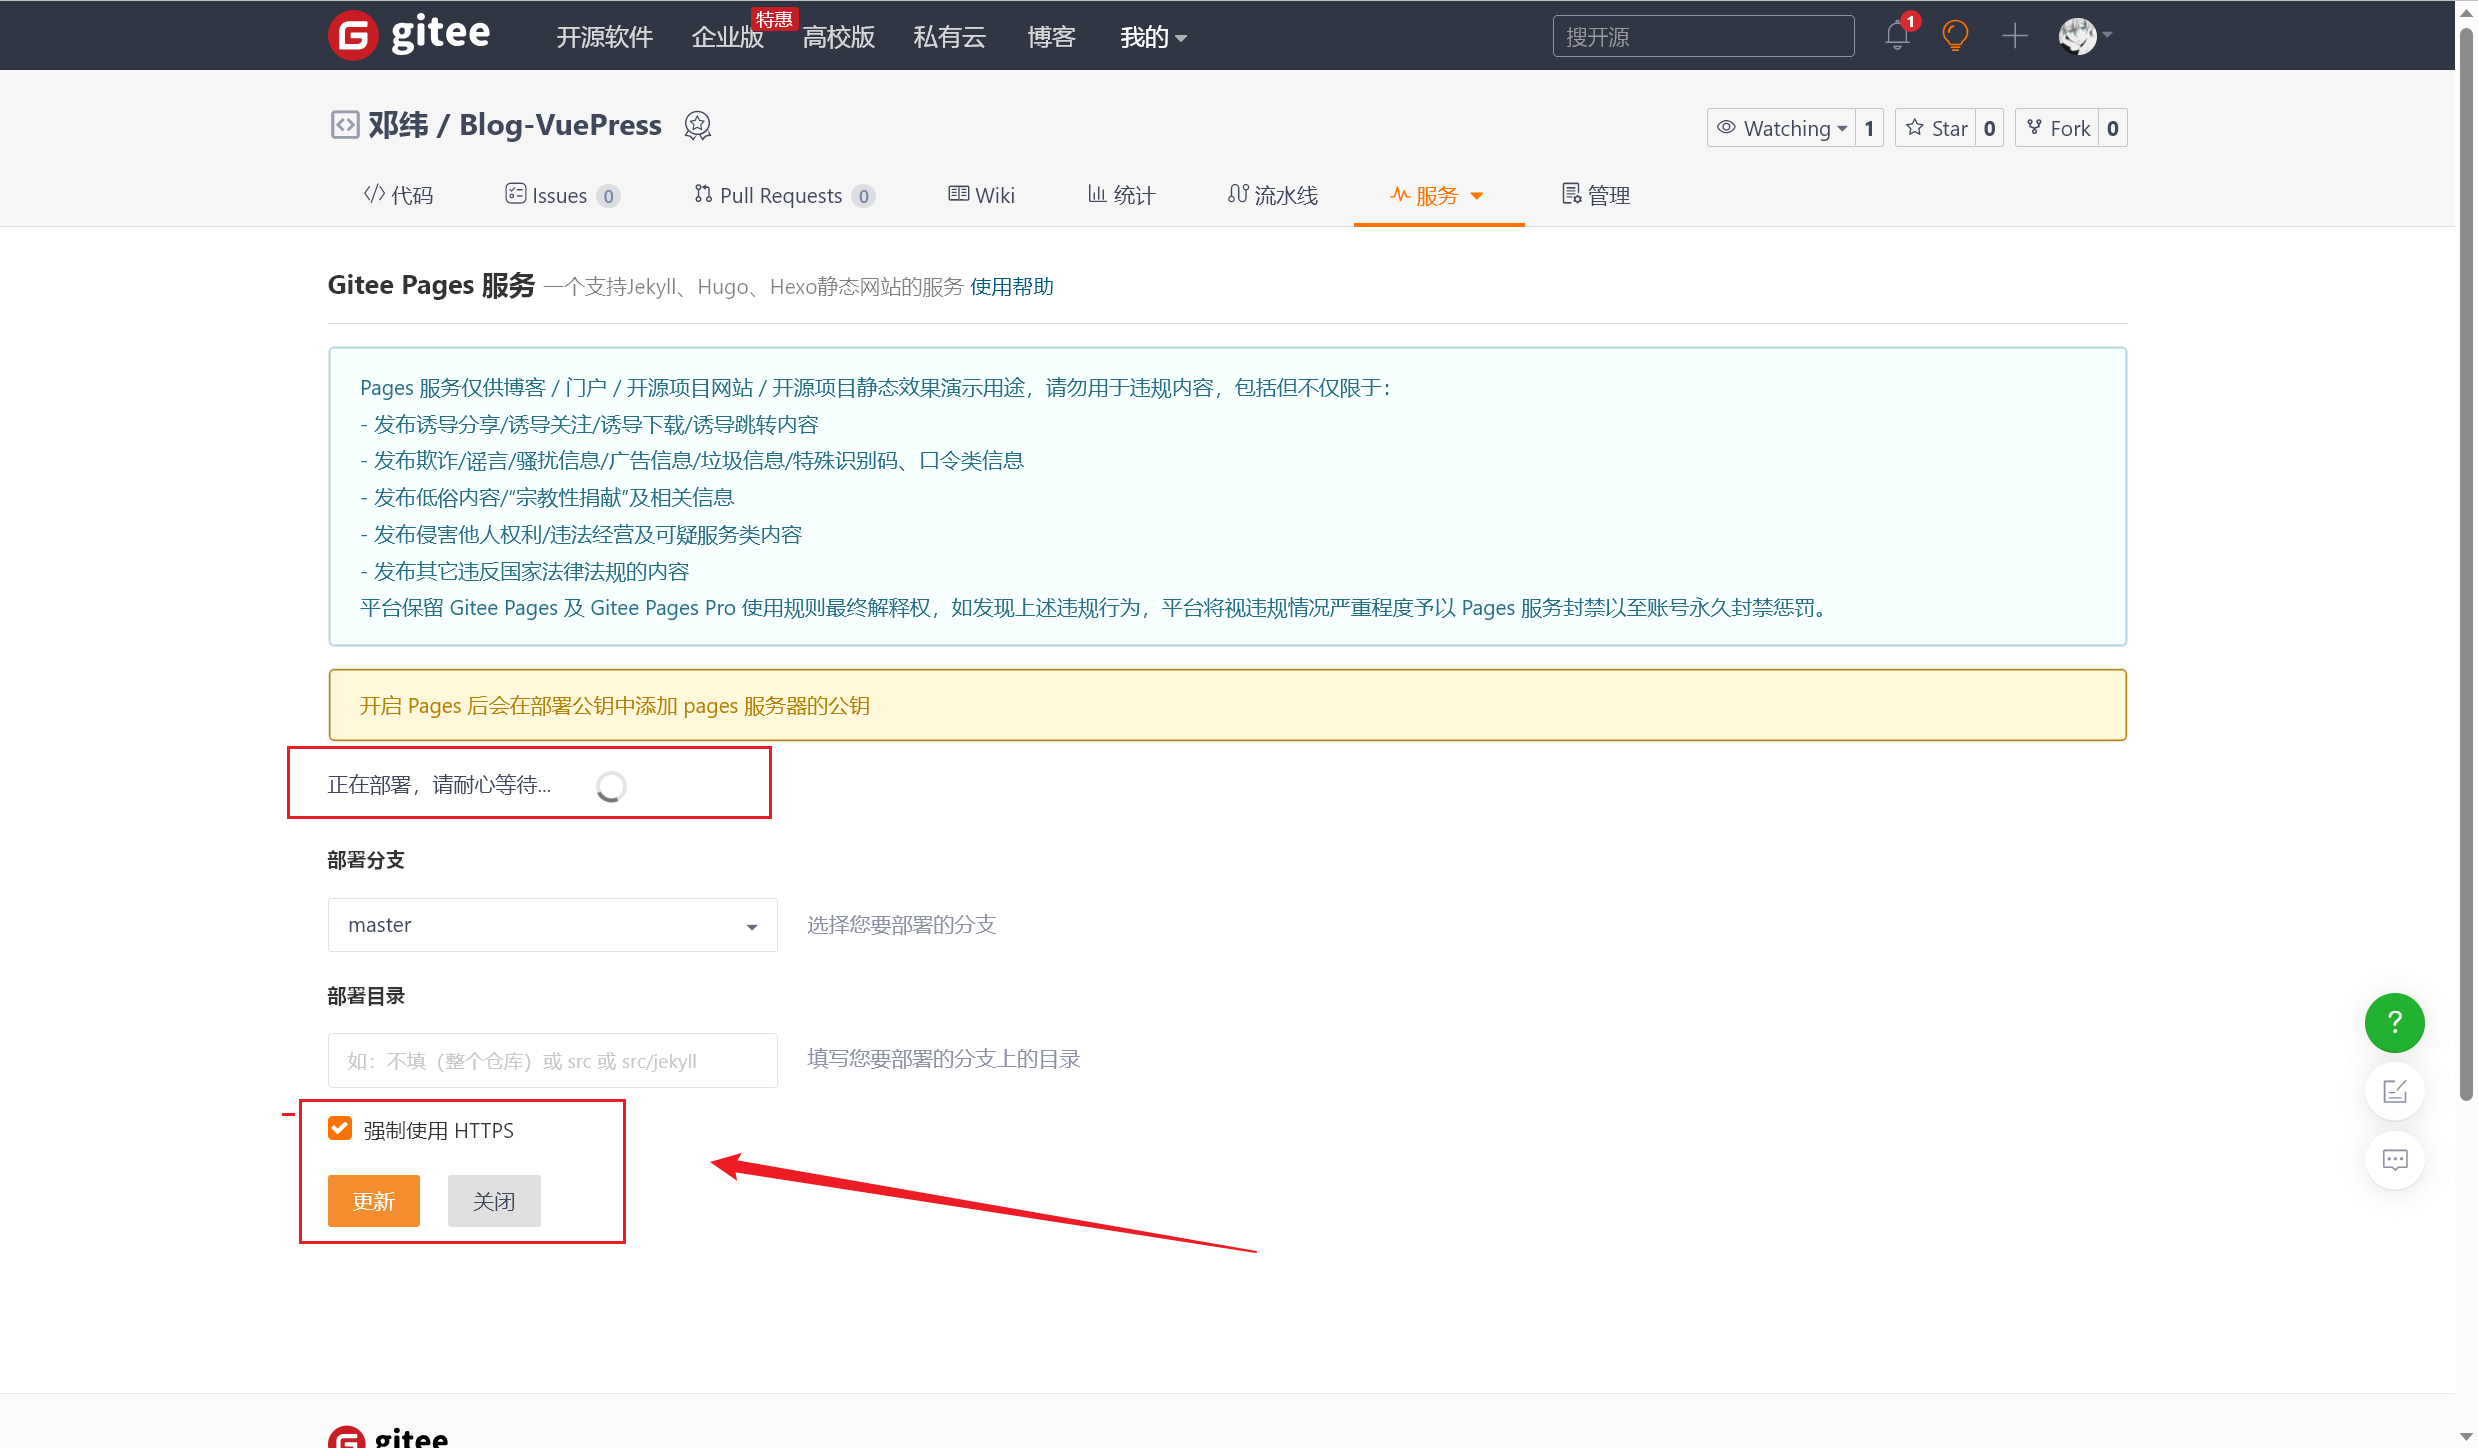
在 AutoGit 仓库下安装 Pages 托管服务:


因为 Gitee 仓库下的博客站点代码是完整的,这里直接启动 Pages 服务就能开启访问。第一次访问应该是需要缓冲时间,等了有十分钟博客才能正常加载图文。(大部分图片都上传到了 Gitee 图床,这个托管网站下无法展示,只能展示本地配置的静态图片。)

推送最新内容成功,最新个人博客站点:[Memory’s Blog]

根据配置文件,默认推送到 main 分支,注意同步更改一下 Paegs 托管分支才能看到最新博客。
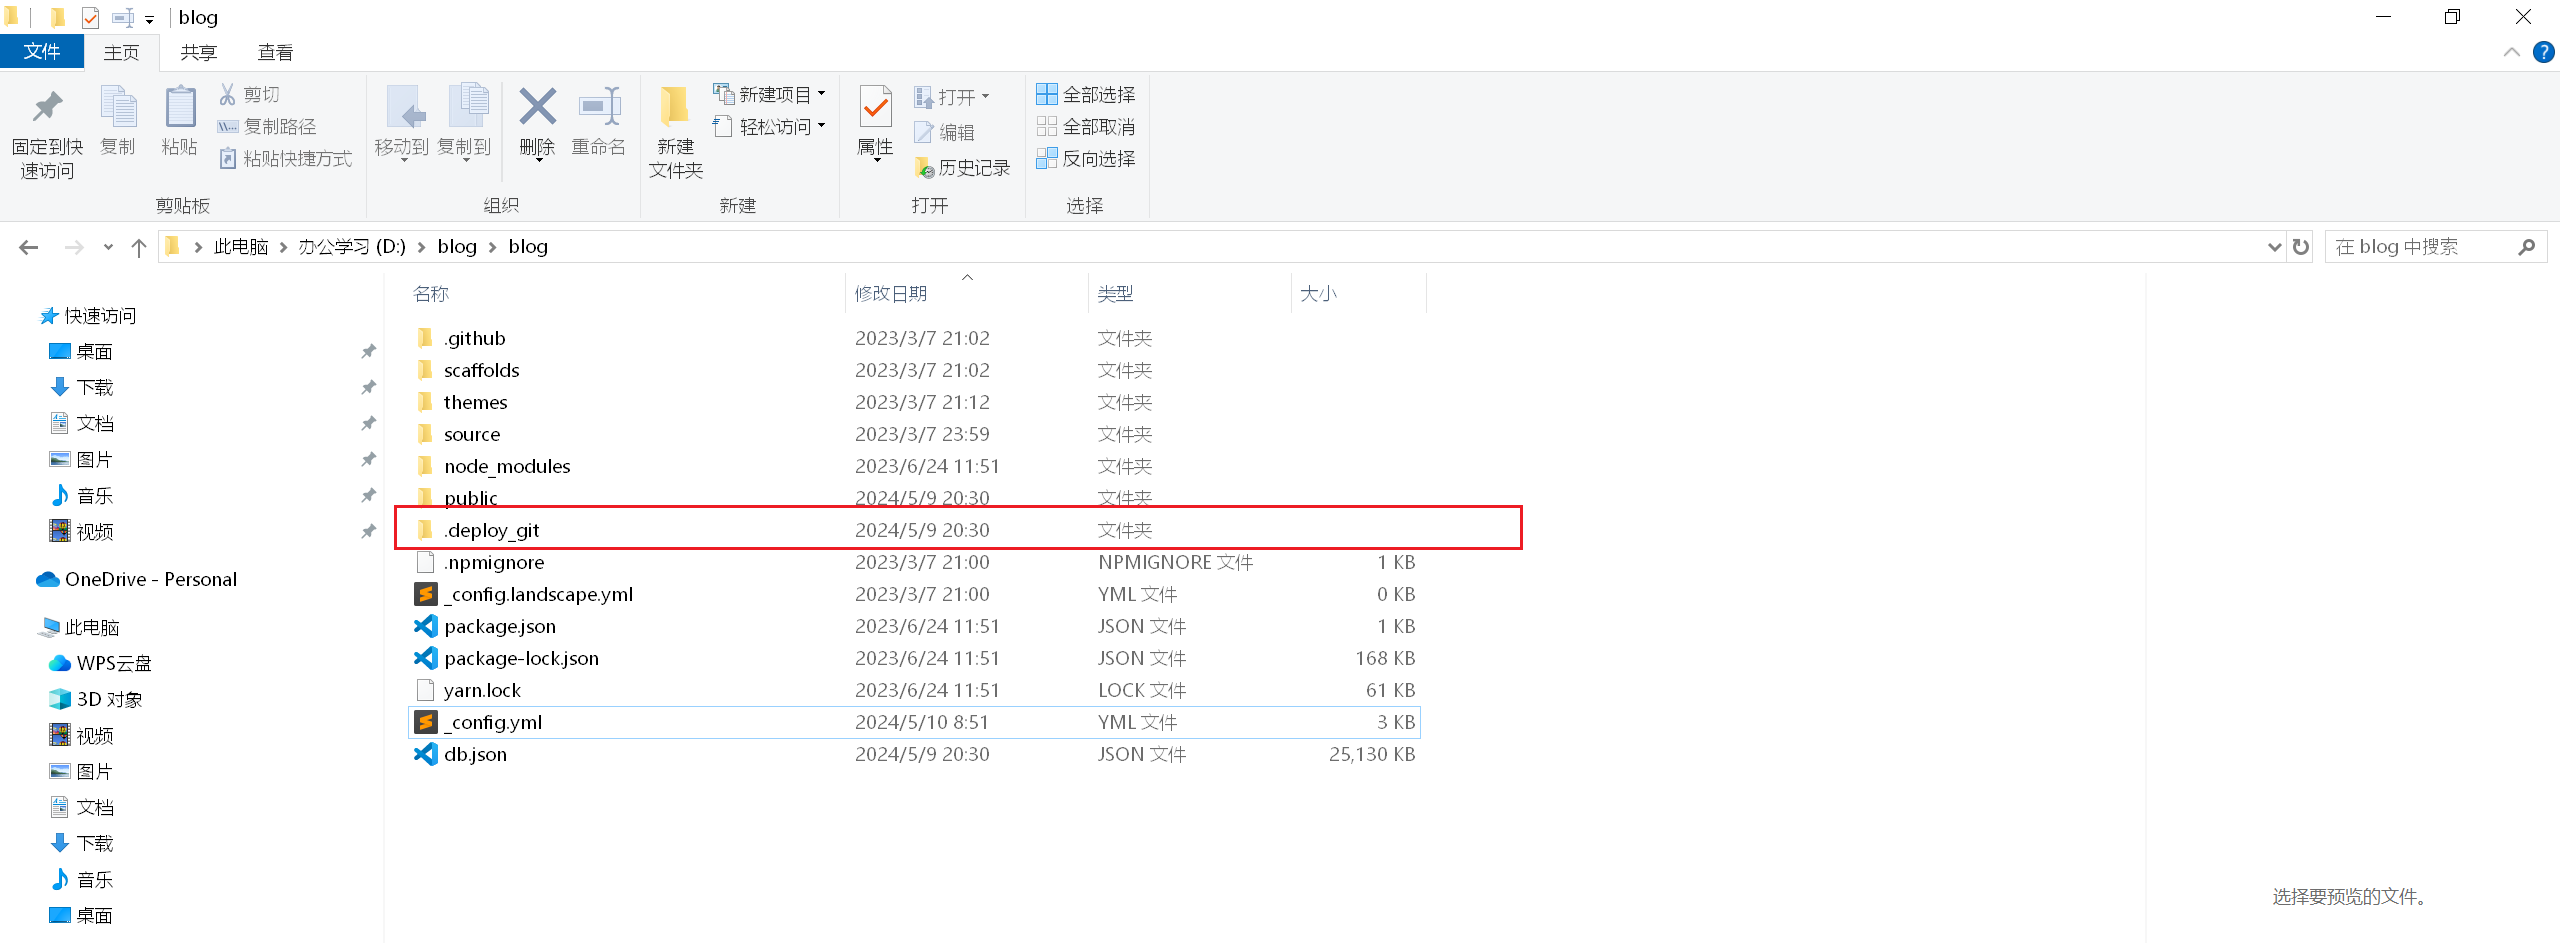
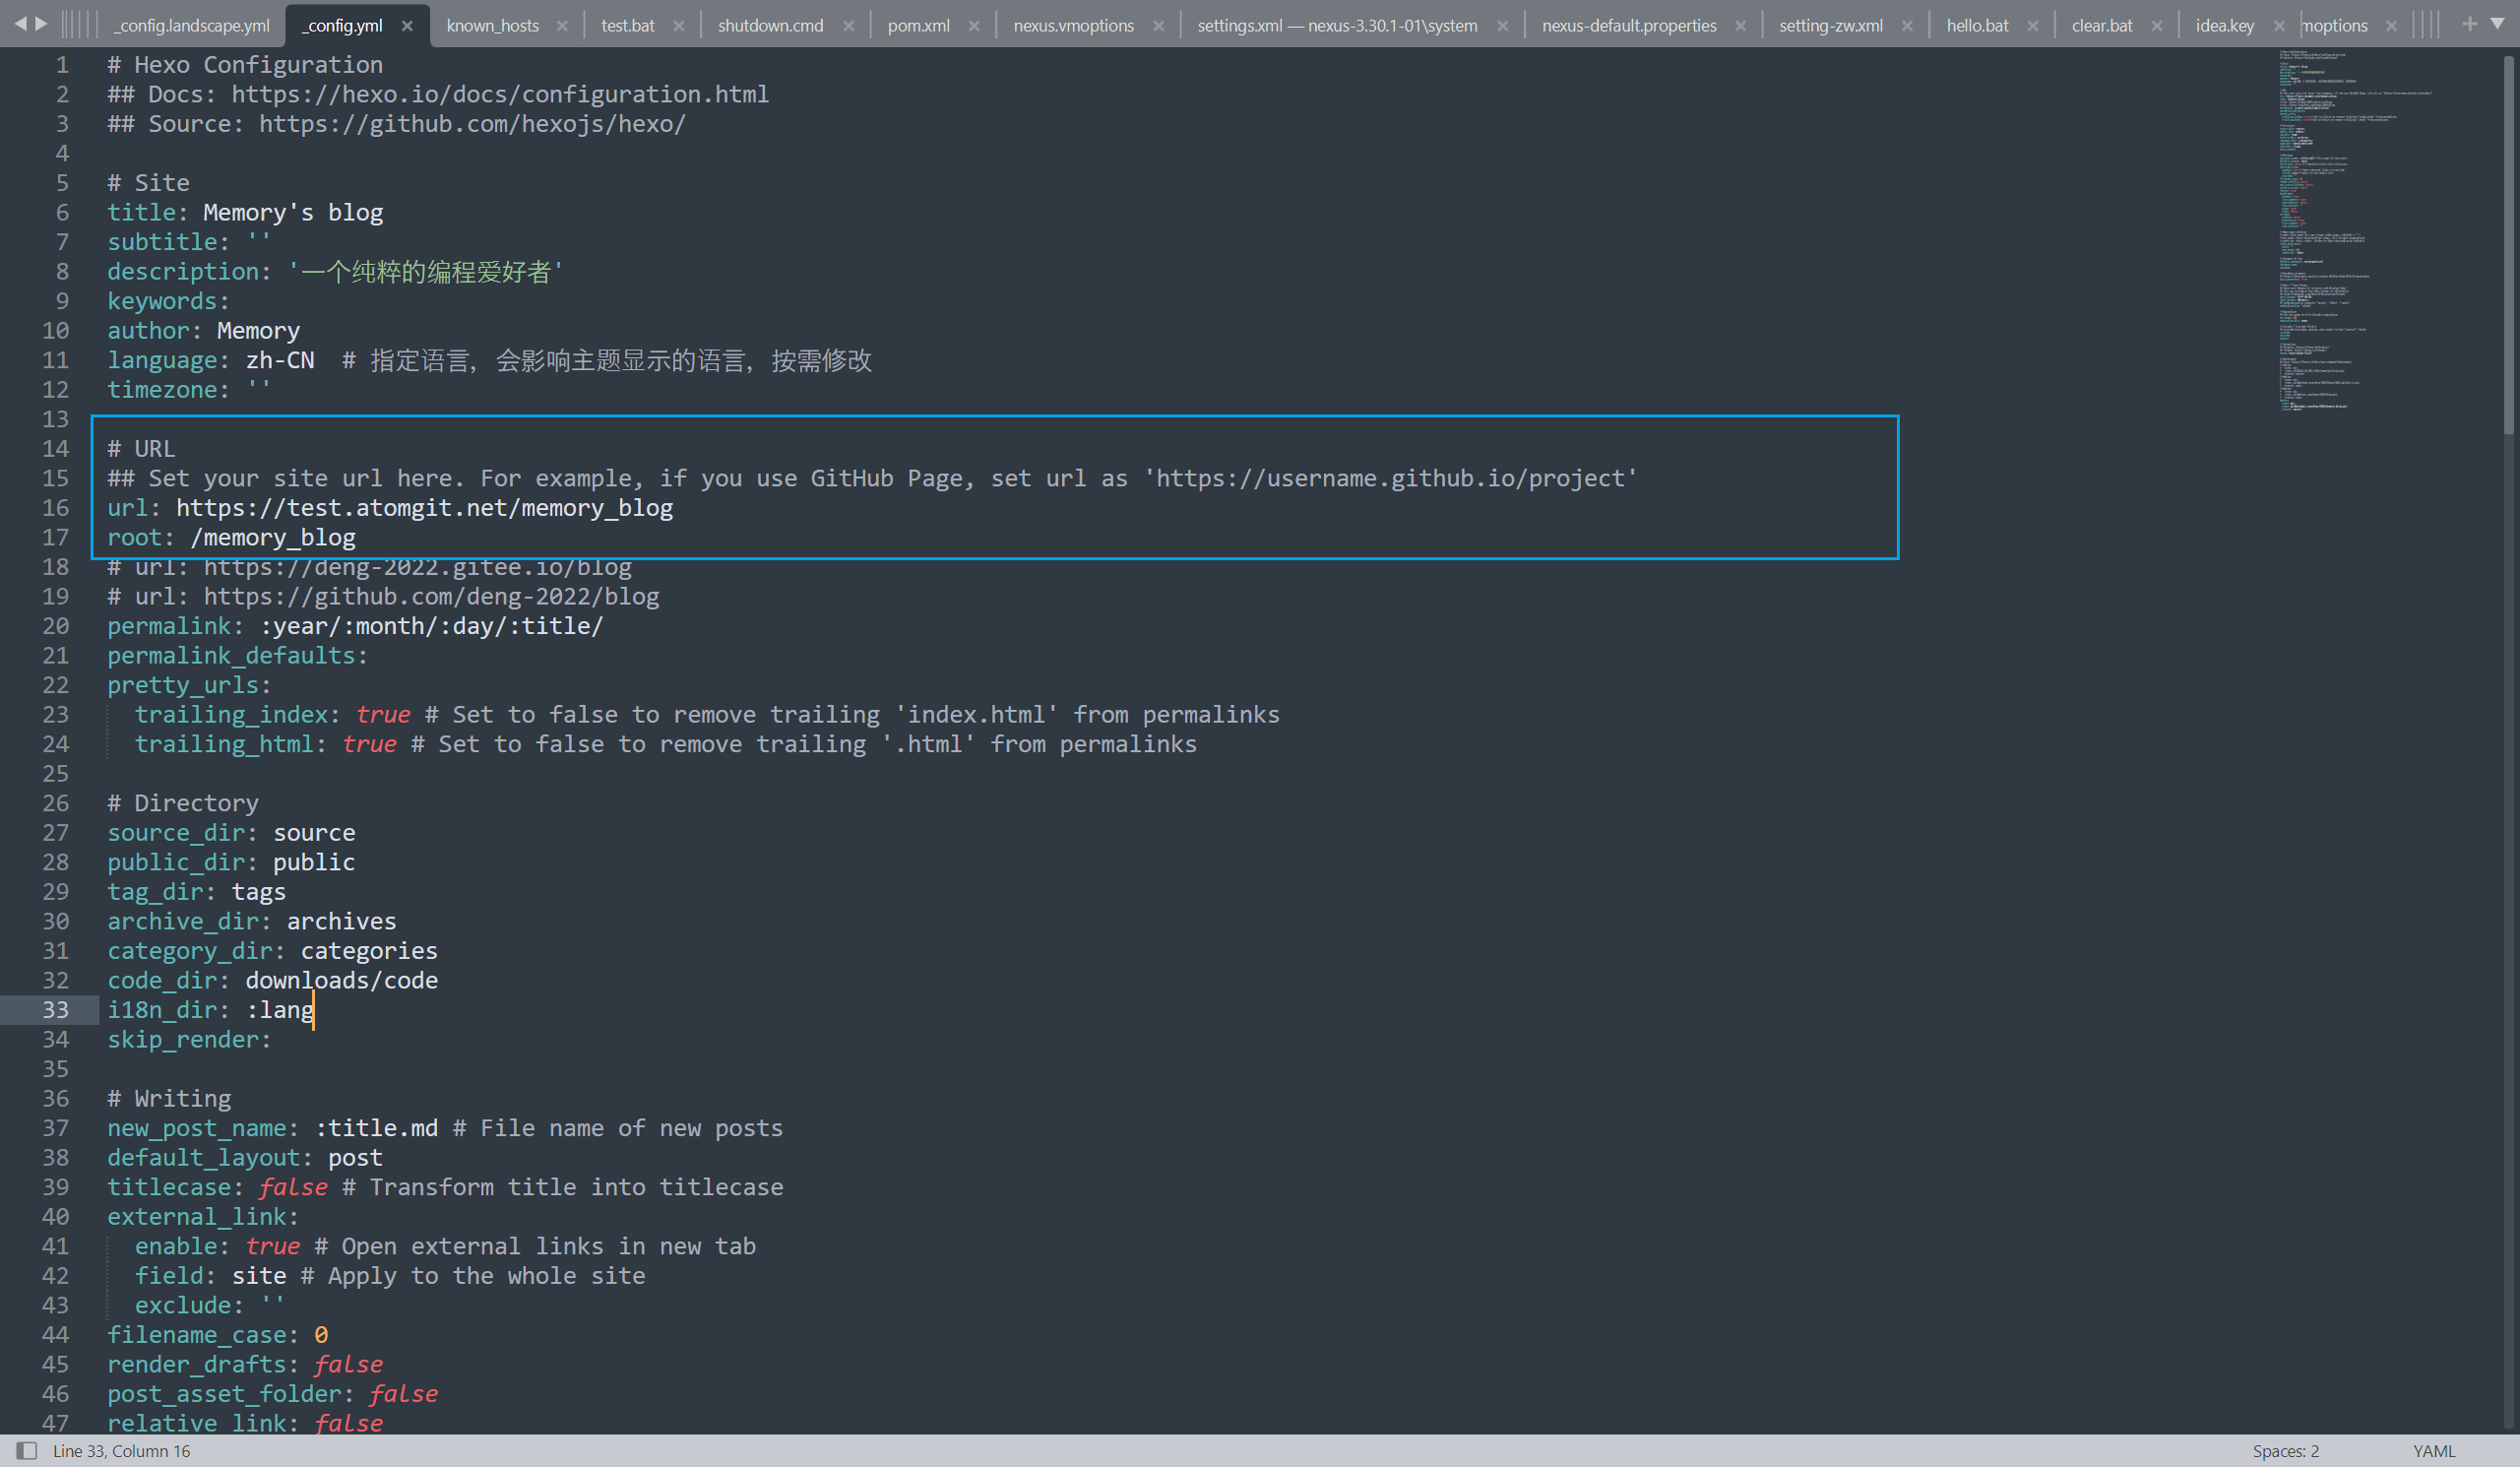
blog 下的 _config.yml 文件内容编辑:
1 | |
问题
2024 年 5 月 9 日
待解决的问题:
- 图片都不能正常显示,都在 Gitee 图床上,短时间内不好解决。
- AutoGit 仓库下多
解决
2024 年 7 月 8 日
前两个月一直不能成功部署,原来是这个原因:
1 | |
还是决定用 AutoGit Pages 服务部署个人博客。
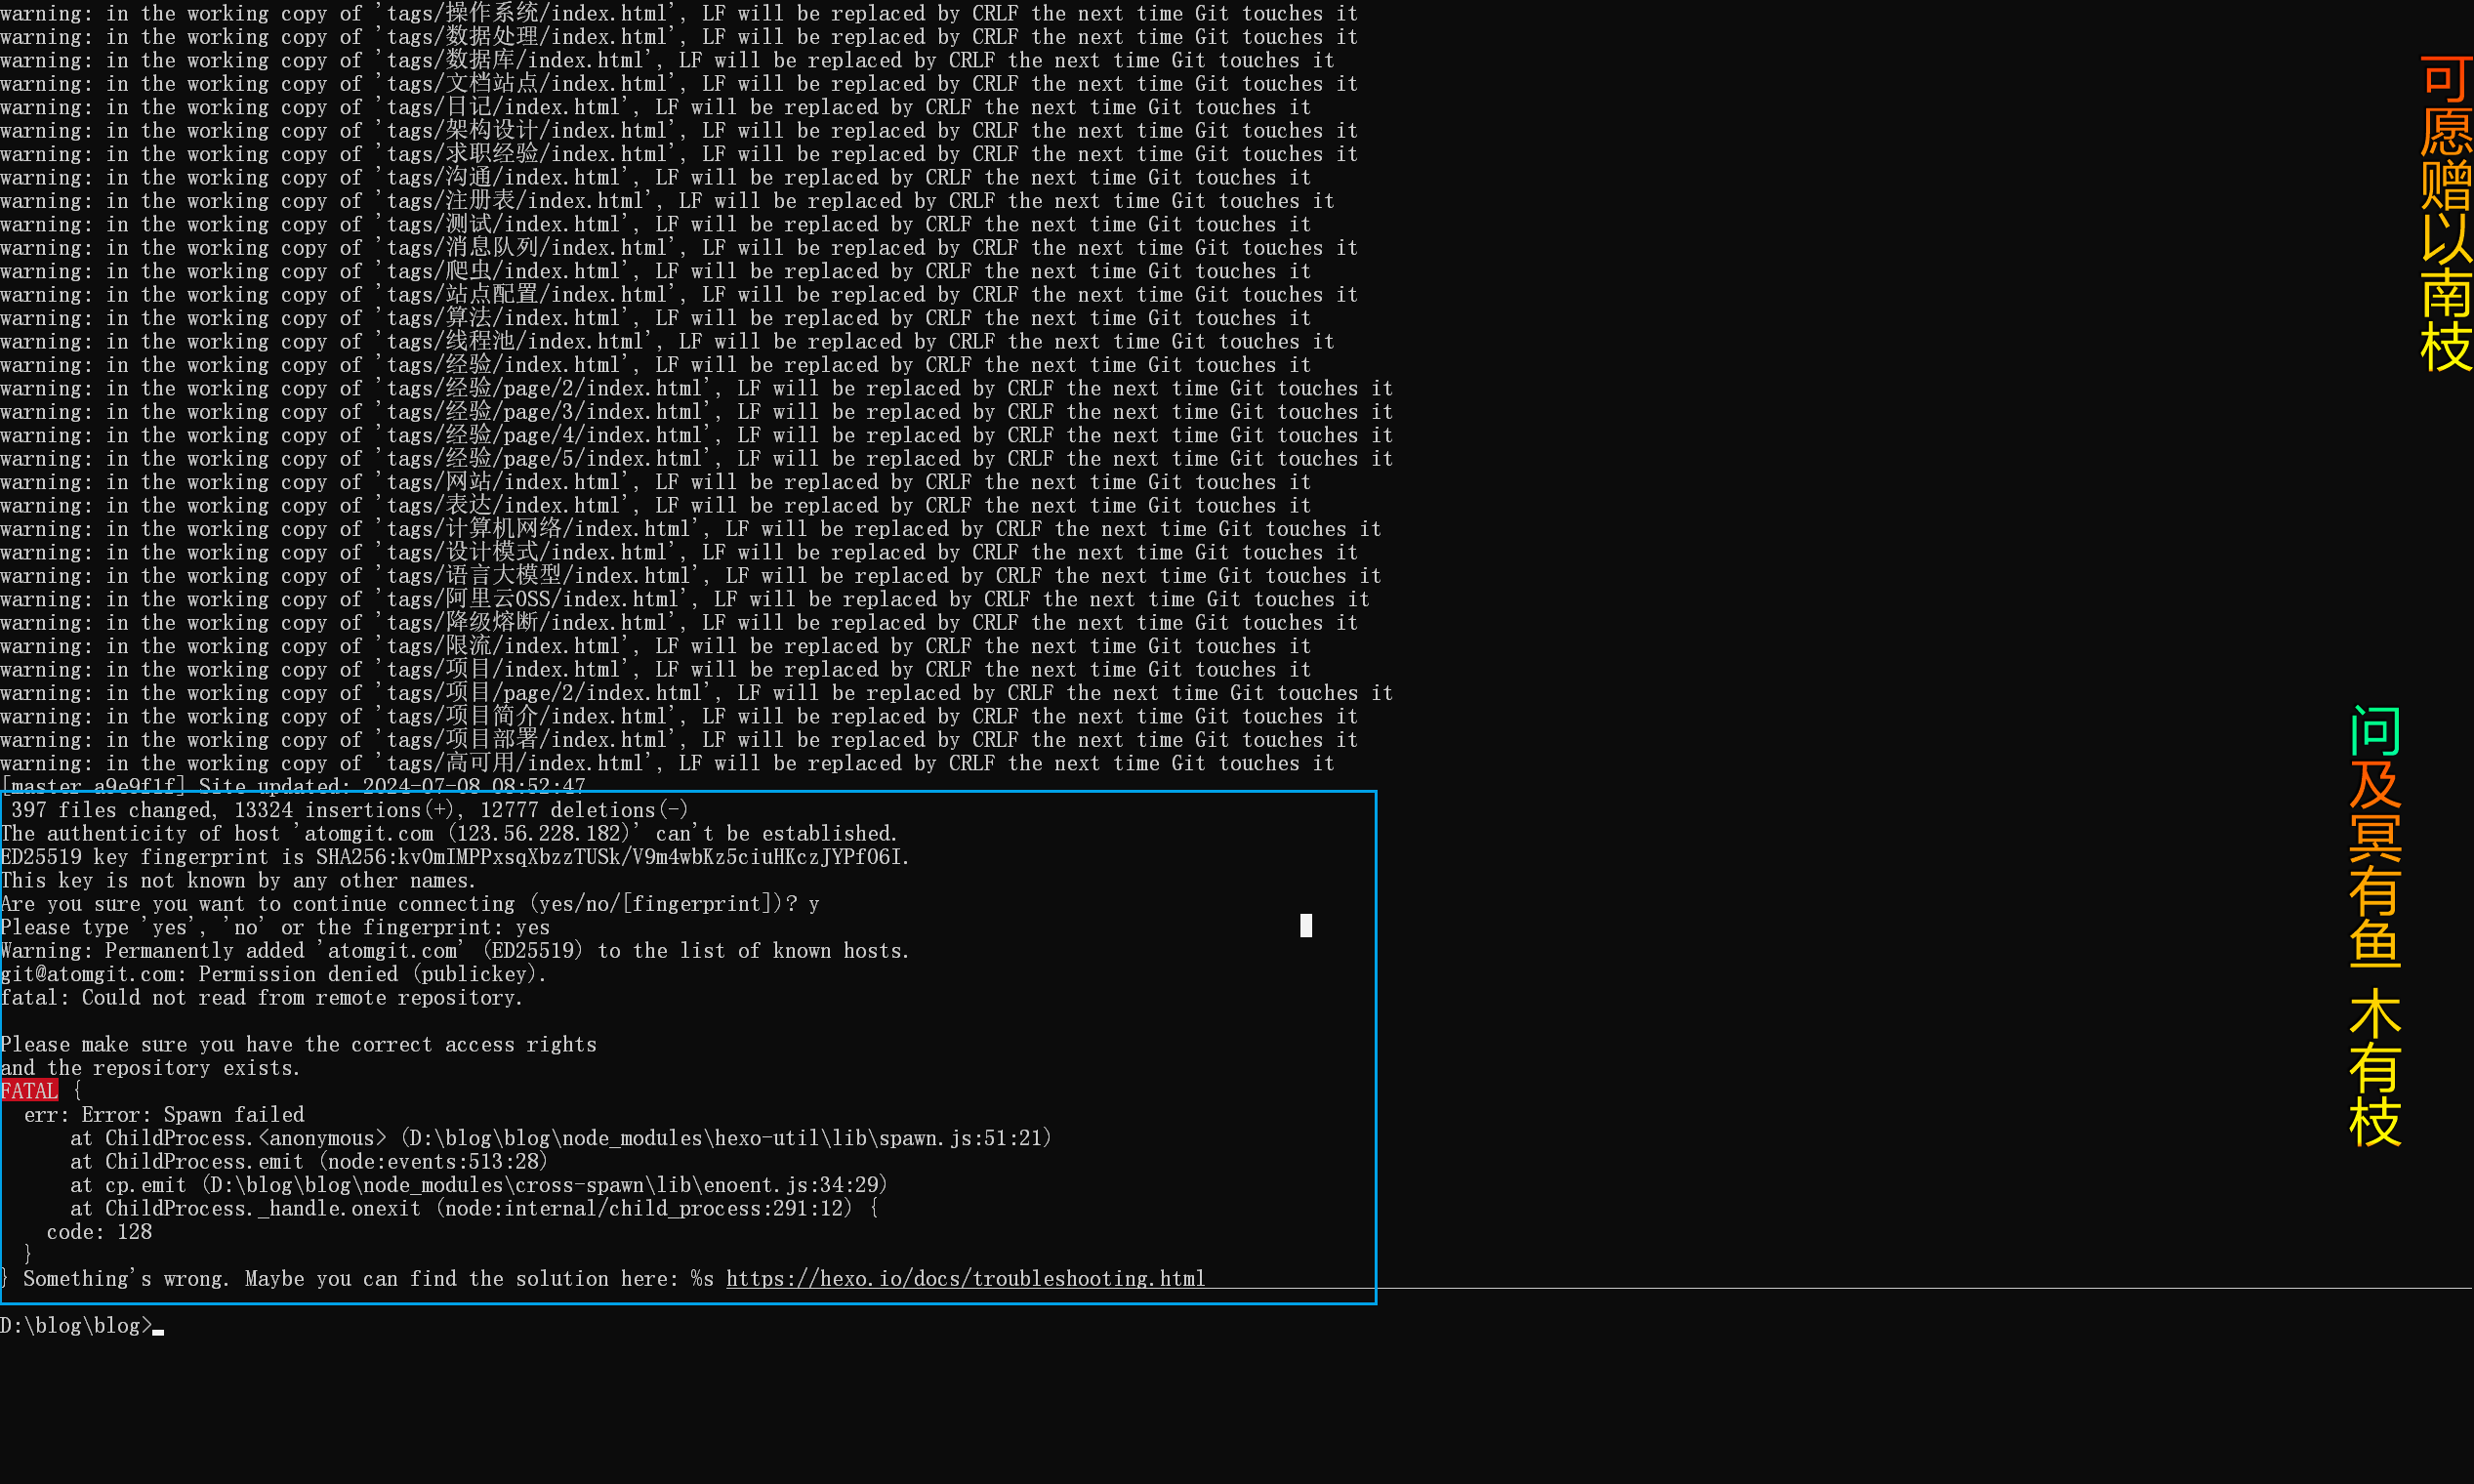
出现这样的问题,那就是推送代码至远程仓库的过程中,没有推送权限而导致出错:
git 报错—The authenticity of host can’t be established._git the authenticity of host can’t-CSDN 博客
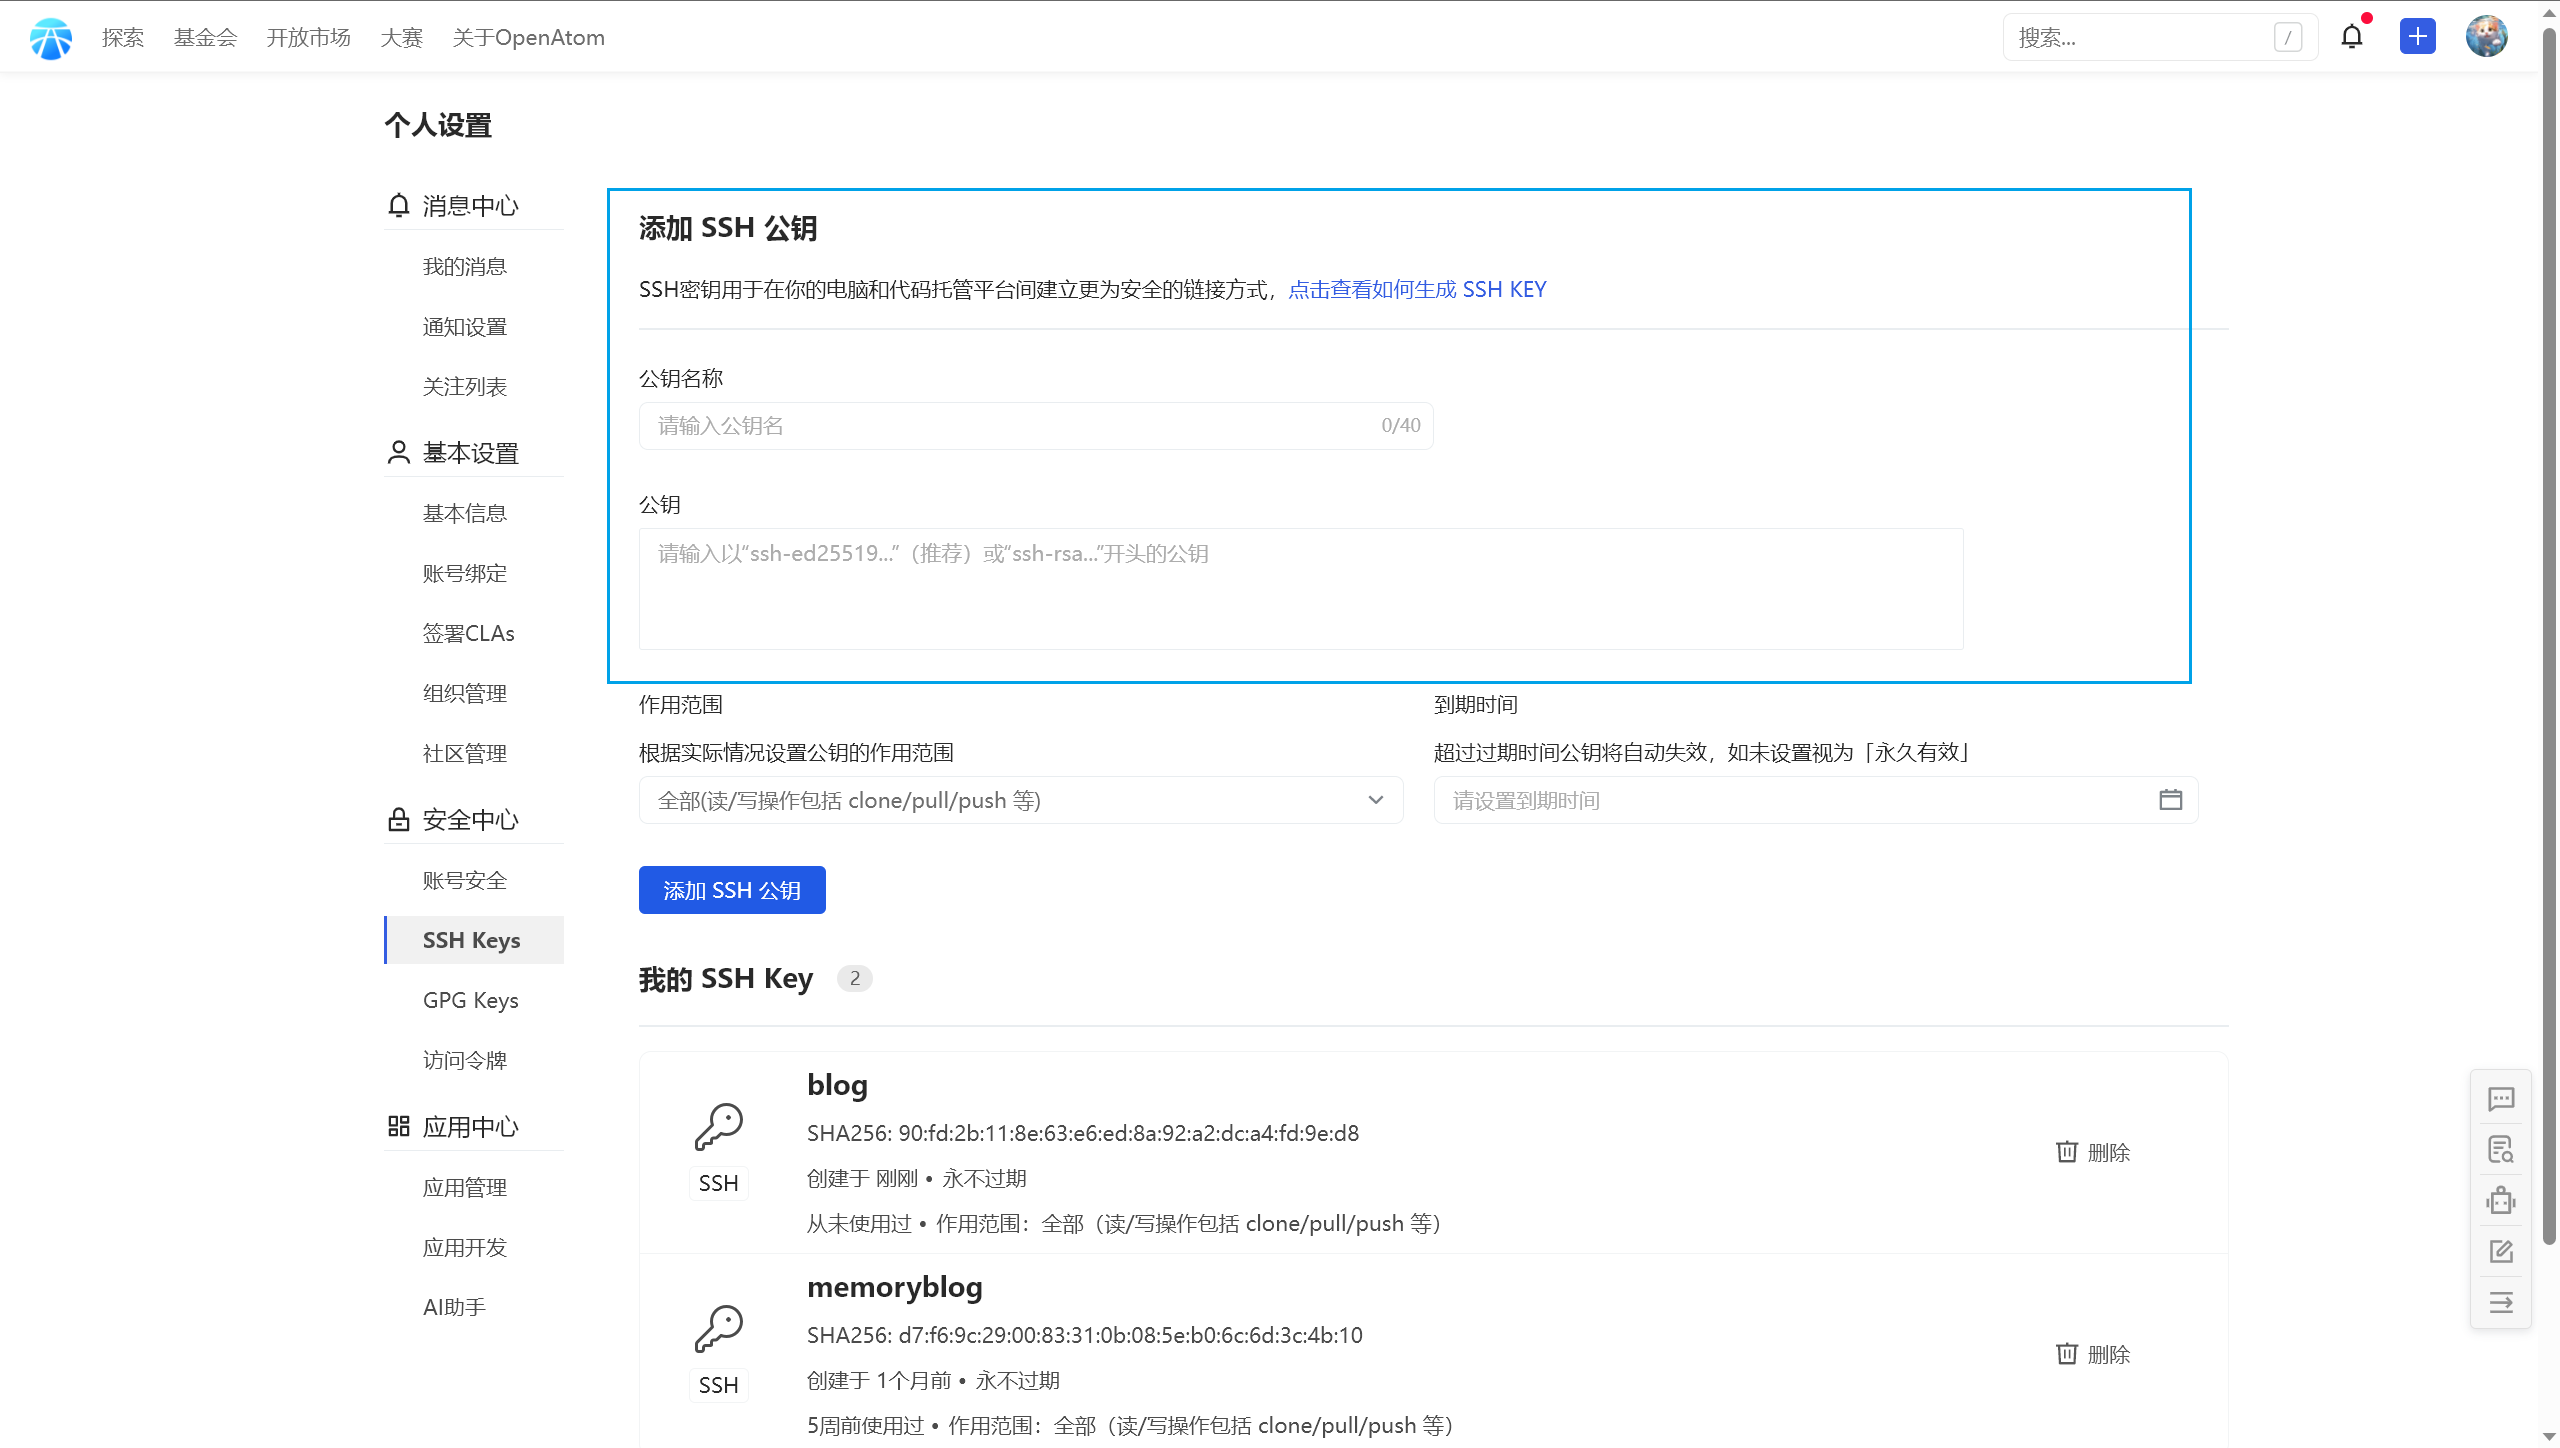
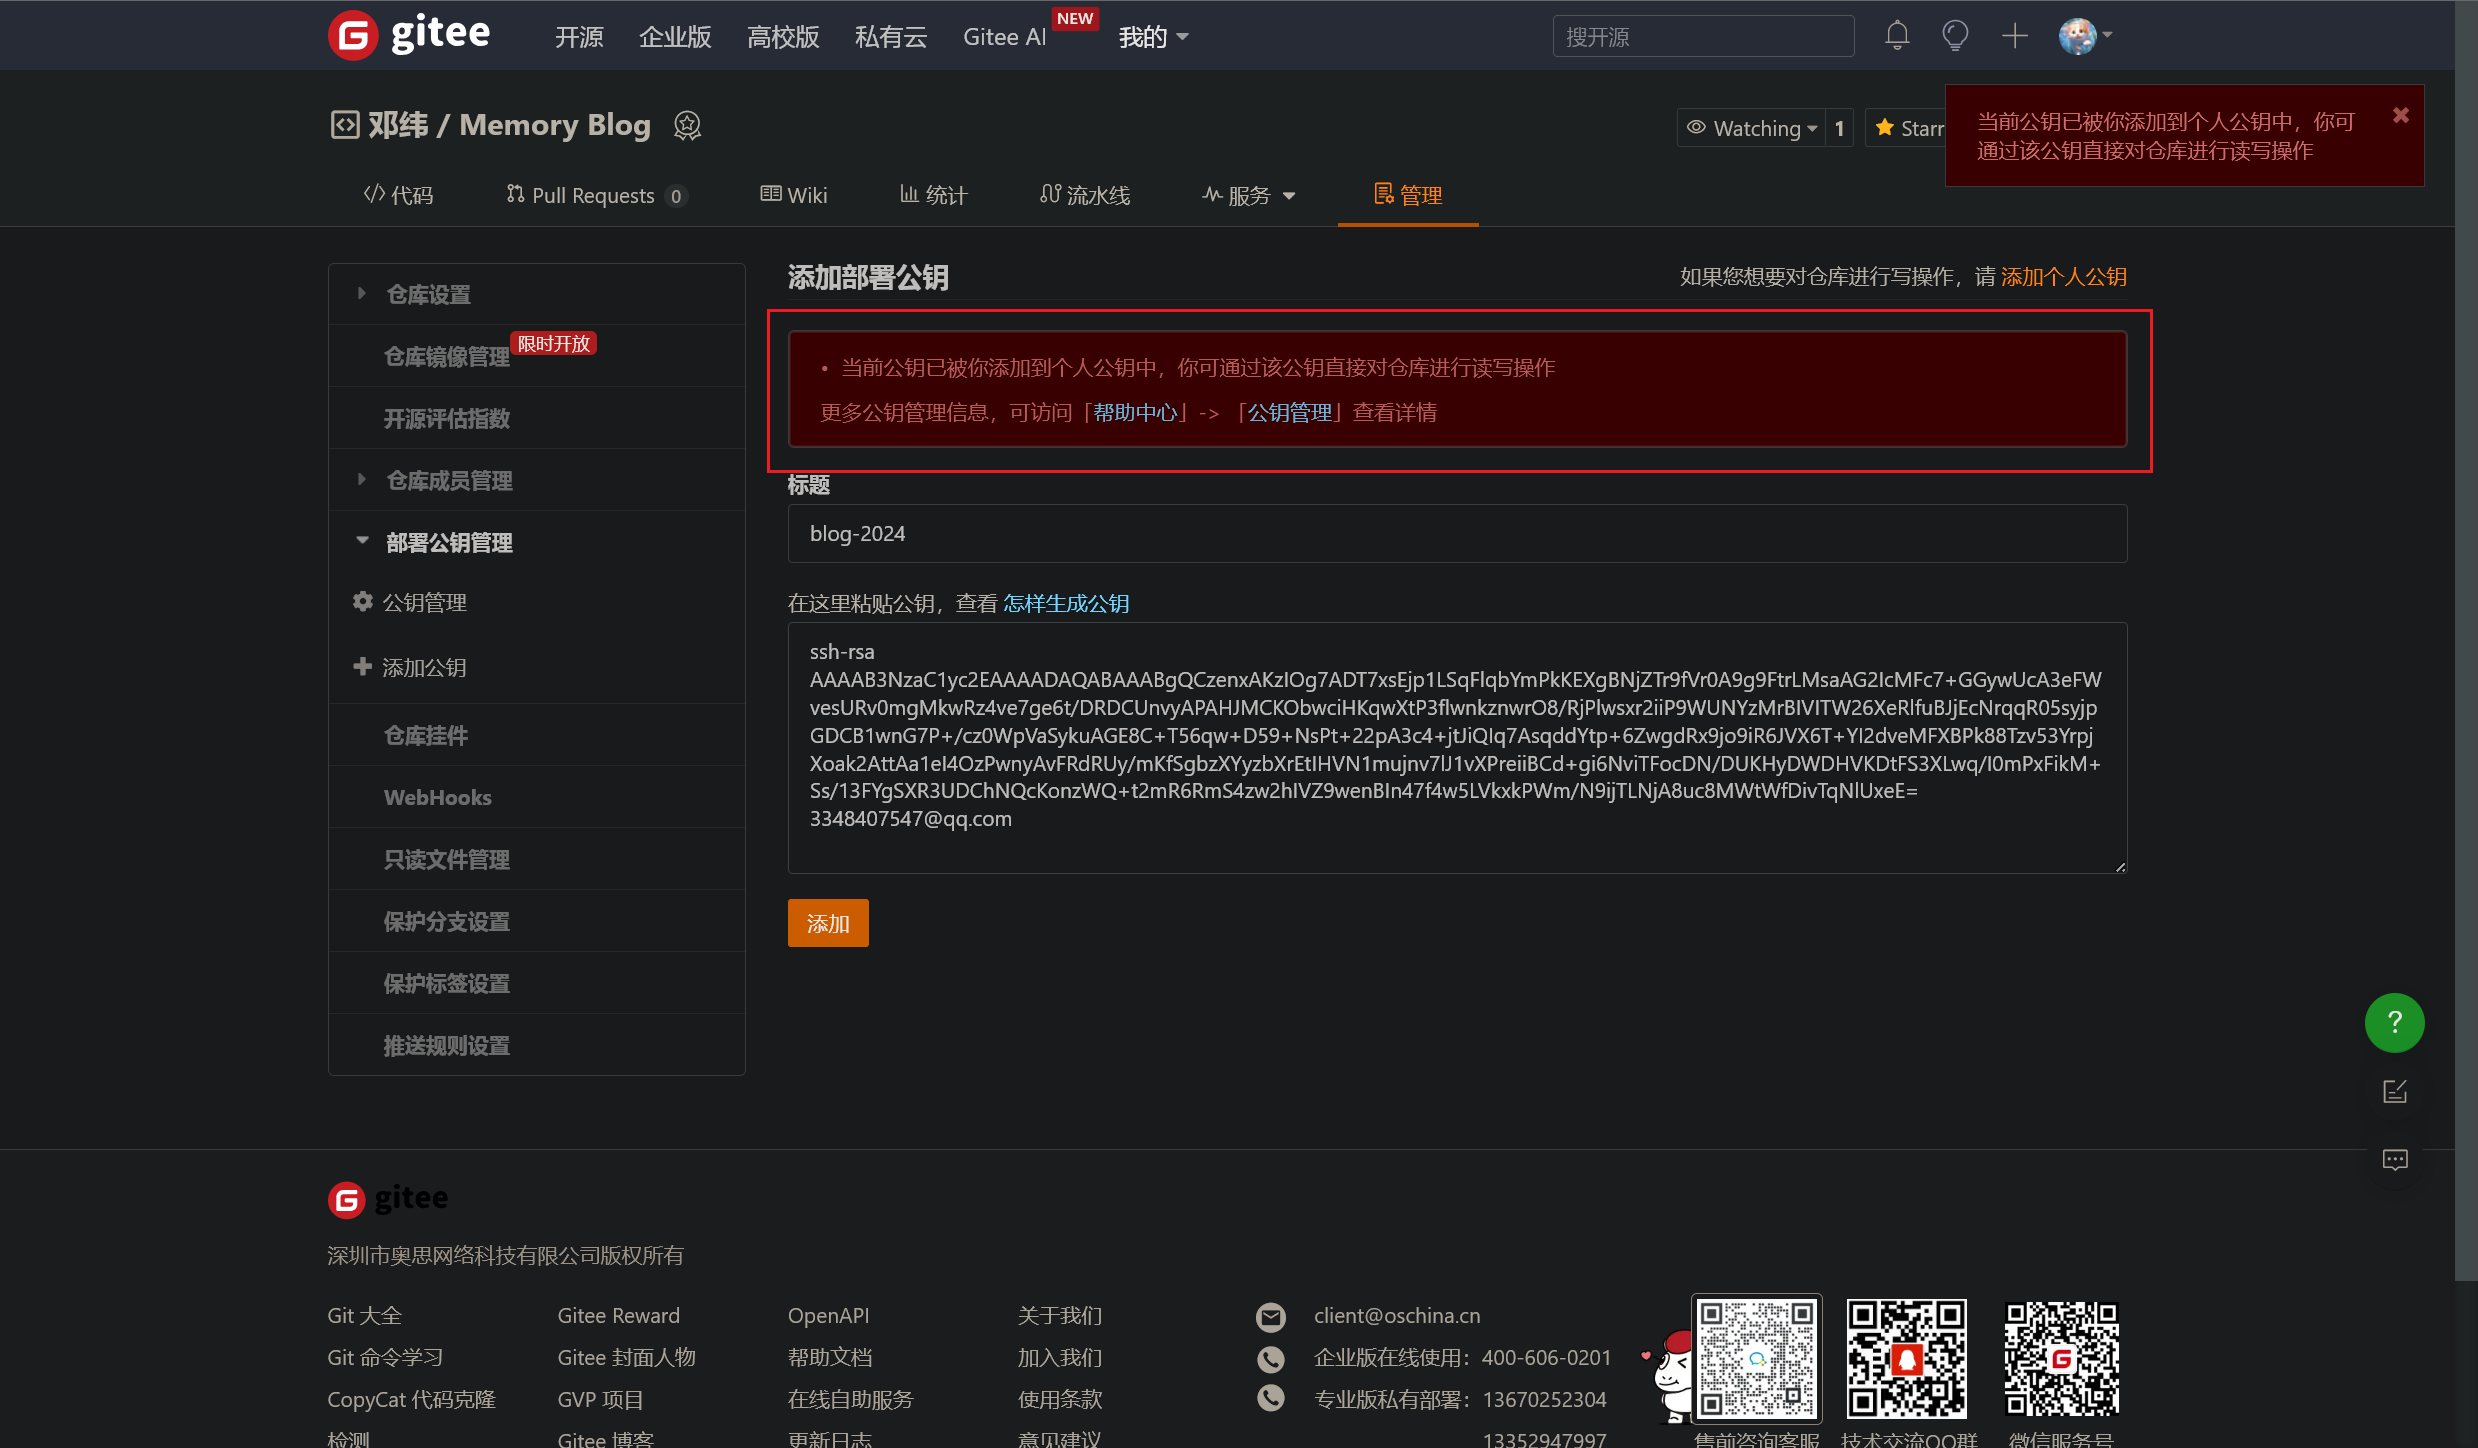
在代码托管仓库中设置就好了,公钥在本地 C 盘下的用户目录中:
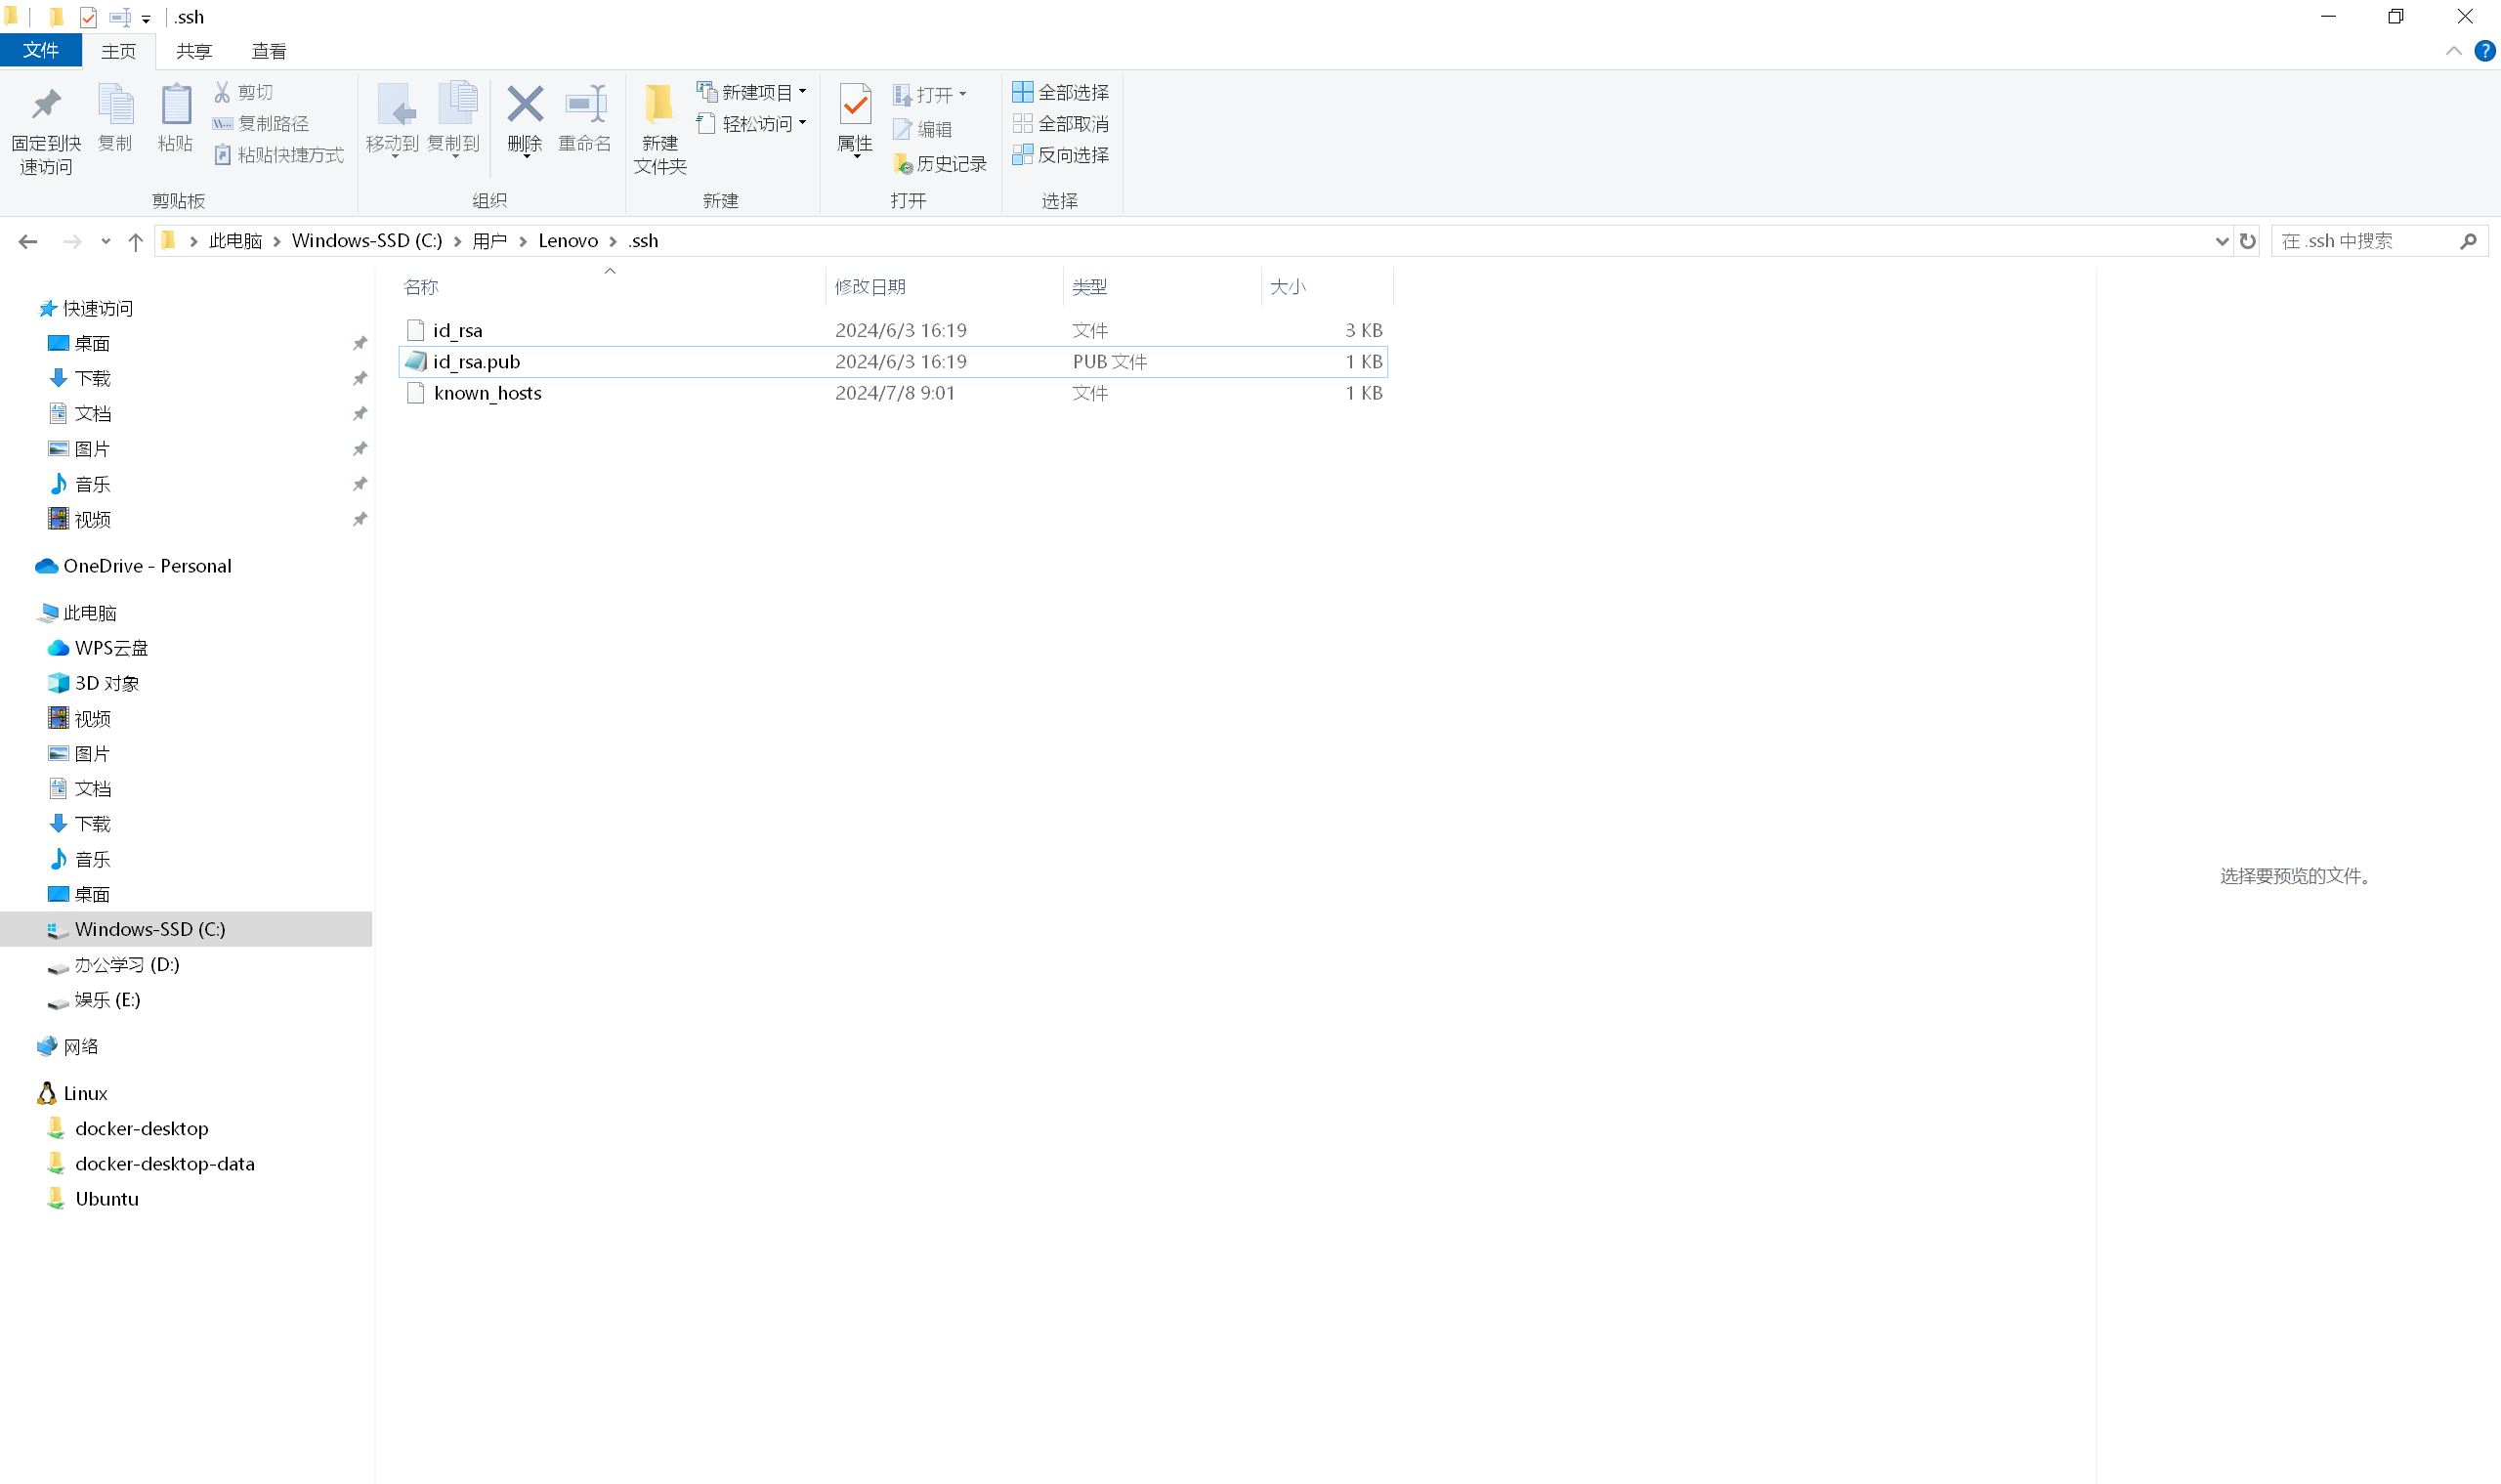
生成密钥可以参考这个文档,网上基本上一找就有:配置 SSH 密钥 | AtomGit 帮助文档
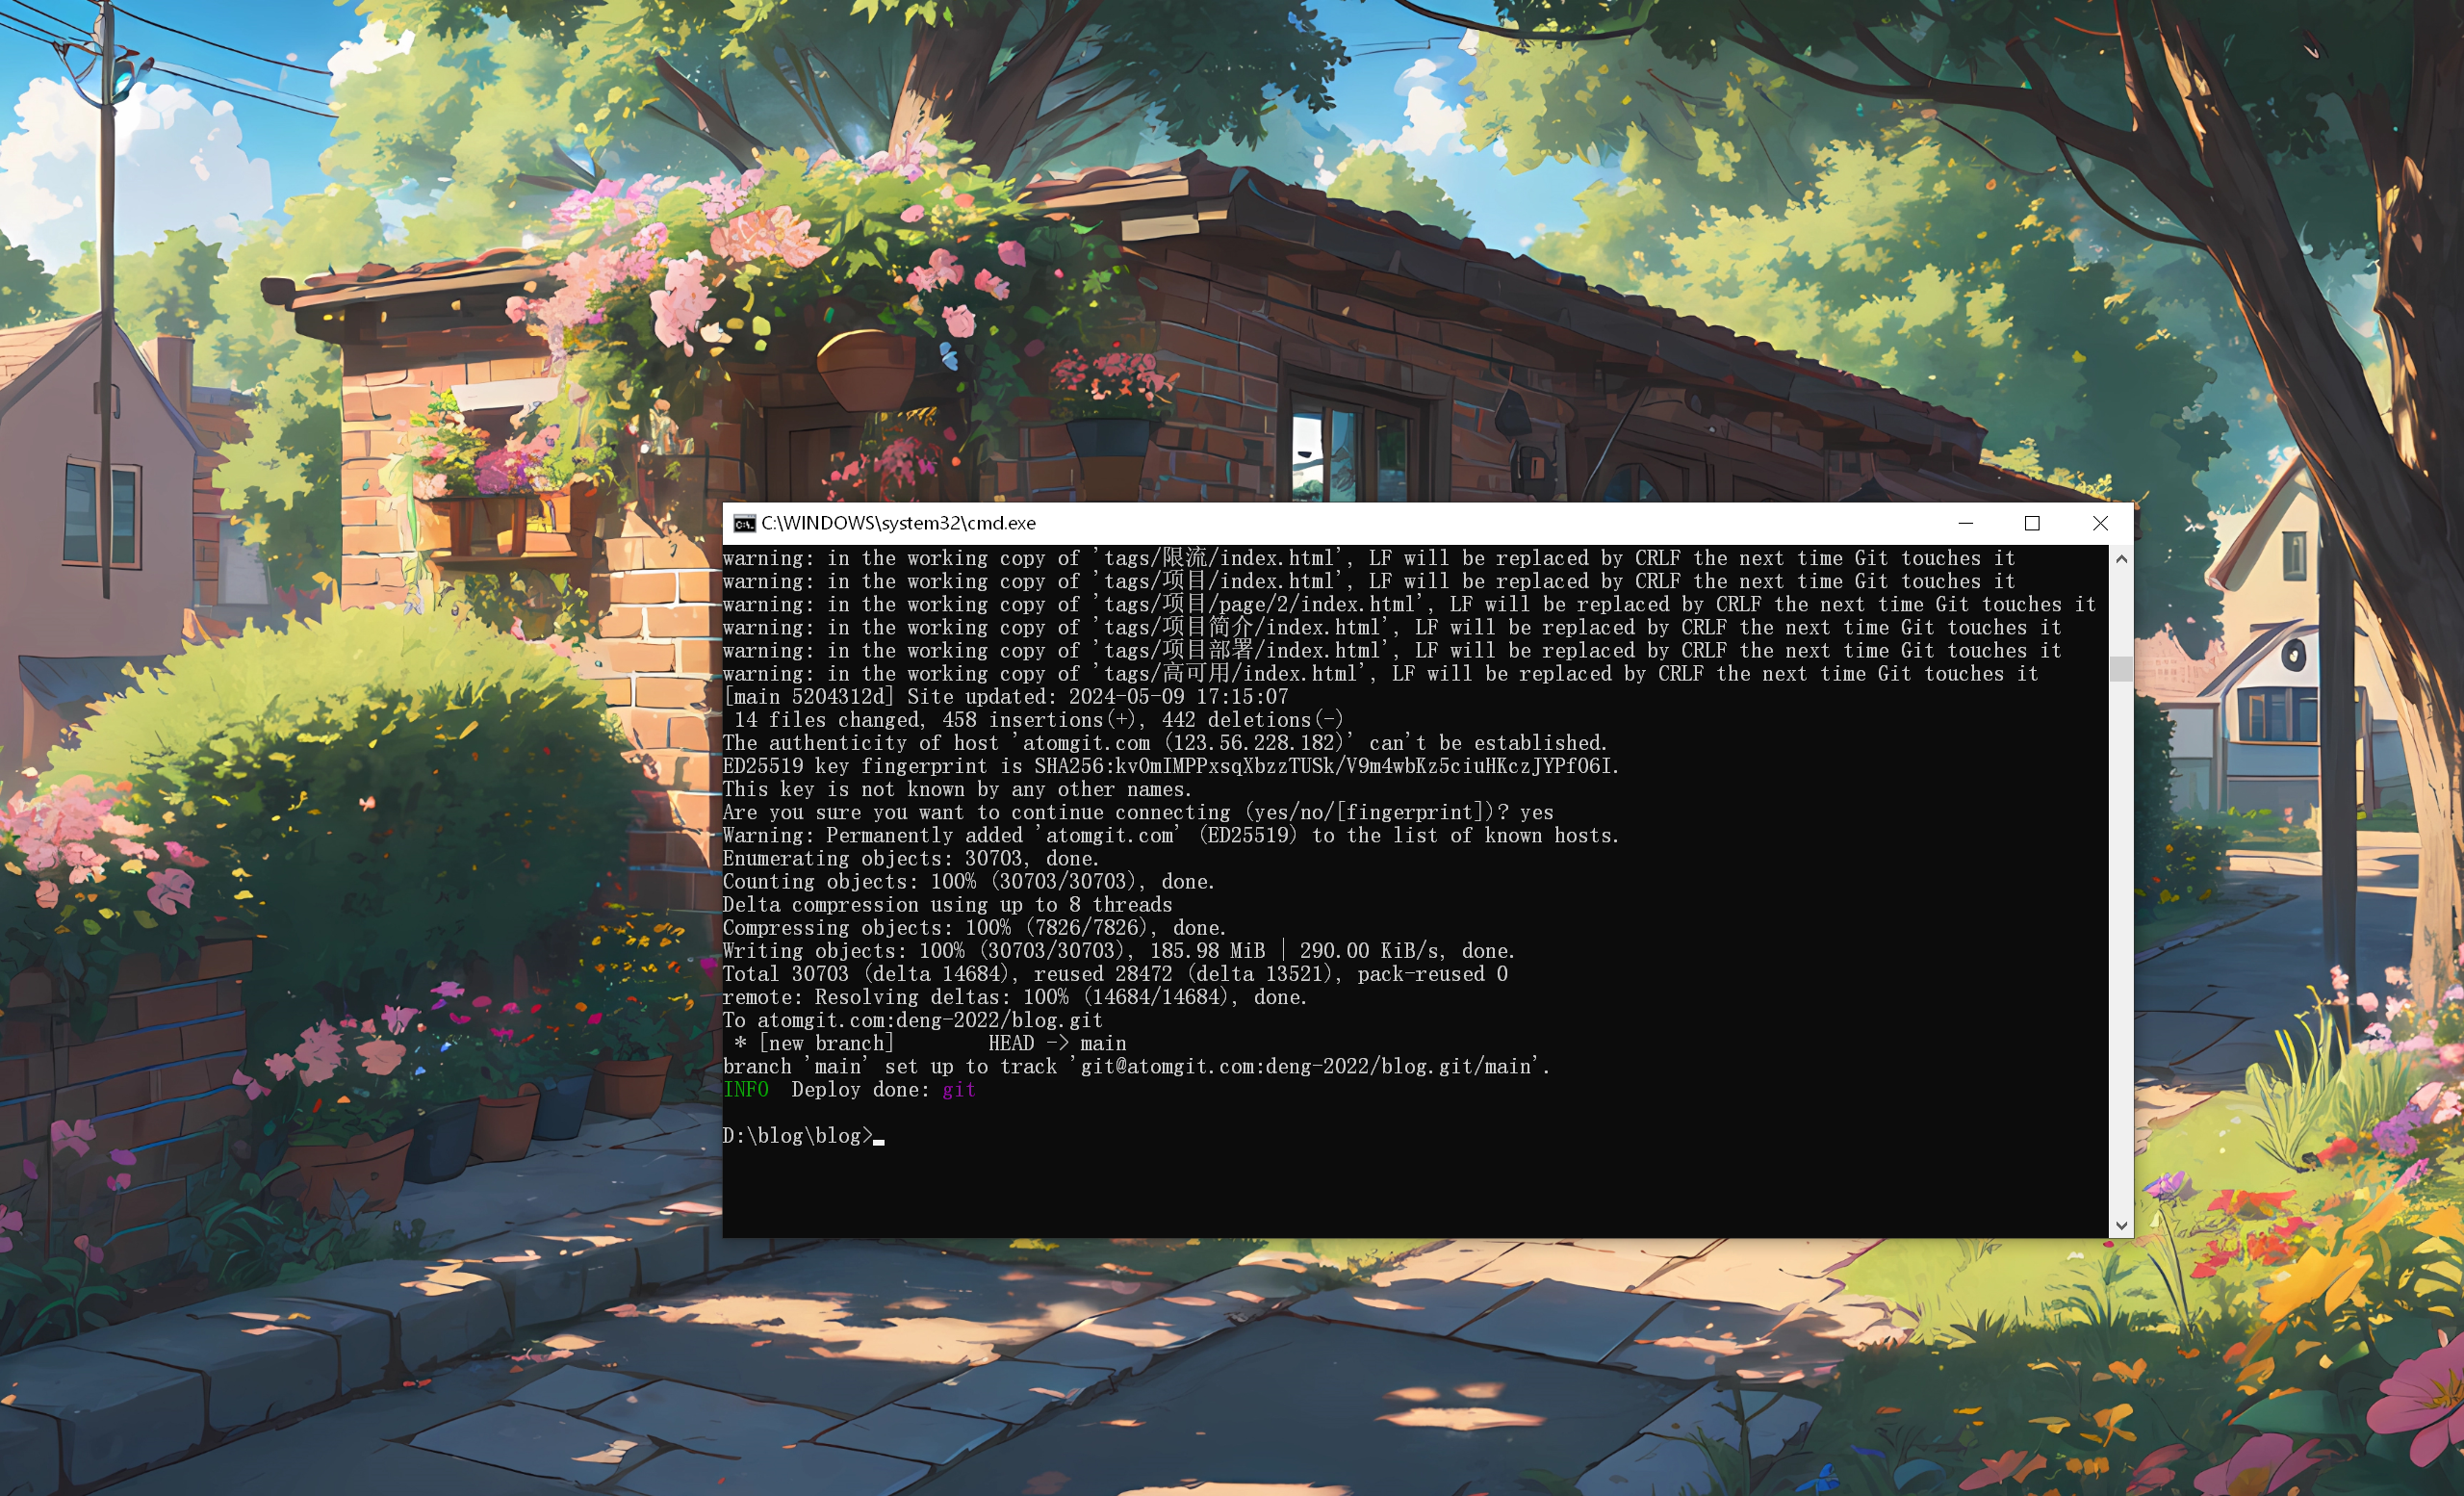
部署成功,可以访问了:
Vuepress 文档站点 部署
🔥 推荐阅读:(2023/11/28 晚)
- vuepress 打包部署到 Gitee Pages 访问页面出现样式丢失_De Ja Vu 幻觉记忆的博客-CSDN 博客
- Getting Started | VuePress (vuejs.org)
- VuePress 起步 - VuePress 中文网 (caibaojian.com)
- 快速上手 | VuePress (vuejs.org)
快速搭建
- 哎,全局安装 Vuepress 不支持了,本来挺好用的:
1 | |
- 直接在 Github 下载了官方文档源码,呃,还是局部安装吧
- 拉取代码后执行依次以下命令,即可成功在本地部署文档站点:
1 | |
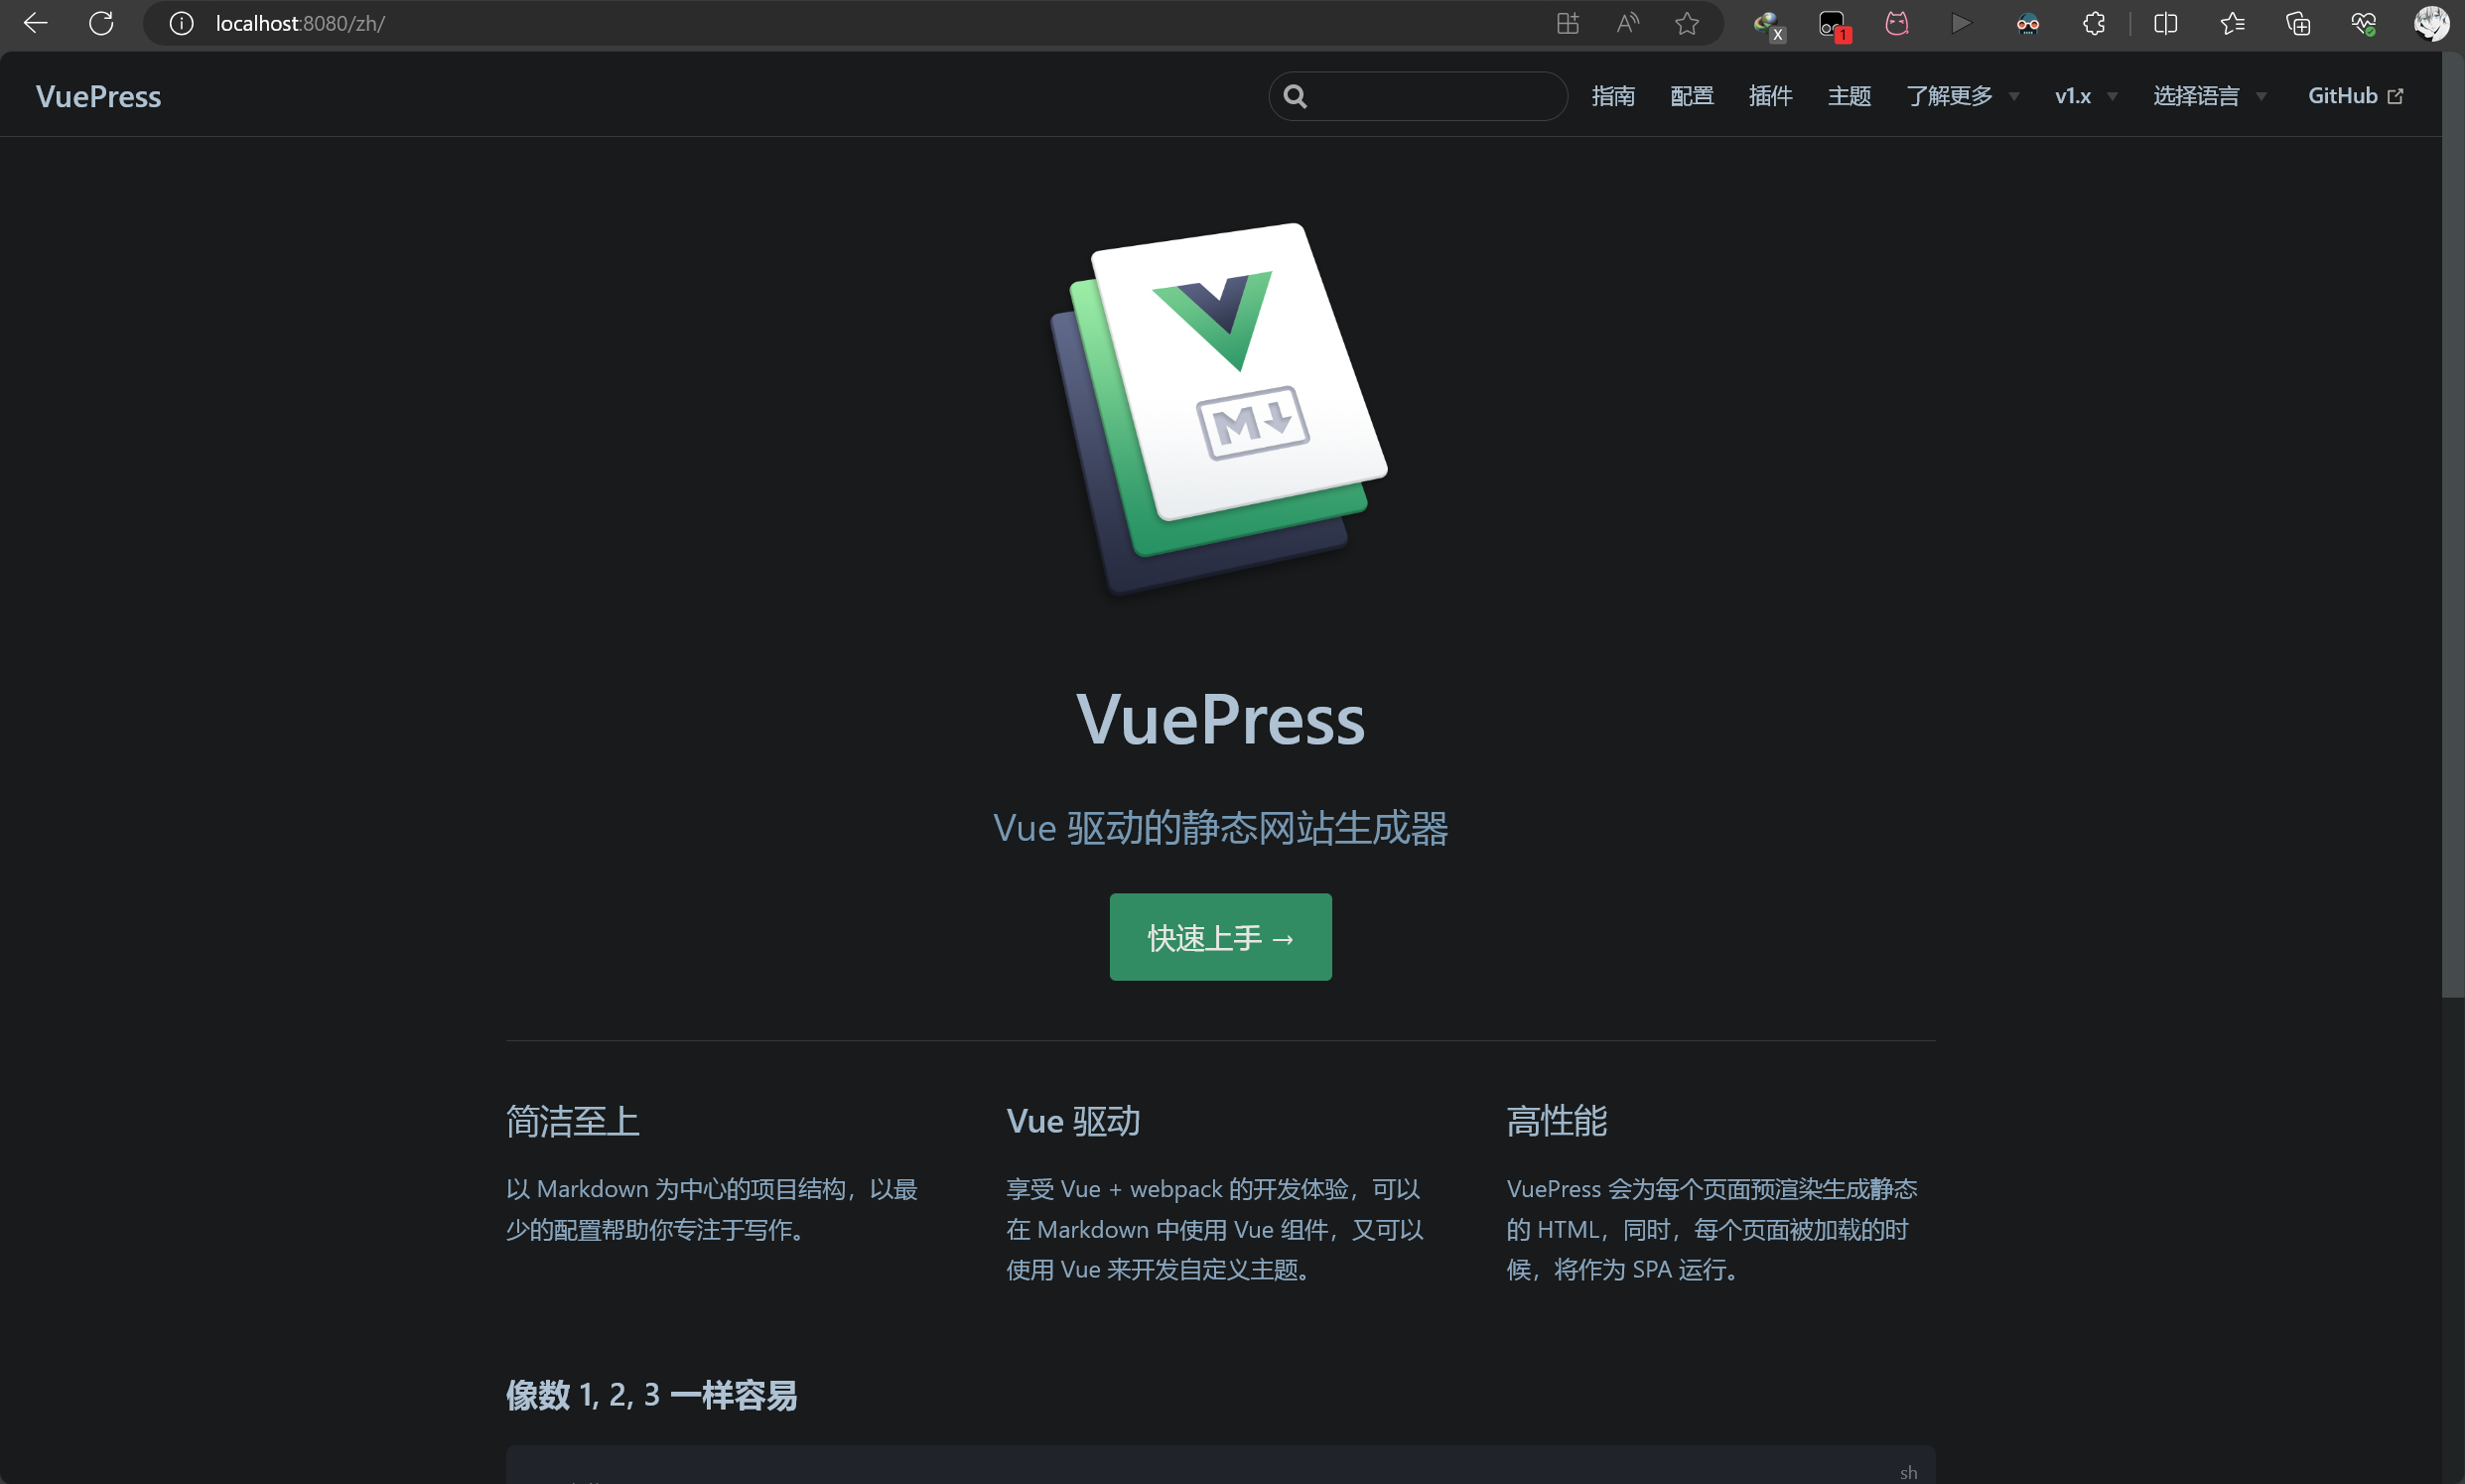
- 效果如下:
- 这两天在研究这个 Vuepress,感觉比 VitePress 更成熟、更好用
- 等我把局部安装的配置搞清楚之后,再来此处作详细记录(2023/11/27 晚)
配置详解
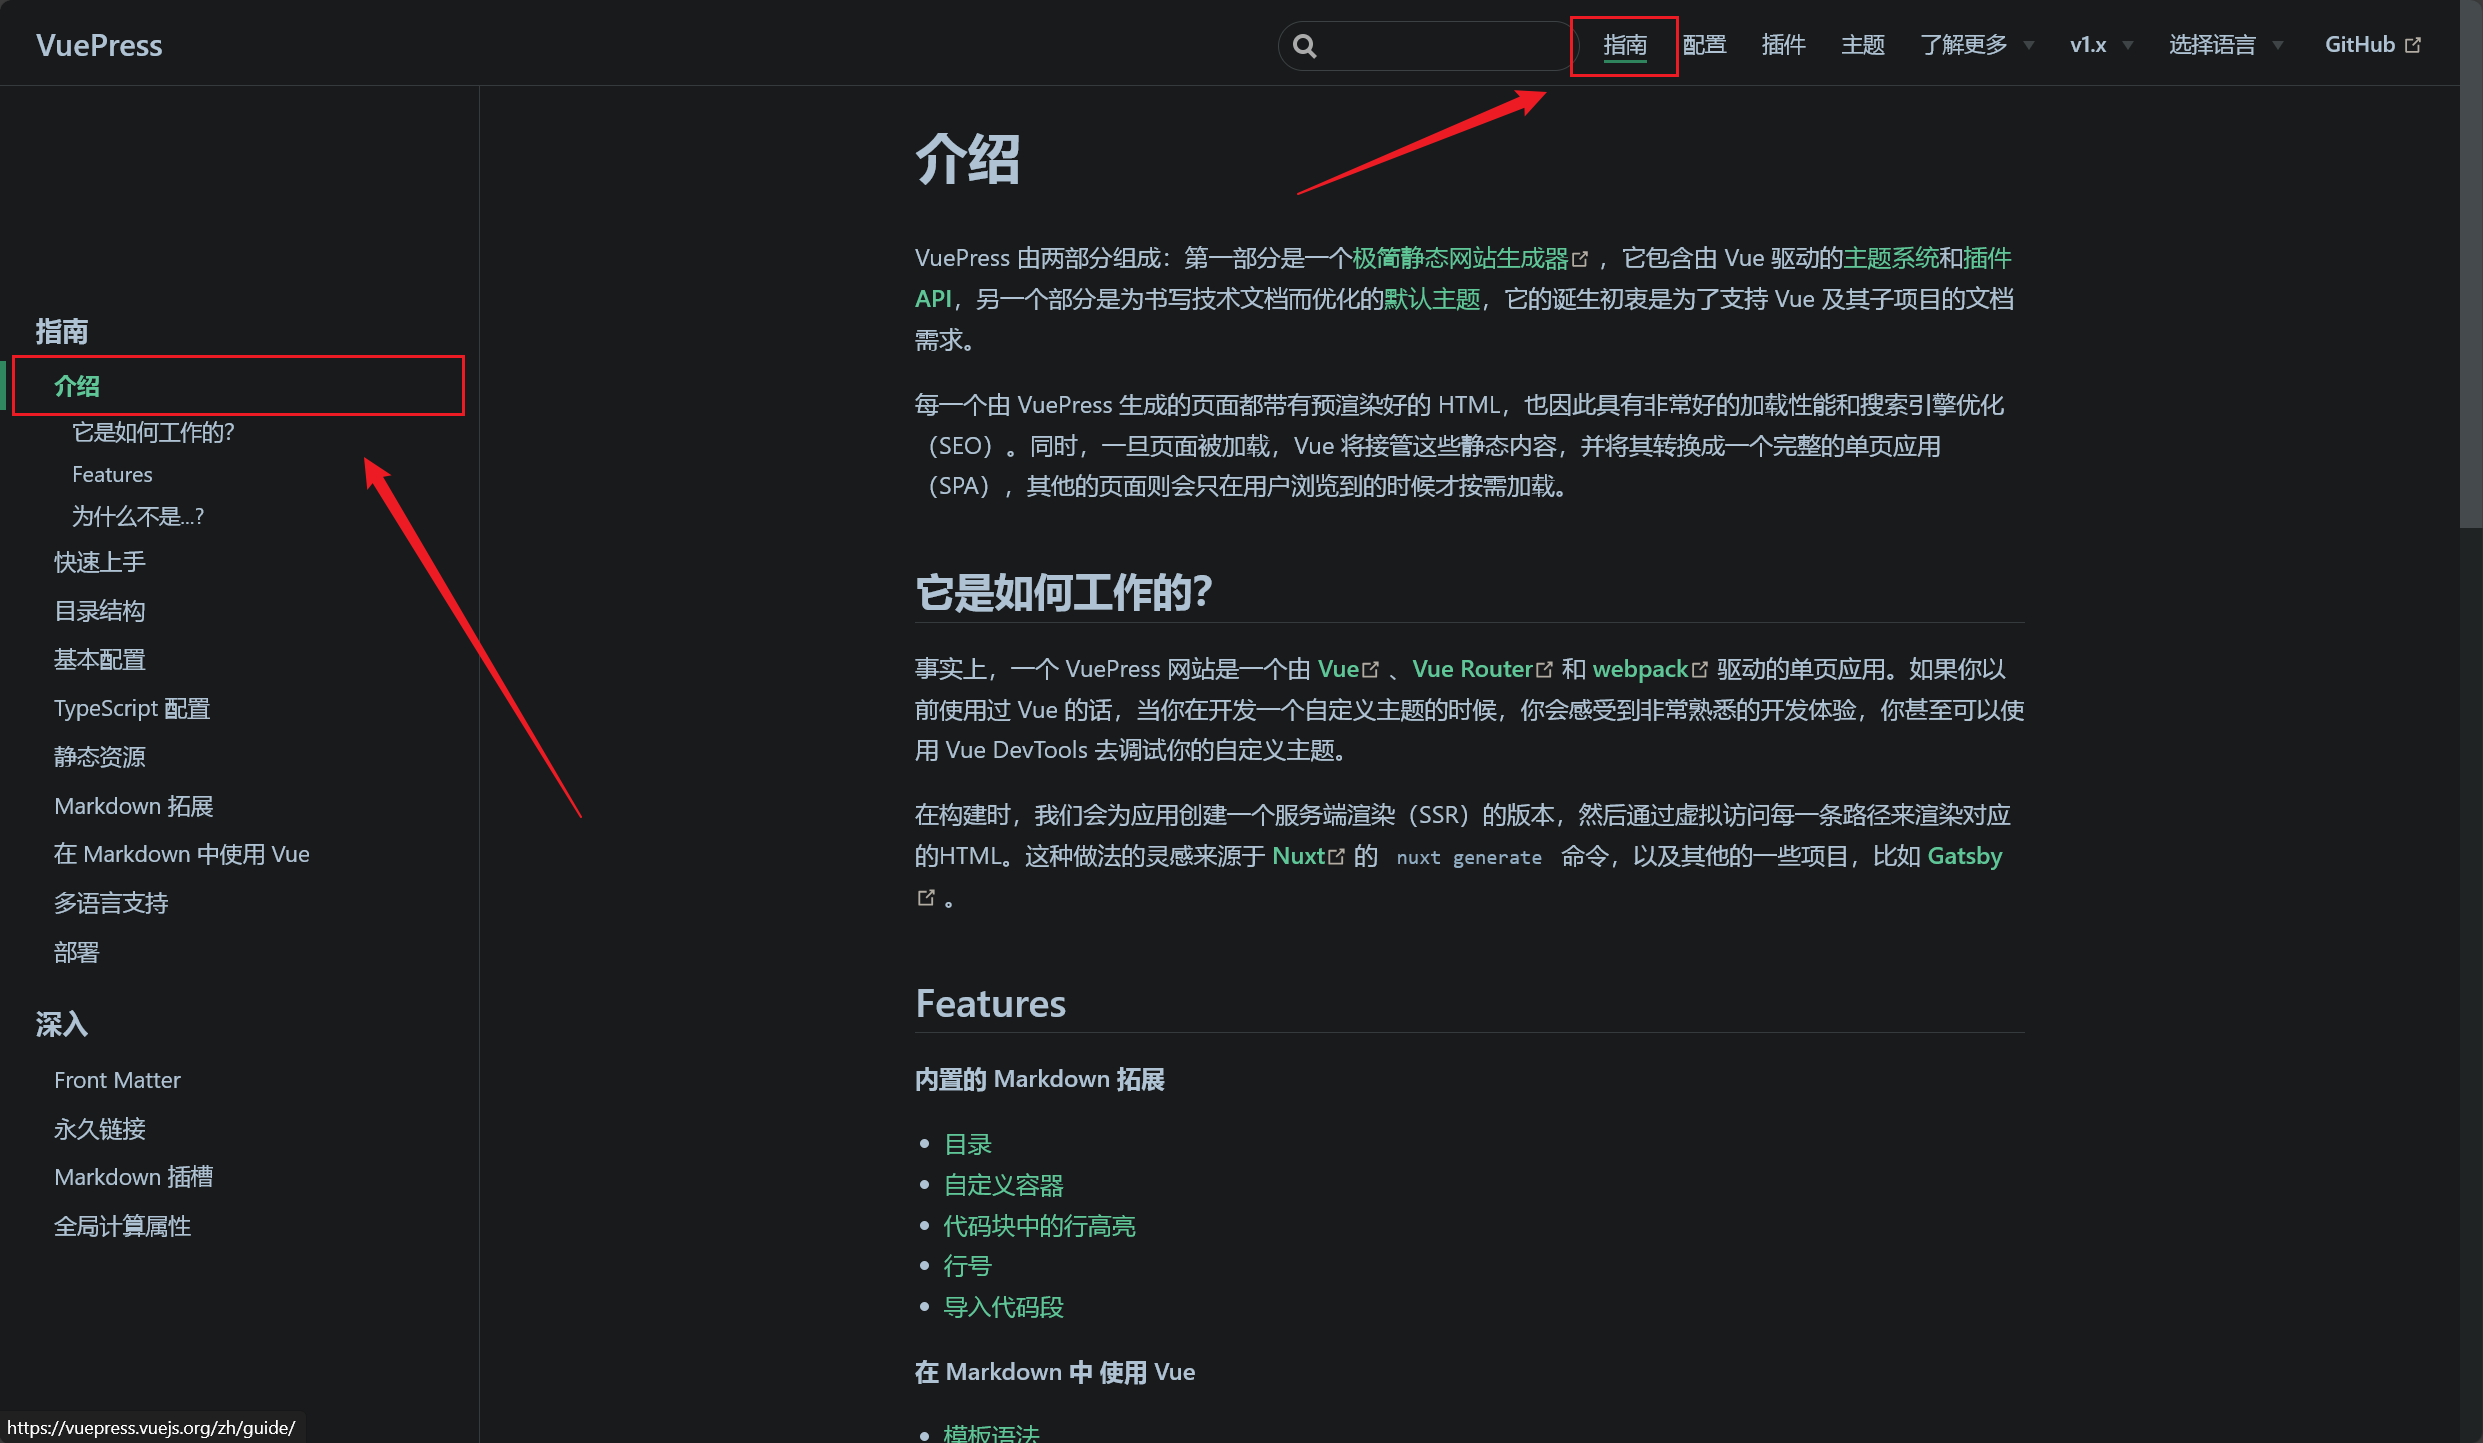
侧边栏配置
- 这里着重详解下 Vuepress 文档站点的侧边栏配置,官方文档在这方面的编写实在是有点含糊不清 (2023/12/06 晚)
- 不同页面显示不同的侧边栏
- 侧边栏分组
- 分组可折叠???
- 侧边栏展示标题深度
- 两个全局配置:活动标题链接(默认开启)和展开所有标题链接(默认关闭)
- 自动生成侧边栏:.js 配置方式 + .md 配置方式,后者更灵活,能配置标题
- 禁用侧边栏
其他
这里先回答之前的两个傻逼的问题:(2023/12/06 晚)
🤡 选中导航栏后,默认为第一个子文件,也就是说,导航栏下没有默认 README.md 页面
- 这是什么意思呢?就是这个意思:
- 这不就很简单?配置好导航栏菜单的跳转就可以了:
1
2
3
4
5
6
7
8
9
10
11
12
13
14
15
16
17
18
19
20
21
22
23nav: [
{ text: "首页", link: "/" },
{
text: "指南",
link: "/pages/52d5c3/",
items: [
{ text: "简介", link: "/pages/52d5c3/" },
{ text: "安装", link: "/pages/a2f161/" },
{ text: "快速开始", link: "/pages/793dcb/" },
{ text: "返回响应码", link: "/pages/2f674a/" },
{
text: "API接口",
items: [
{ text: "随机壁纸", link: "/pages/8dfab5/" },
{ text: "随机名言", link: "/pages/dd027d/" },
{ text: "天气查询", link: "/pages/2b8e22/" },
{ text: "获取IP信息归属地", link: "/pages/0fc1d2/" },
],
},
],
},
.......................
],🤡 显示文章的右侧目录
- 大哥,想什么呢,官网文档都没实现呢,不过有插件可以实现,没有成功过:vuepress 右侧小目录 二级目录 右侧锚点 模拟 Docusaurus 效果 - 丁少华 - 博客园 (cnblogs.com)
- 要想做个右侧目录,那就使用
Vdoing吧
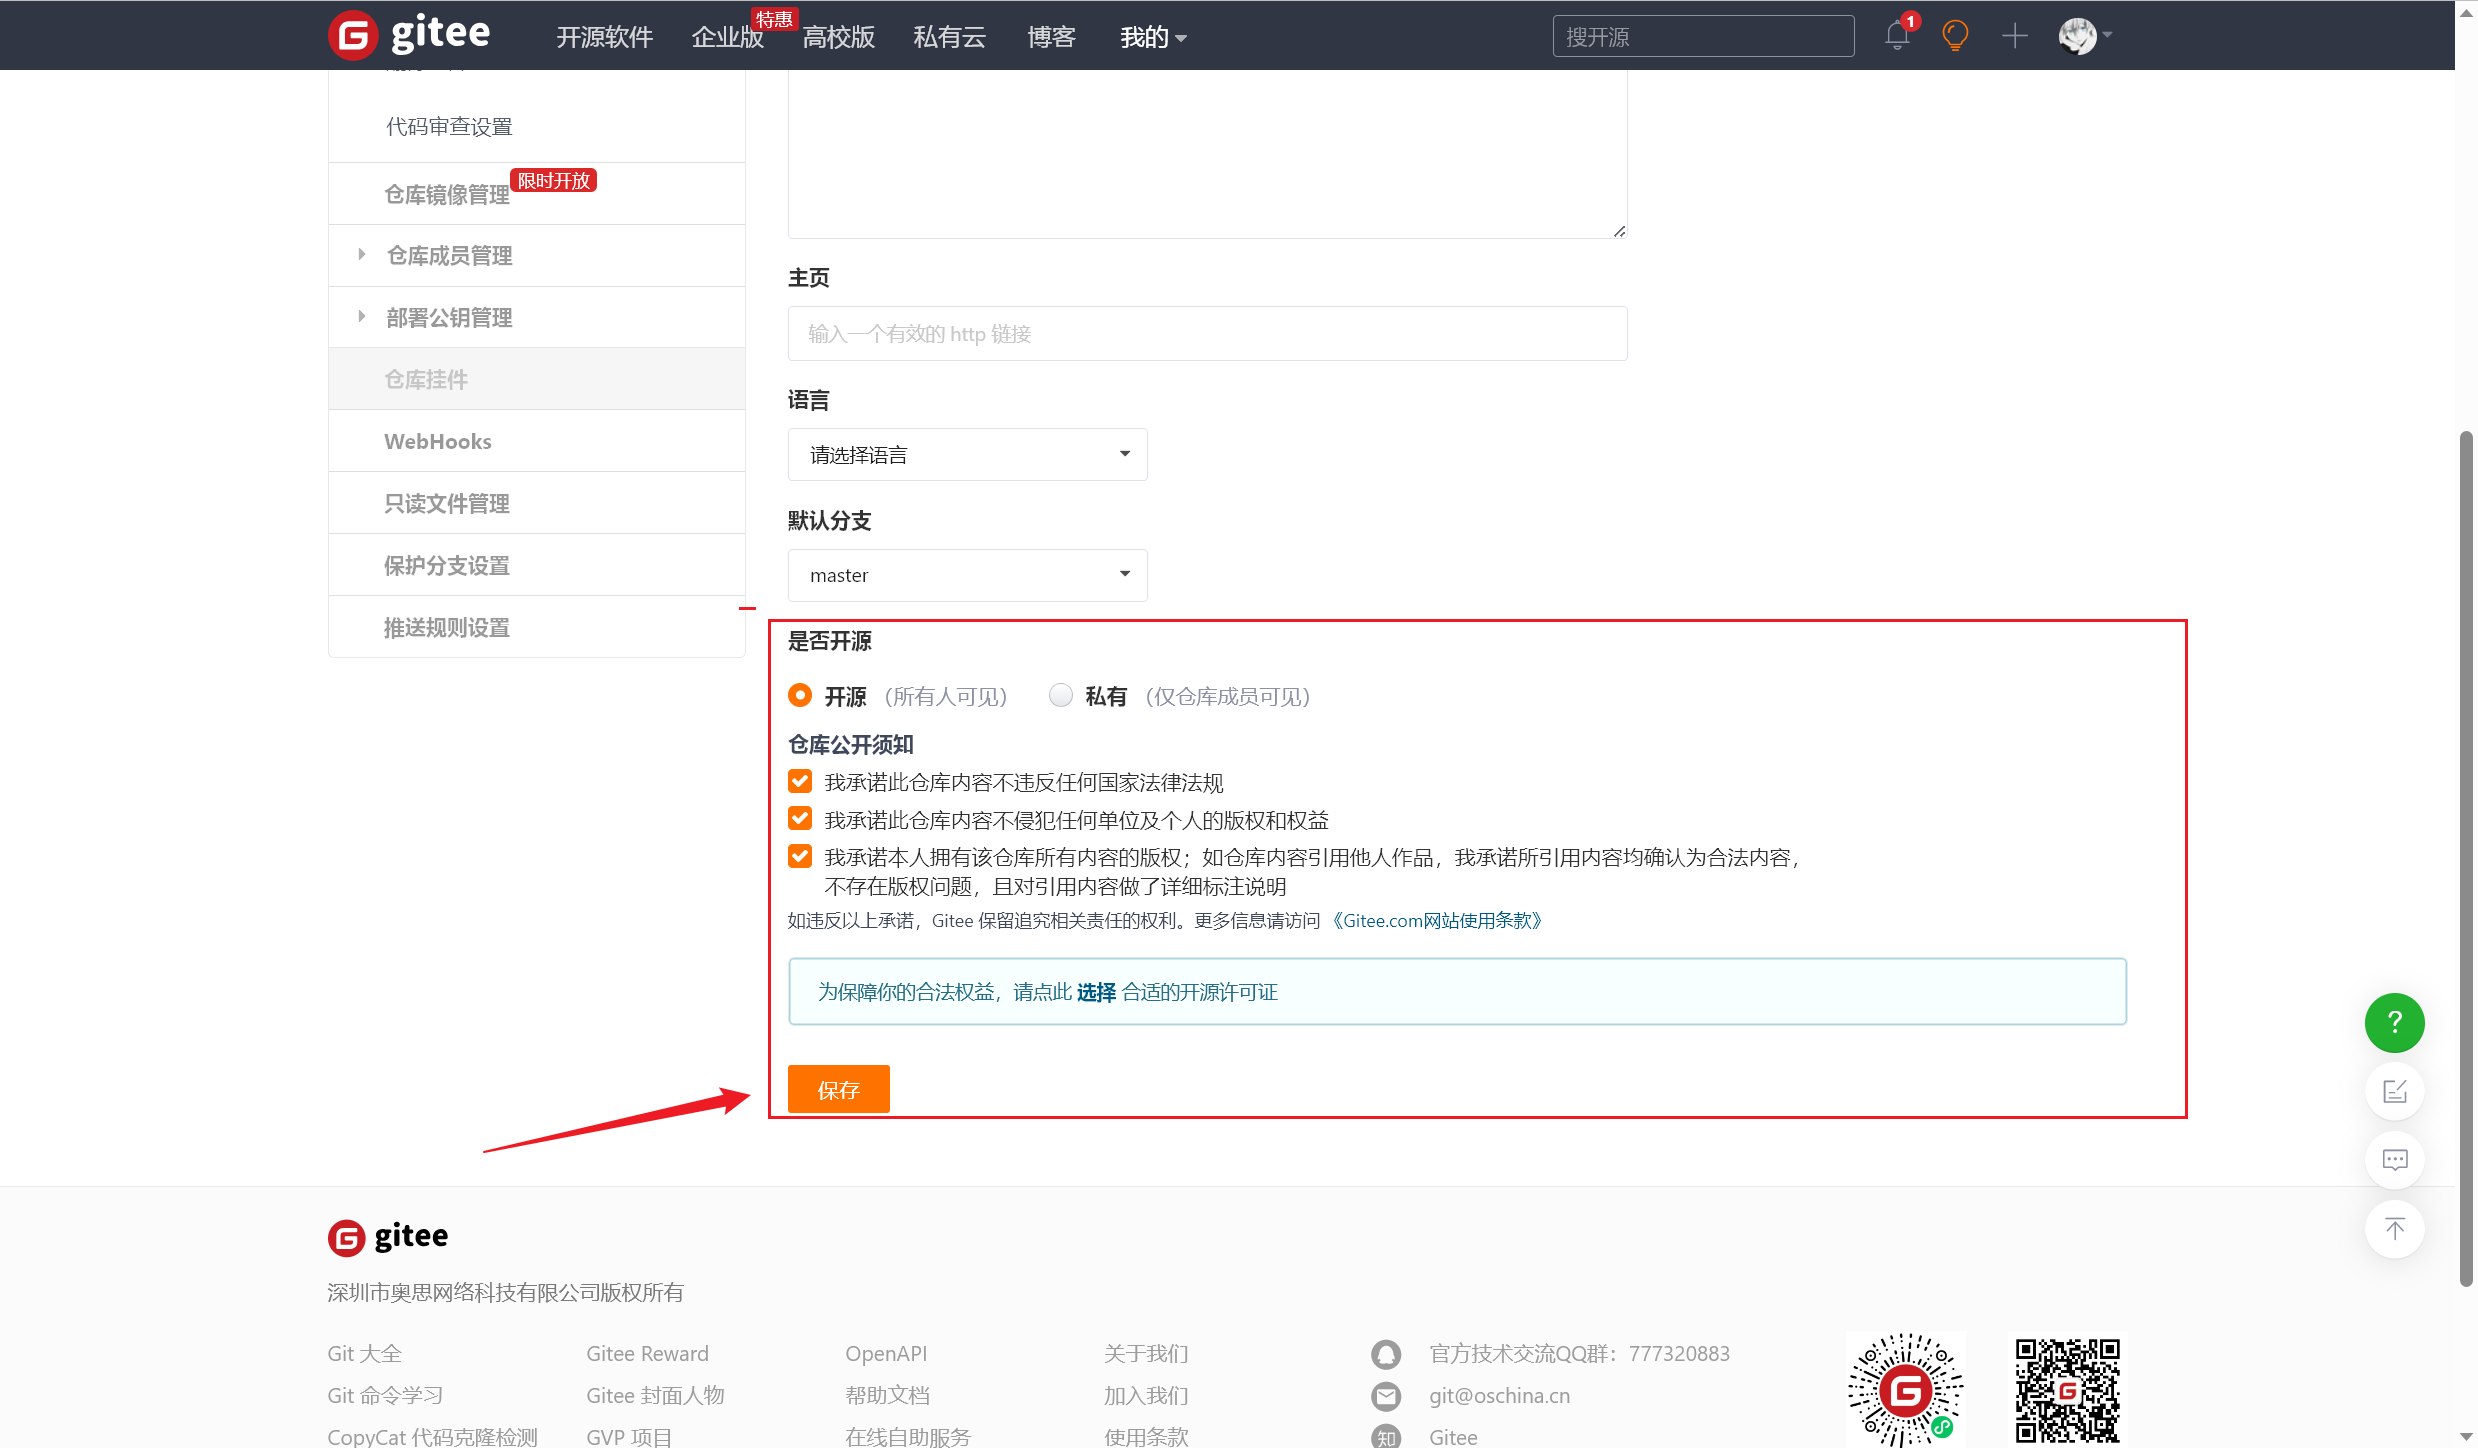
Gitee 部署
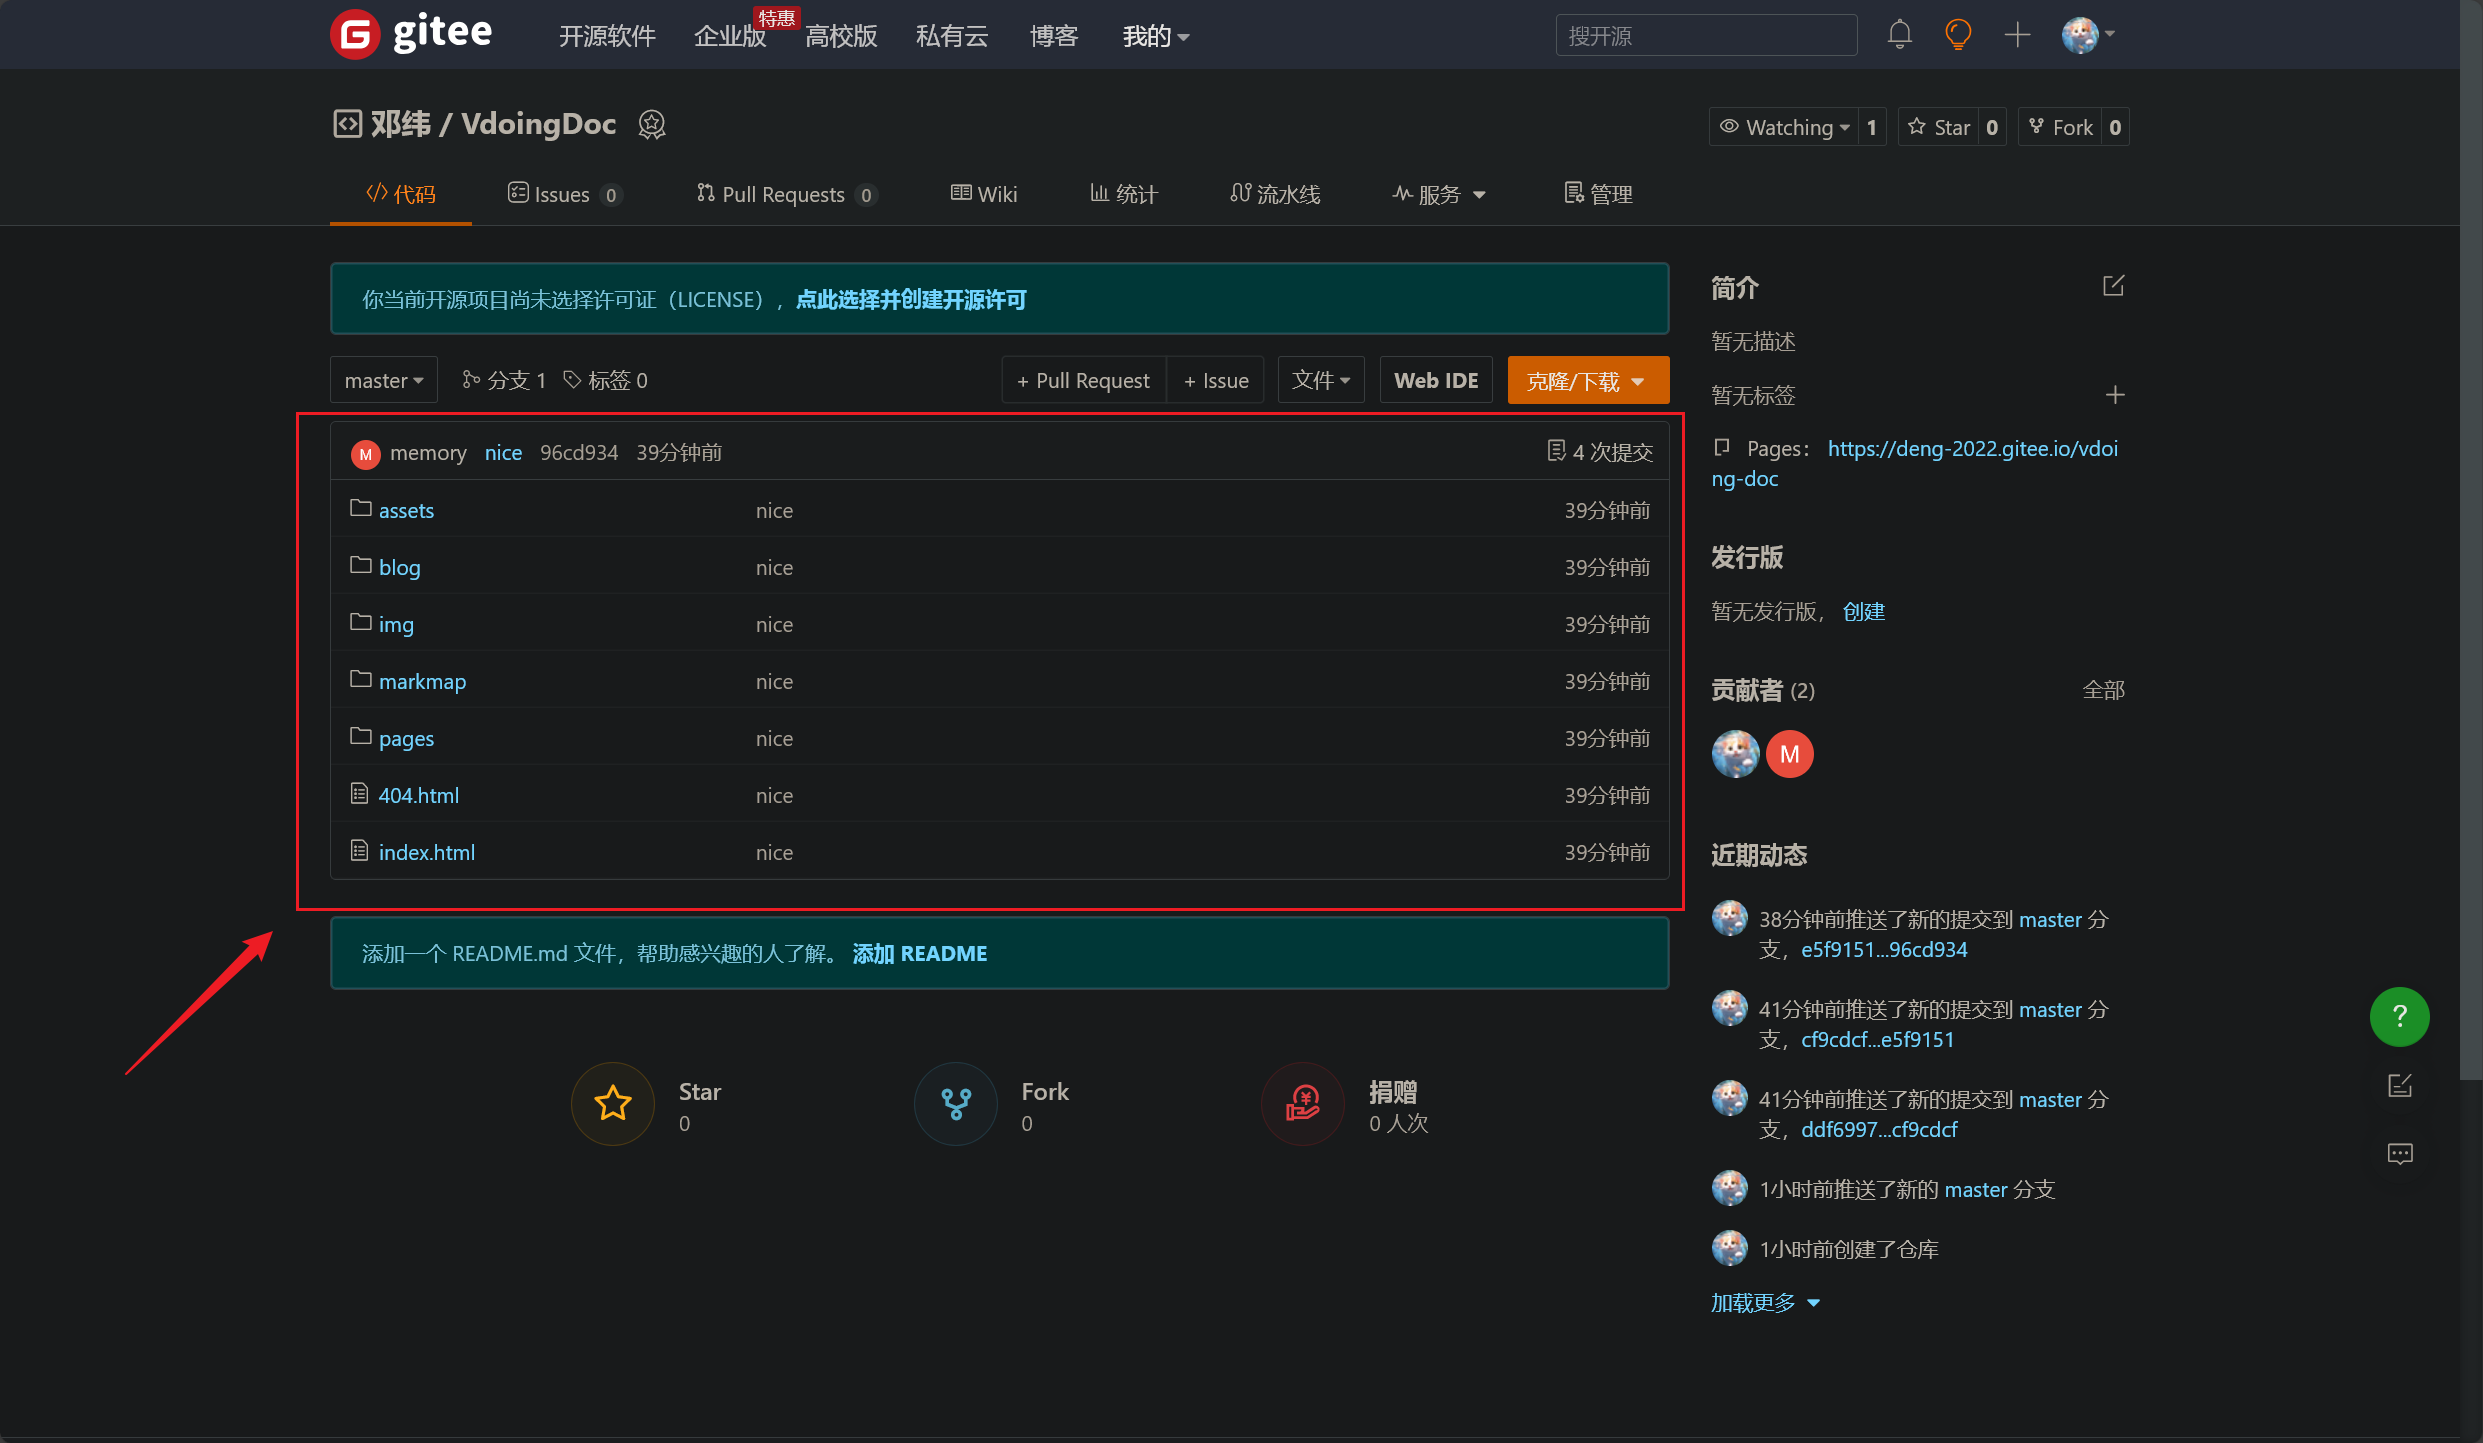
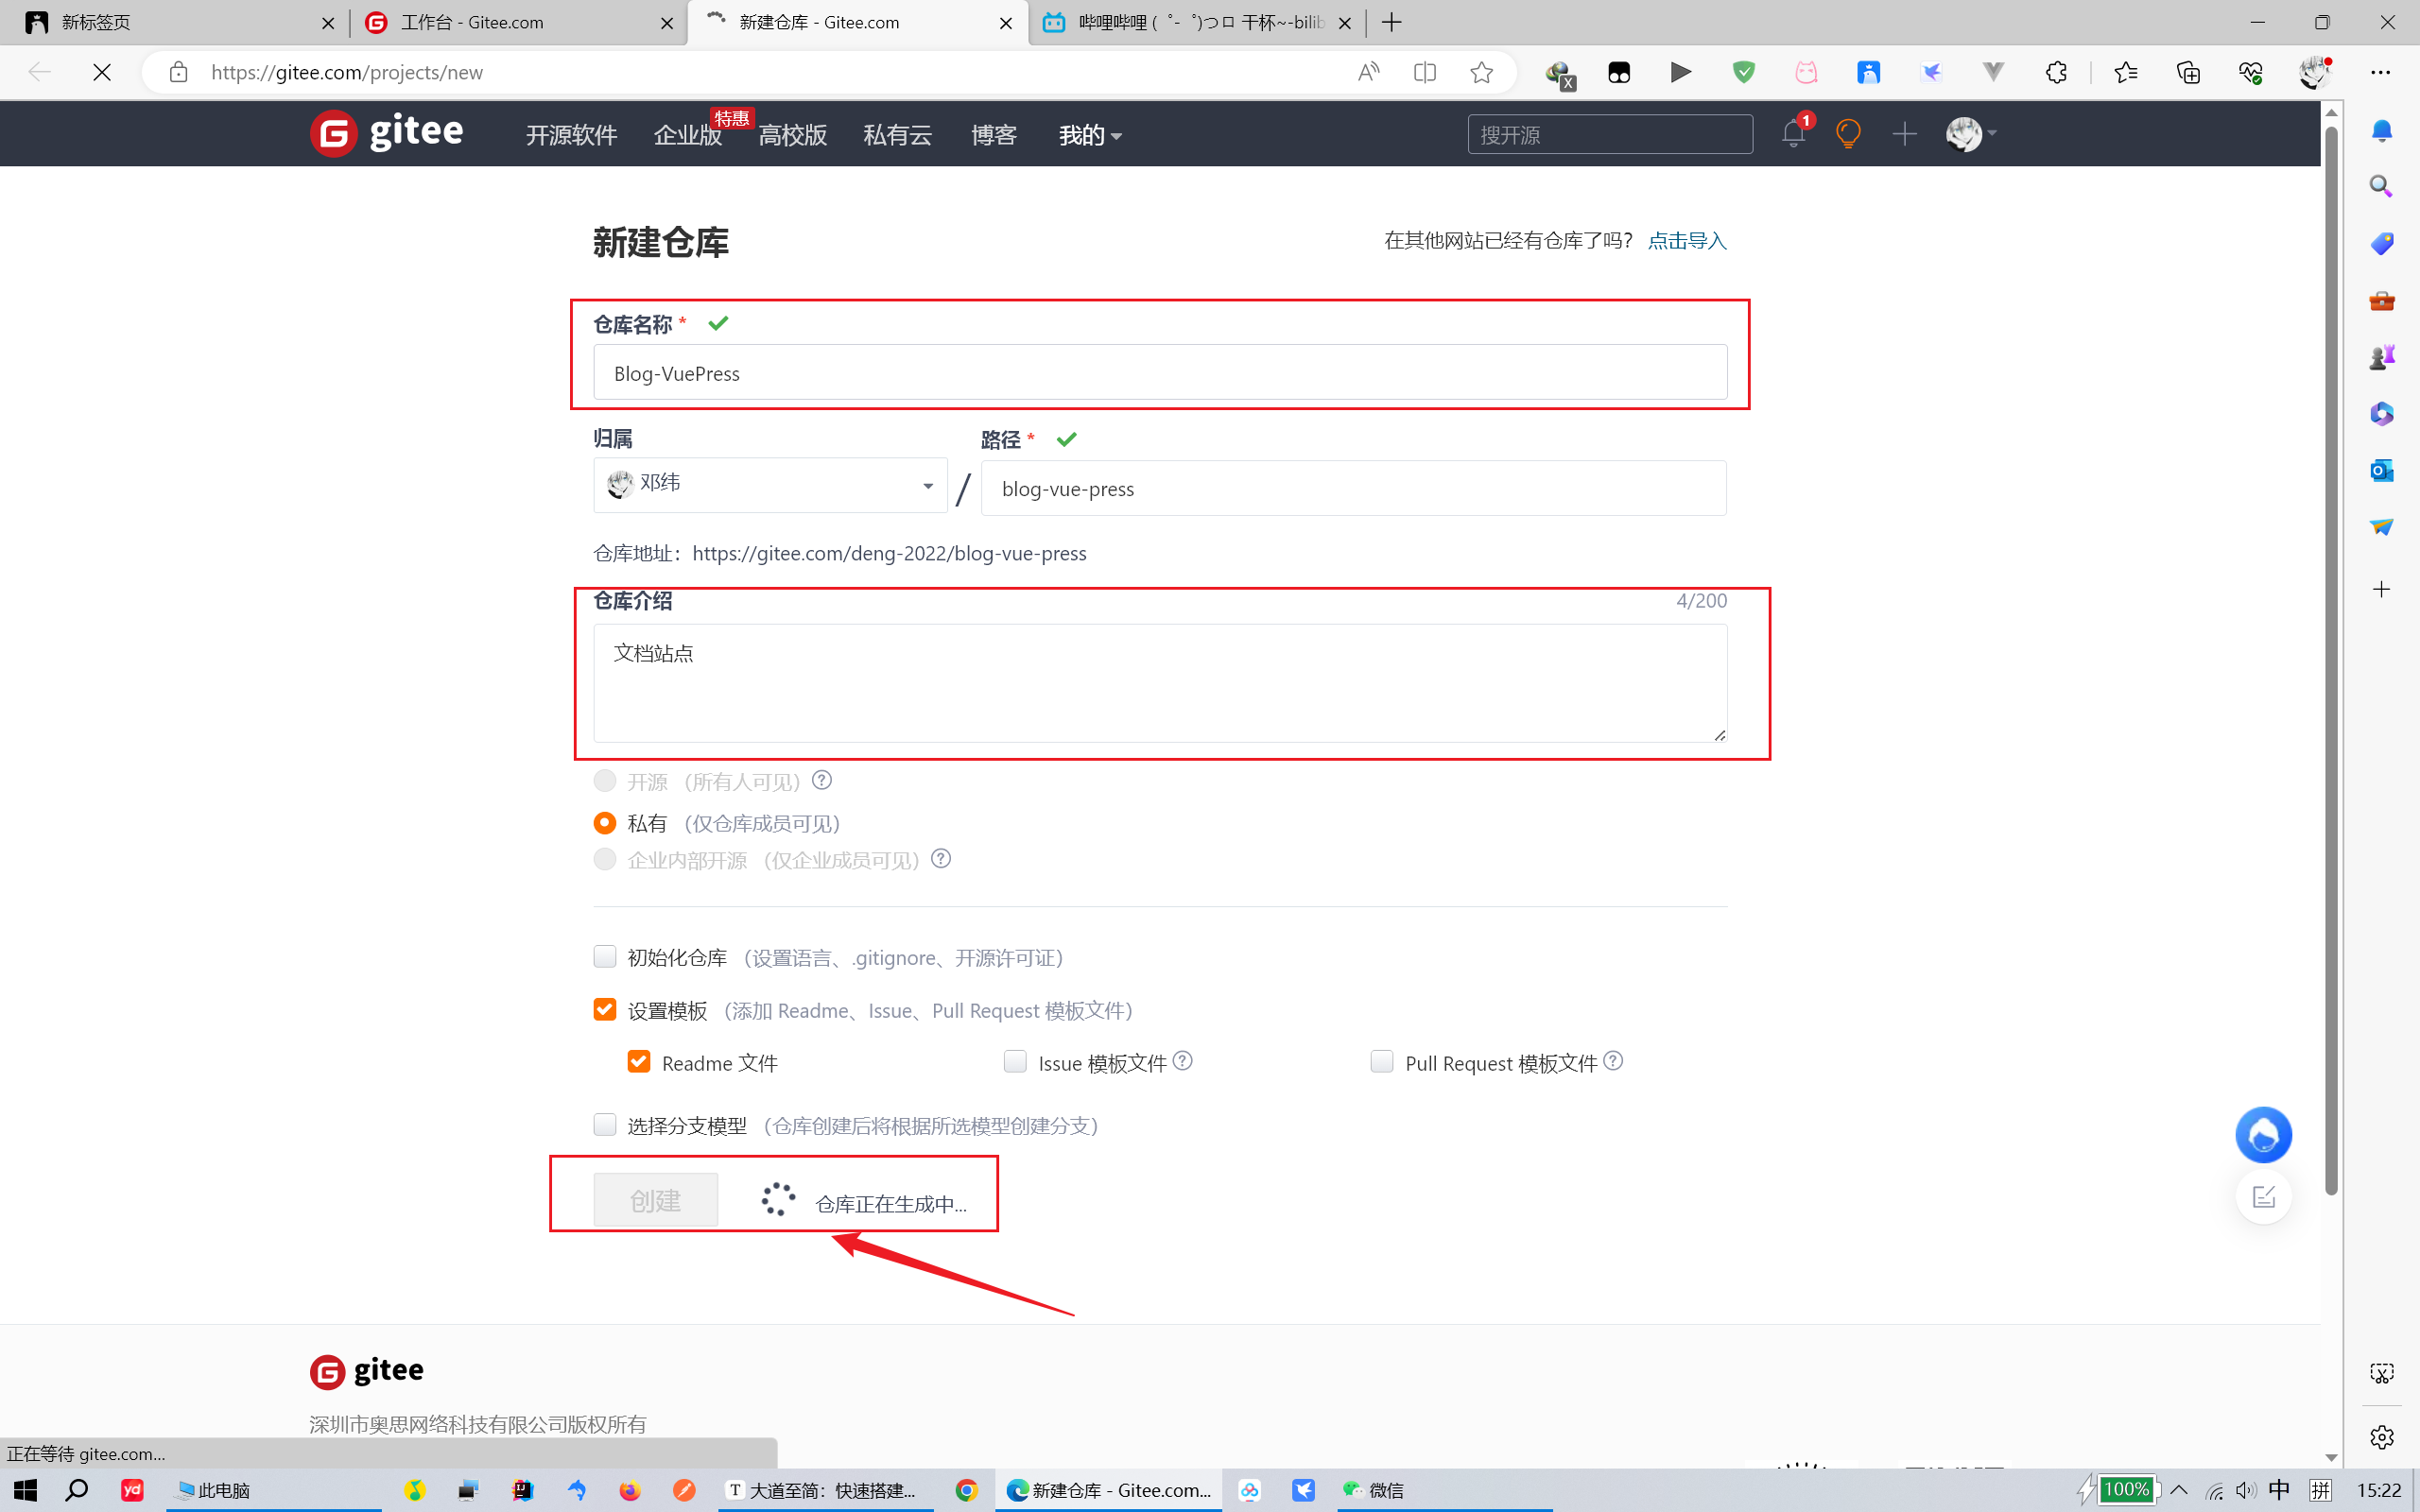
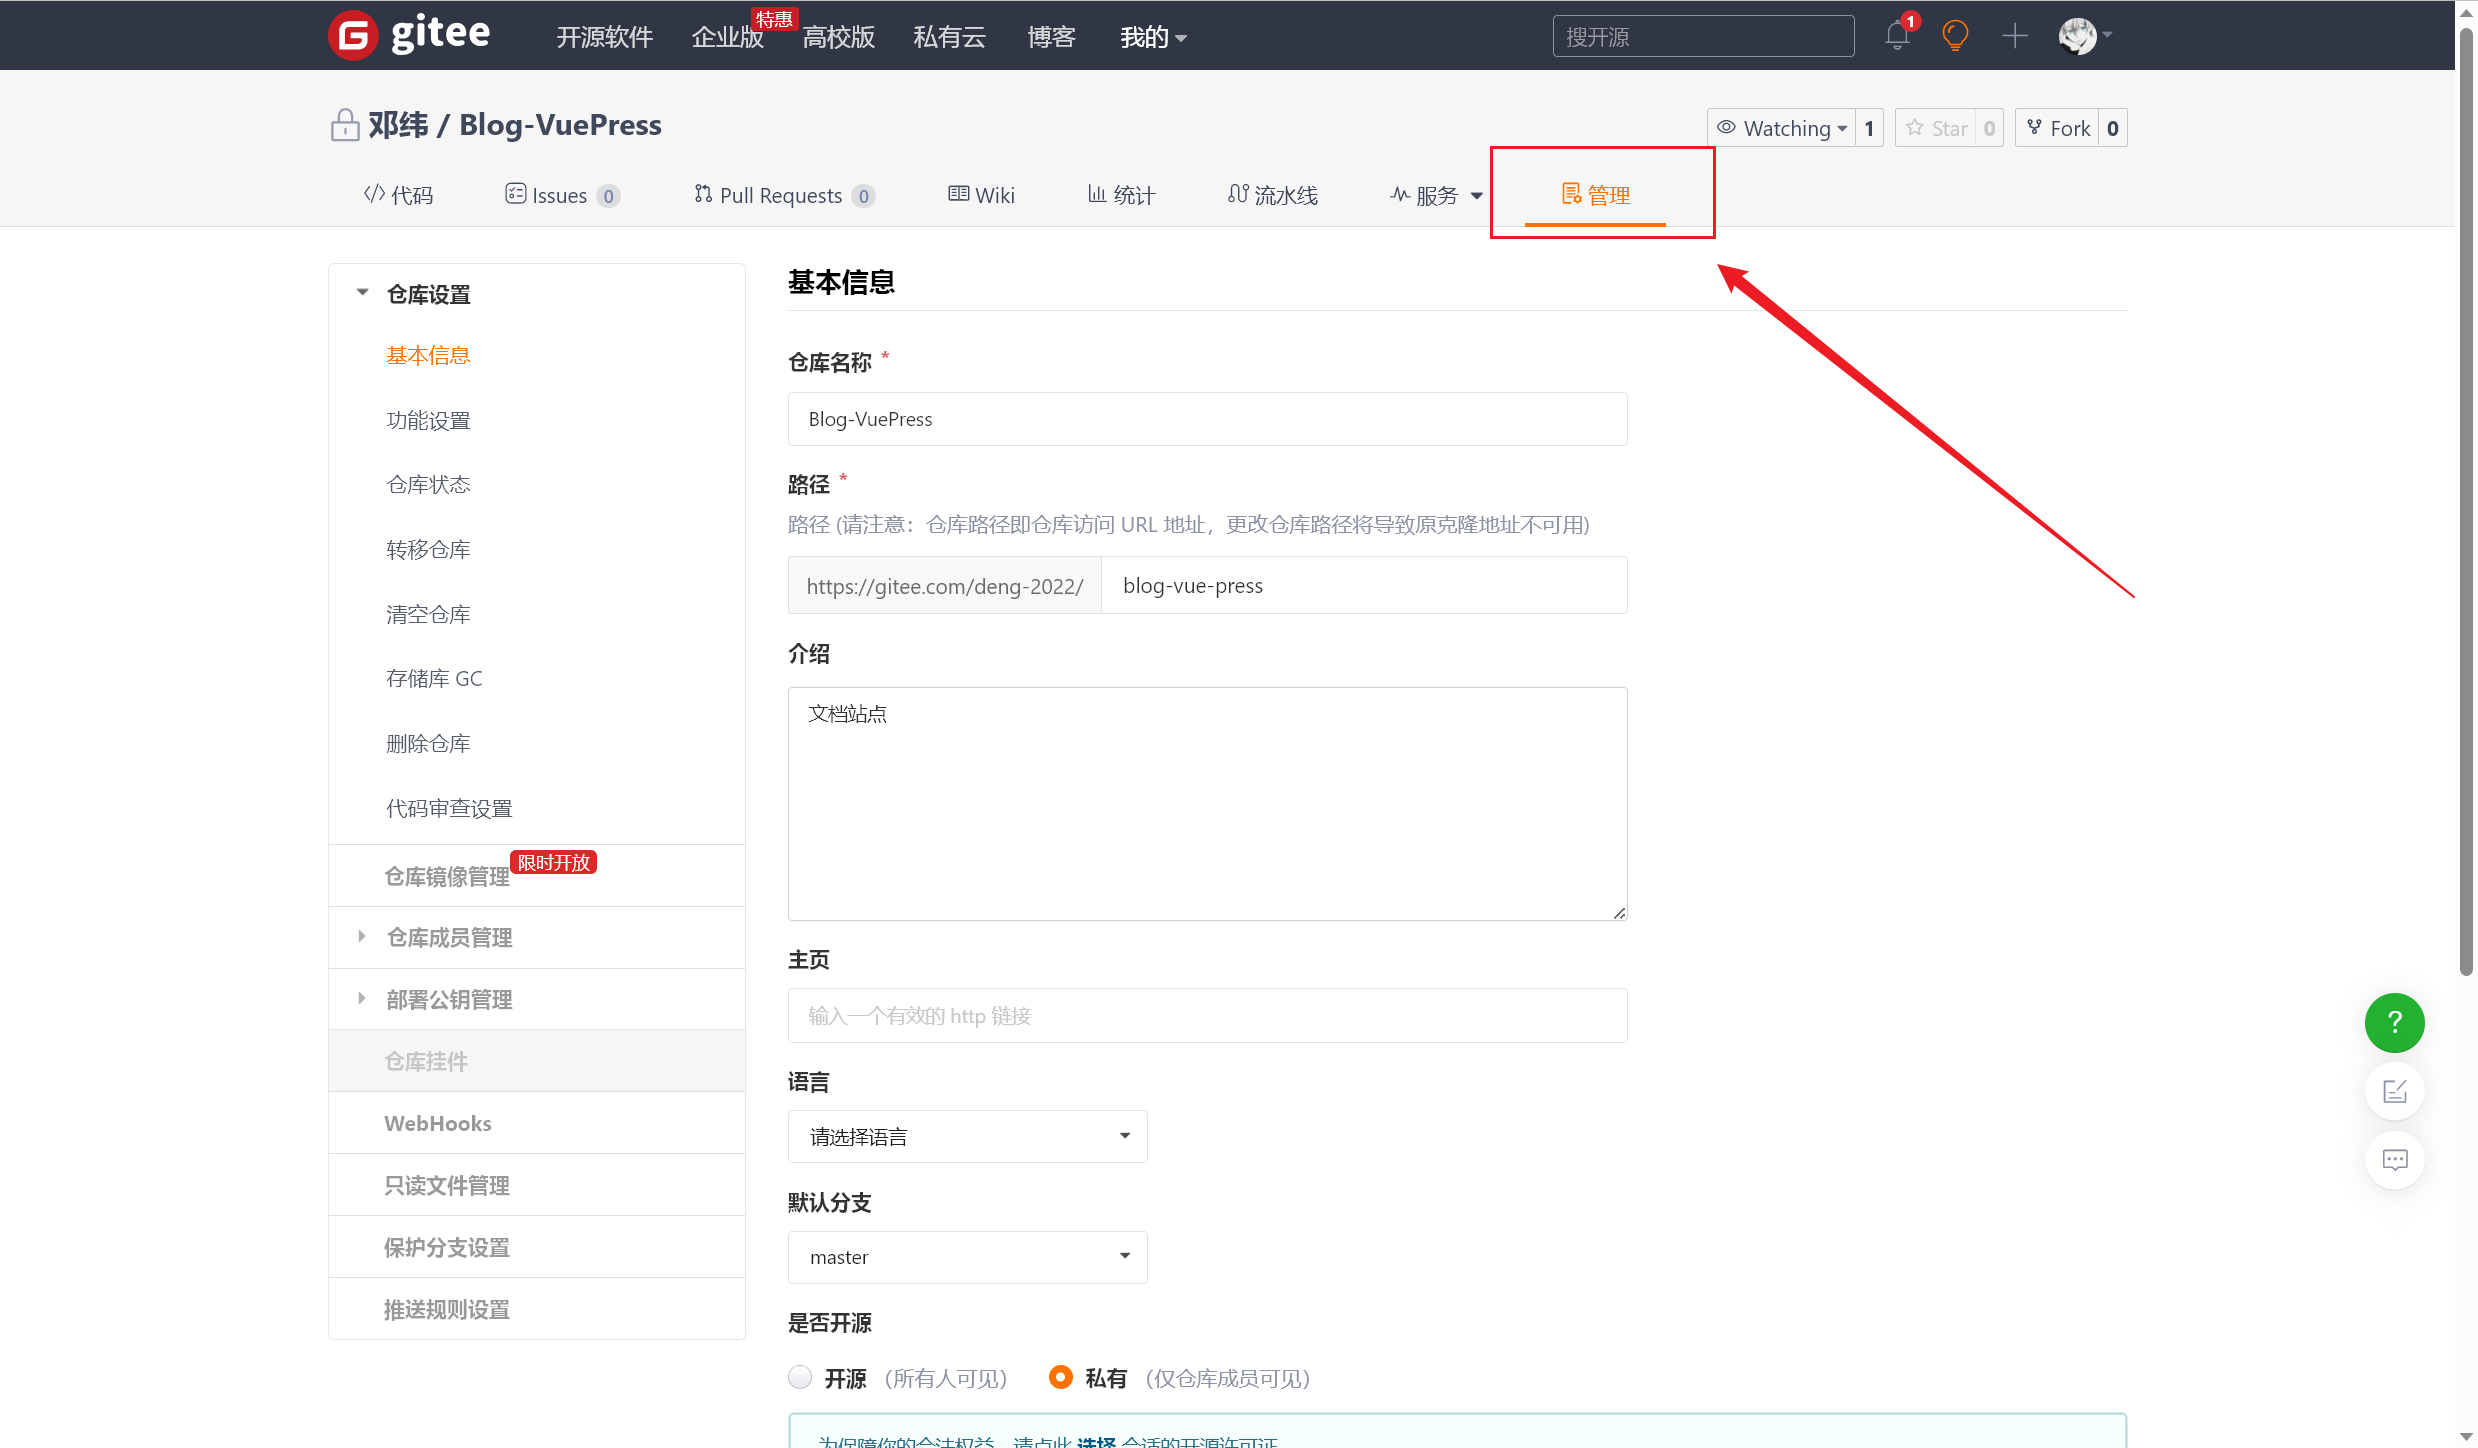
- 部署之前肯定要有 Gitee 远程仓库吧,创建一个新仓库,这里新仓库名就叫
VuepressDocs3了(2023/11/28 晚)

- 在
.vuepress/config.js下,作如下配置:
1 | |
这里注意,base 的值对应的是将要部署的 Gitee 仓库地址,看清楚上面新仓库的地址:
vuepress-docs3执行以下命令,打包:
1 | |
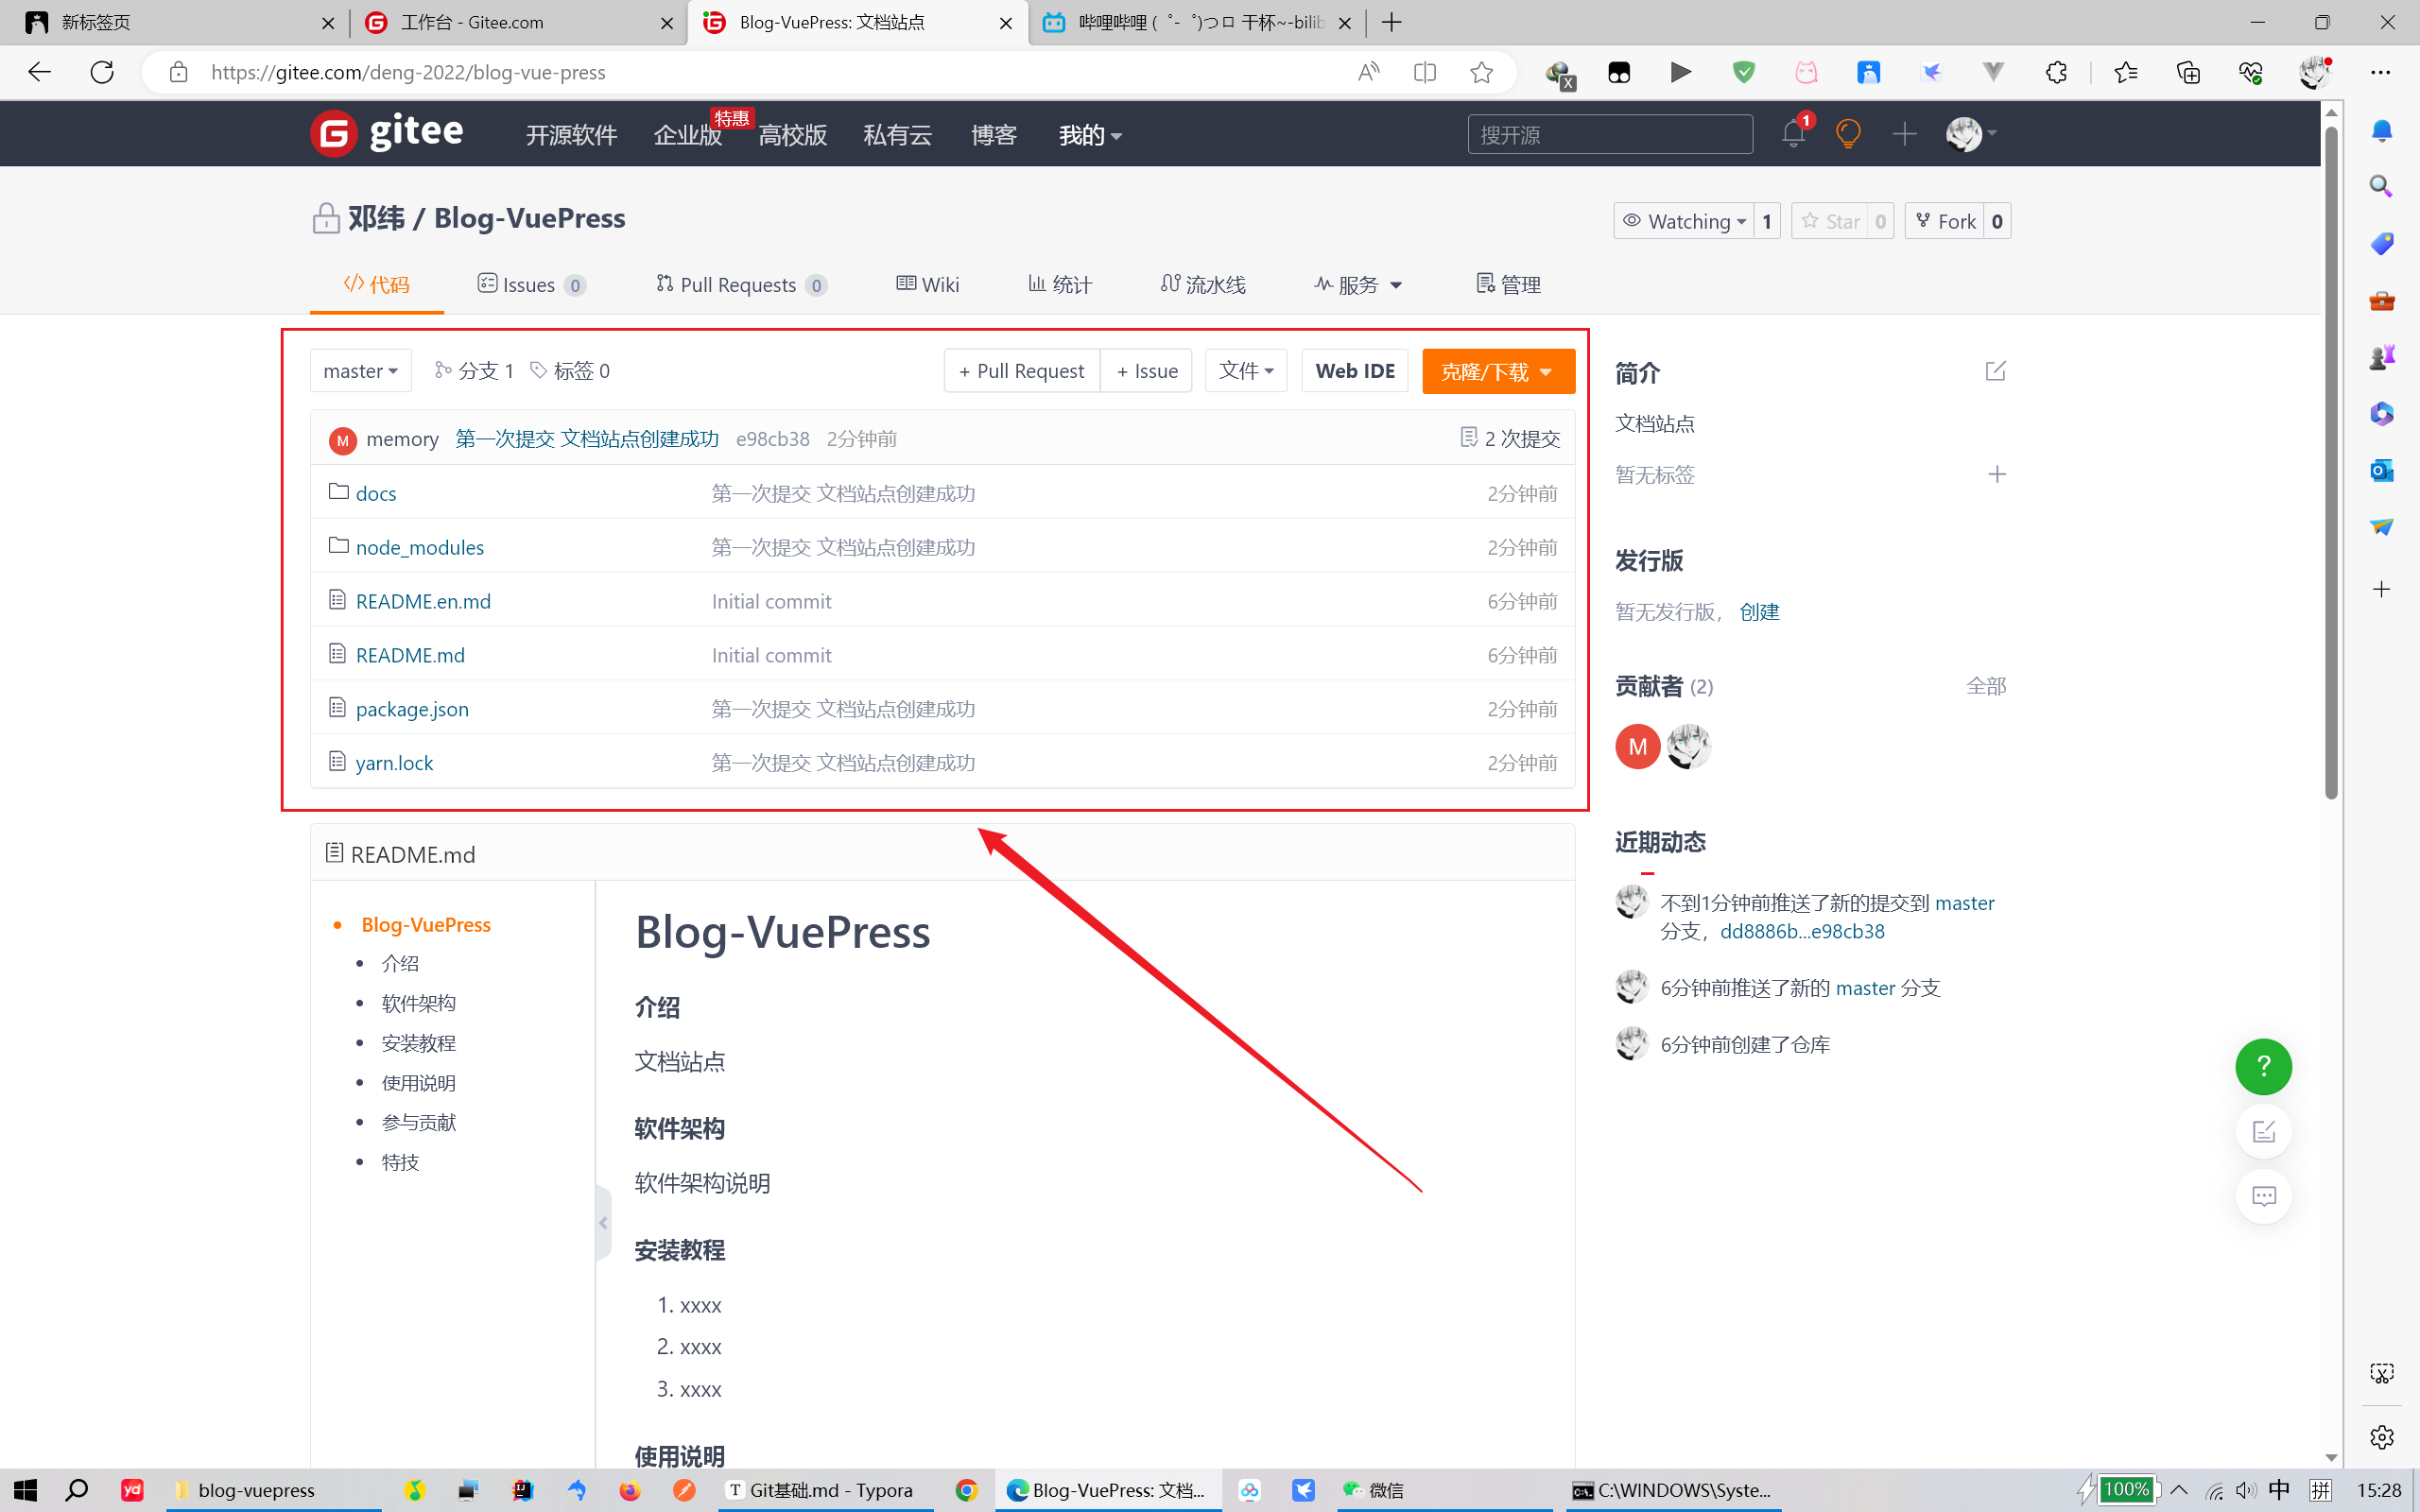
- 然后你就会神奇的发现,.vuepress 目录下多了一个 dist 文件夹,这就是打包好的静态网站文件了
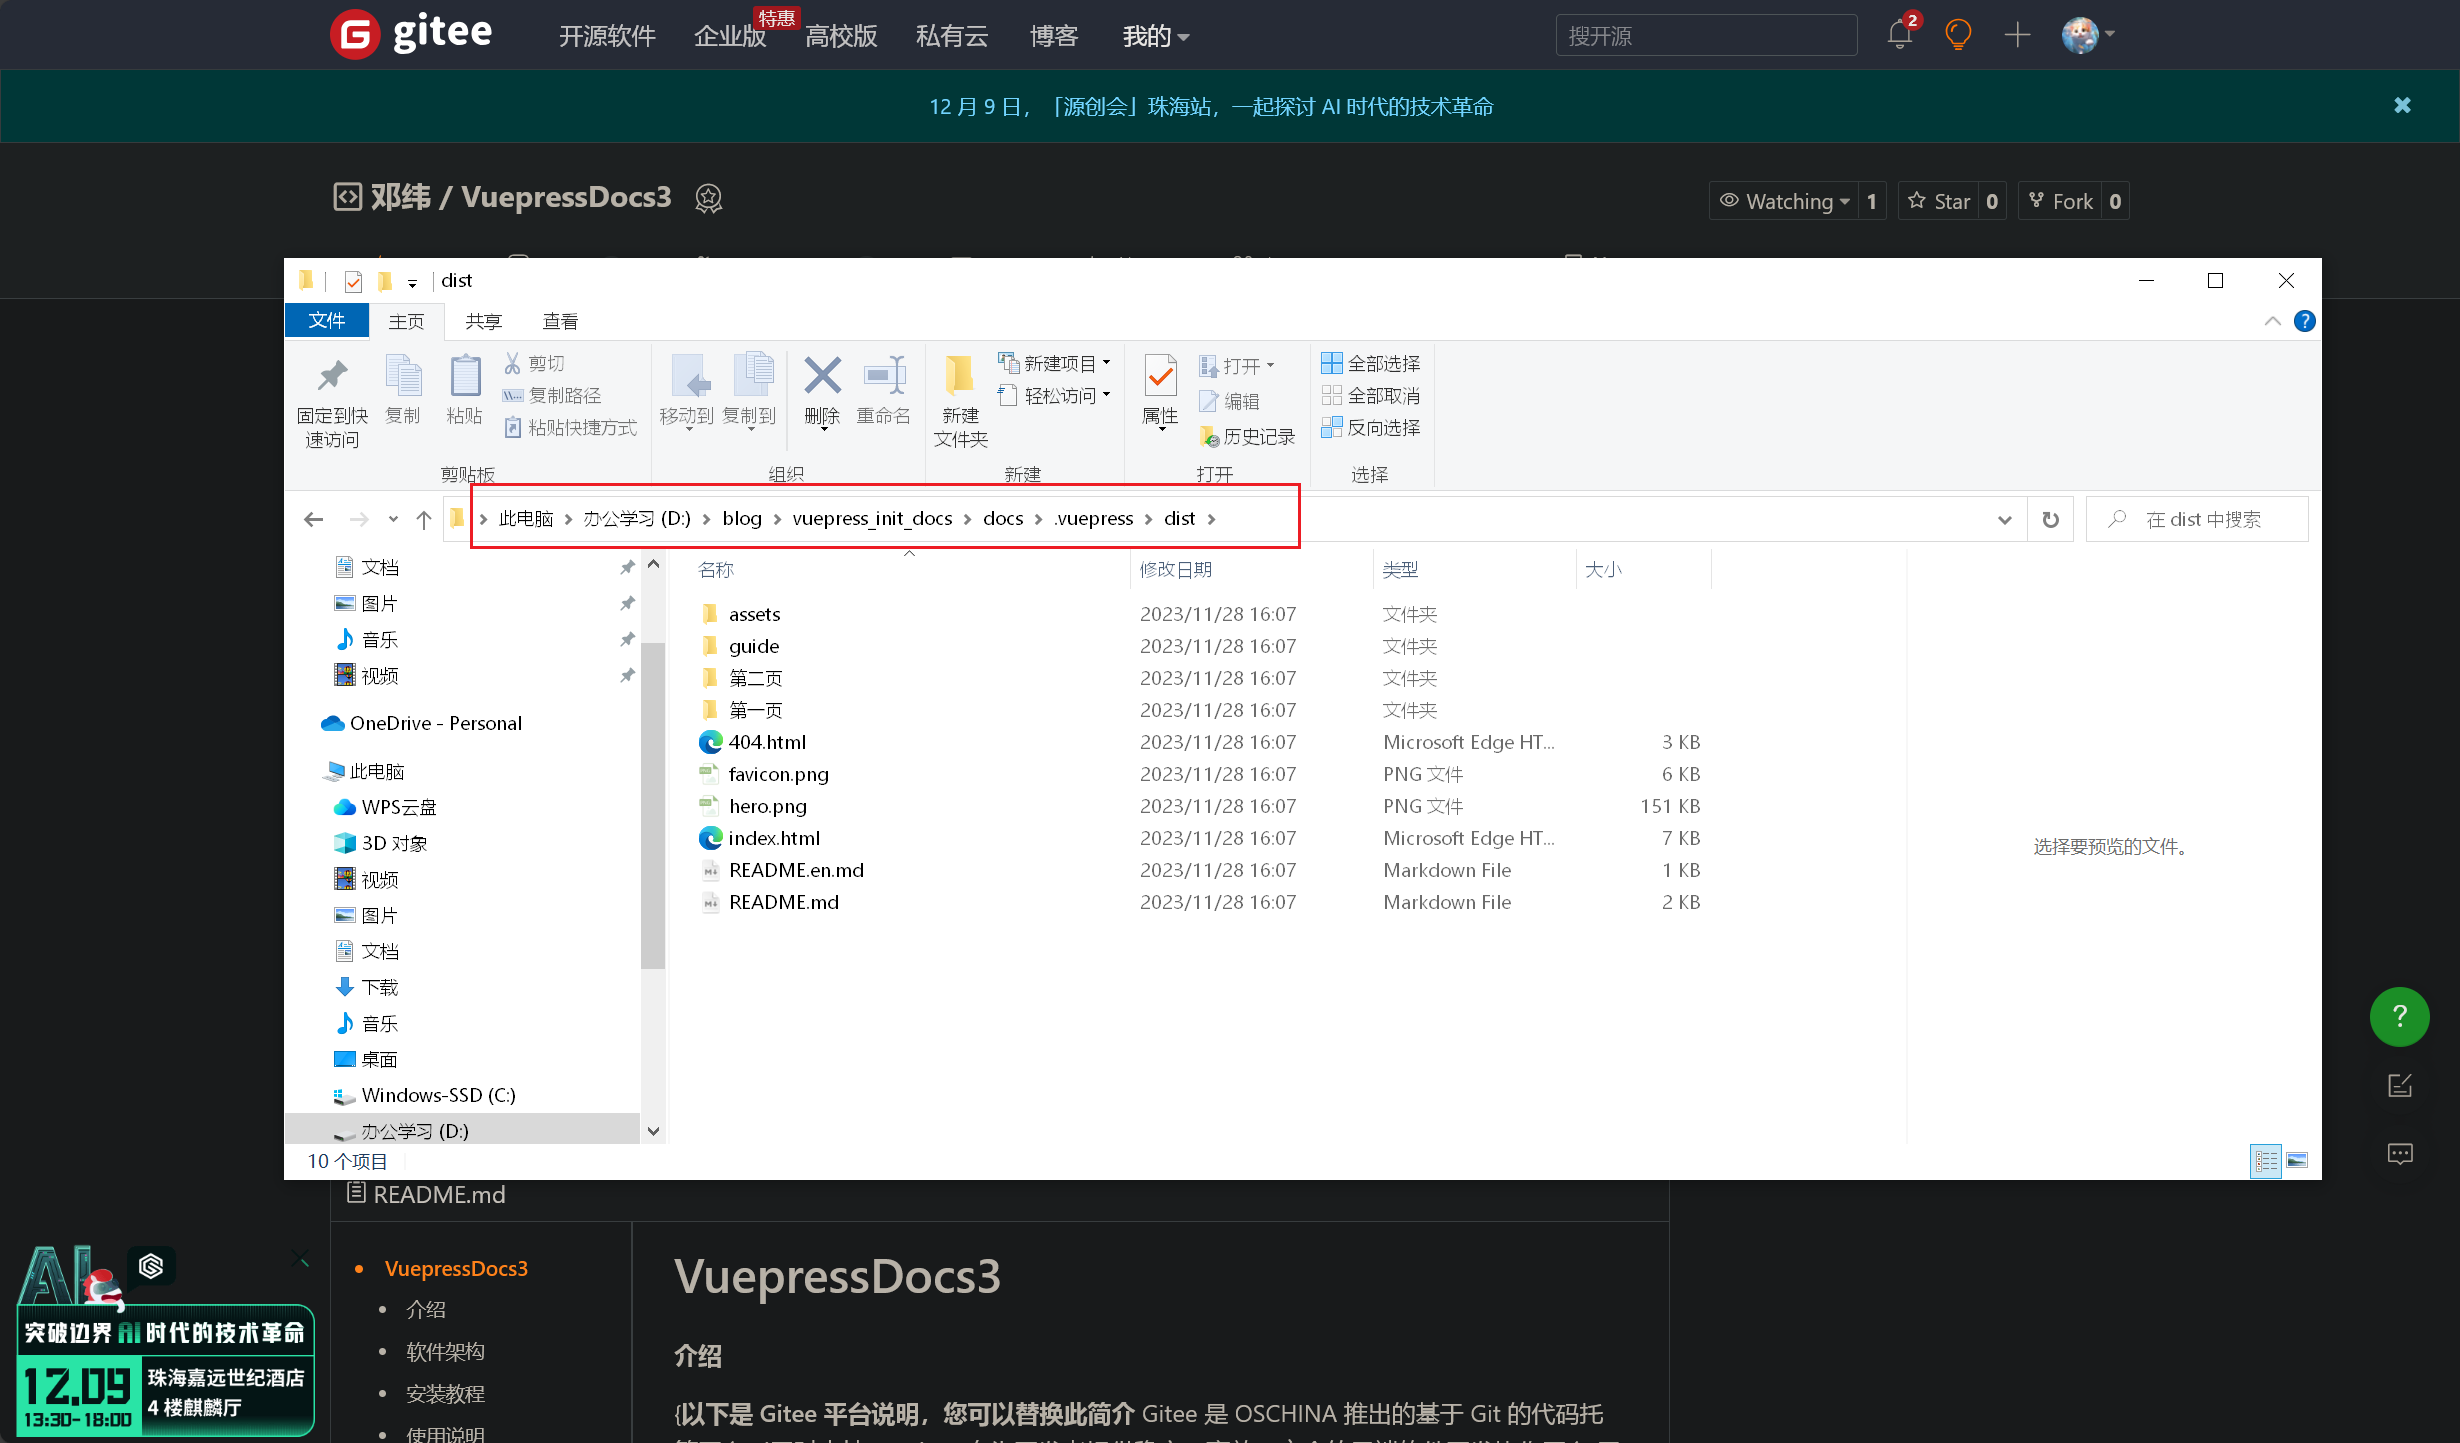
- 把
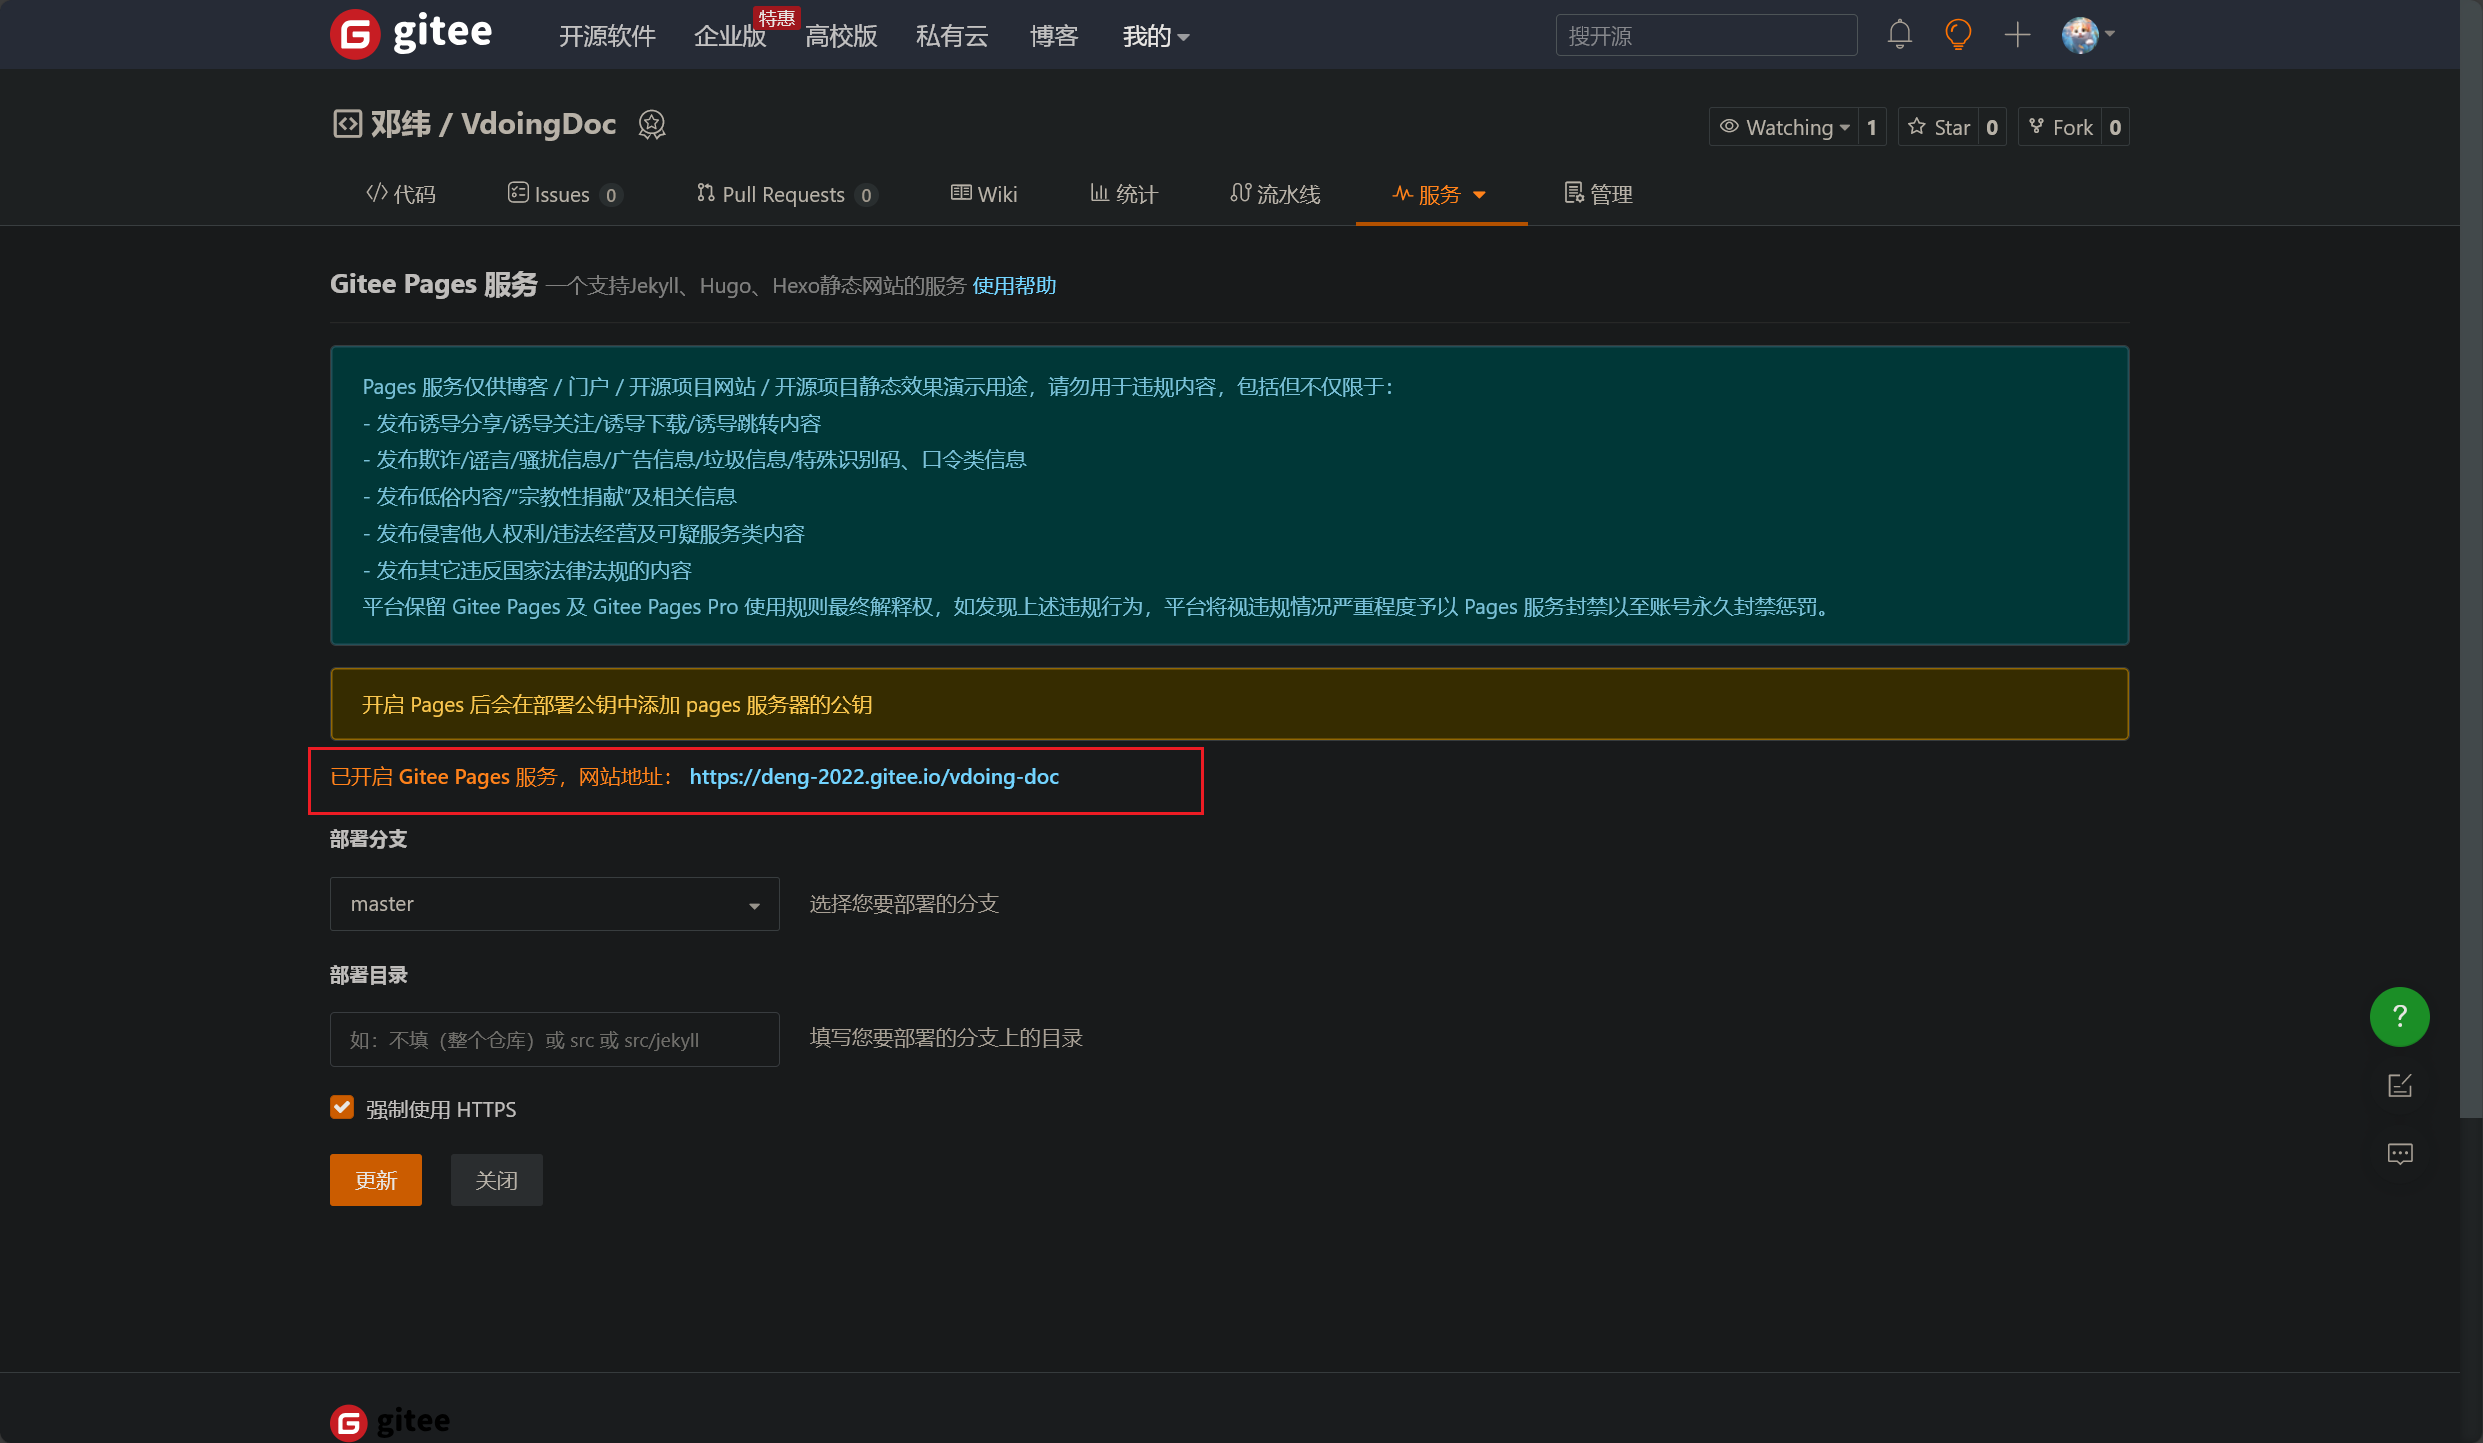
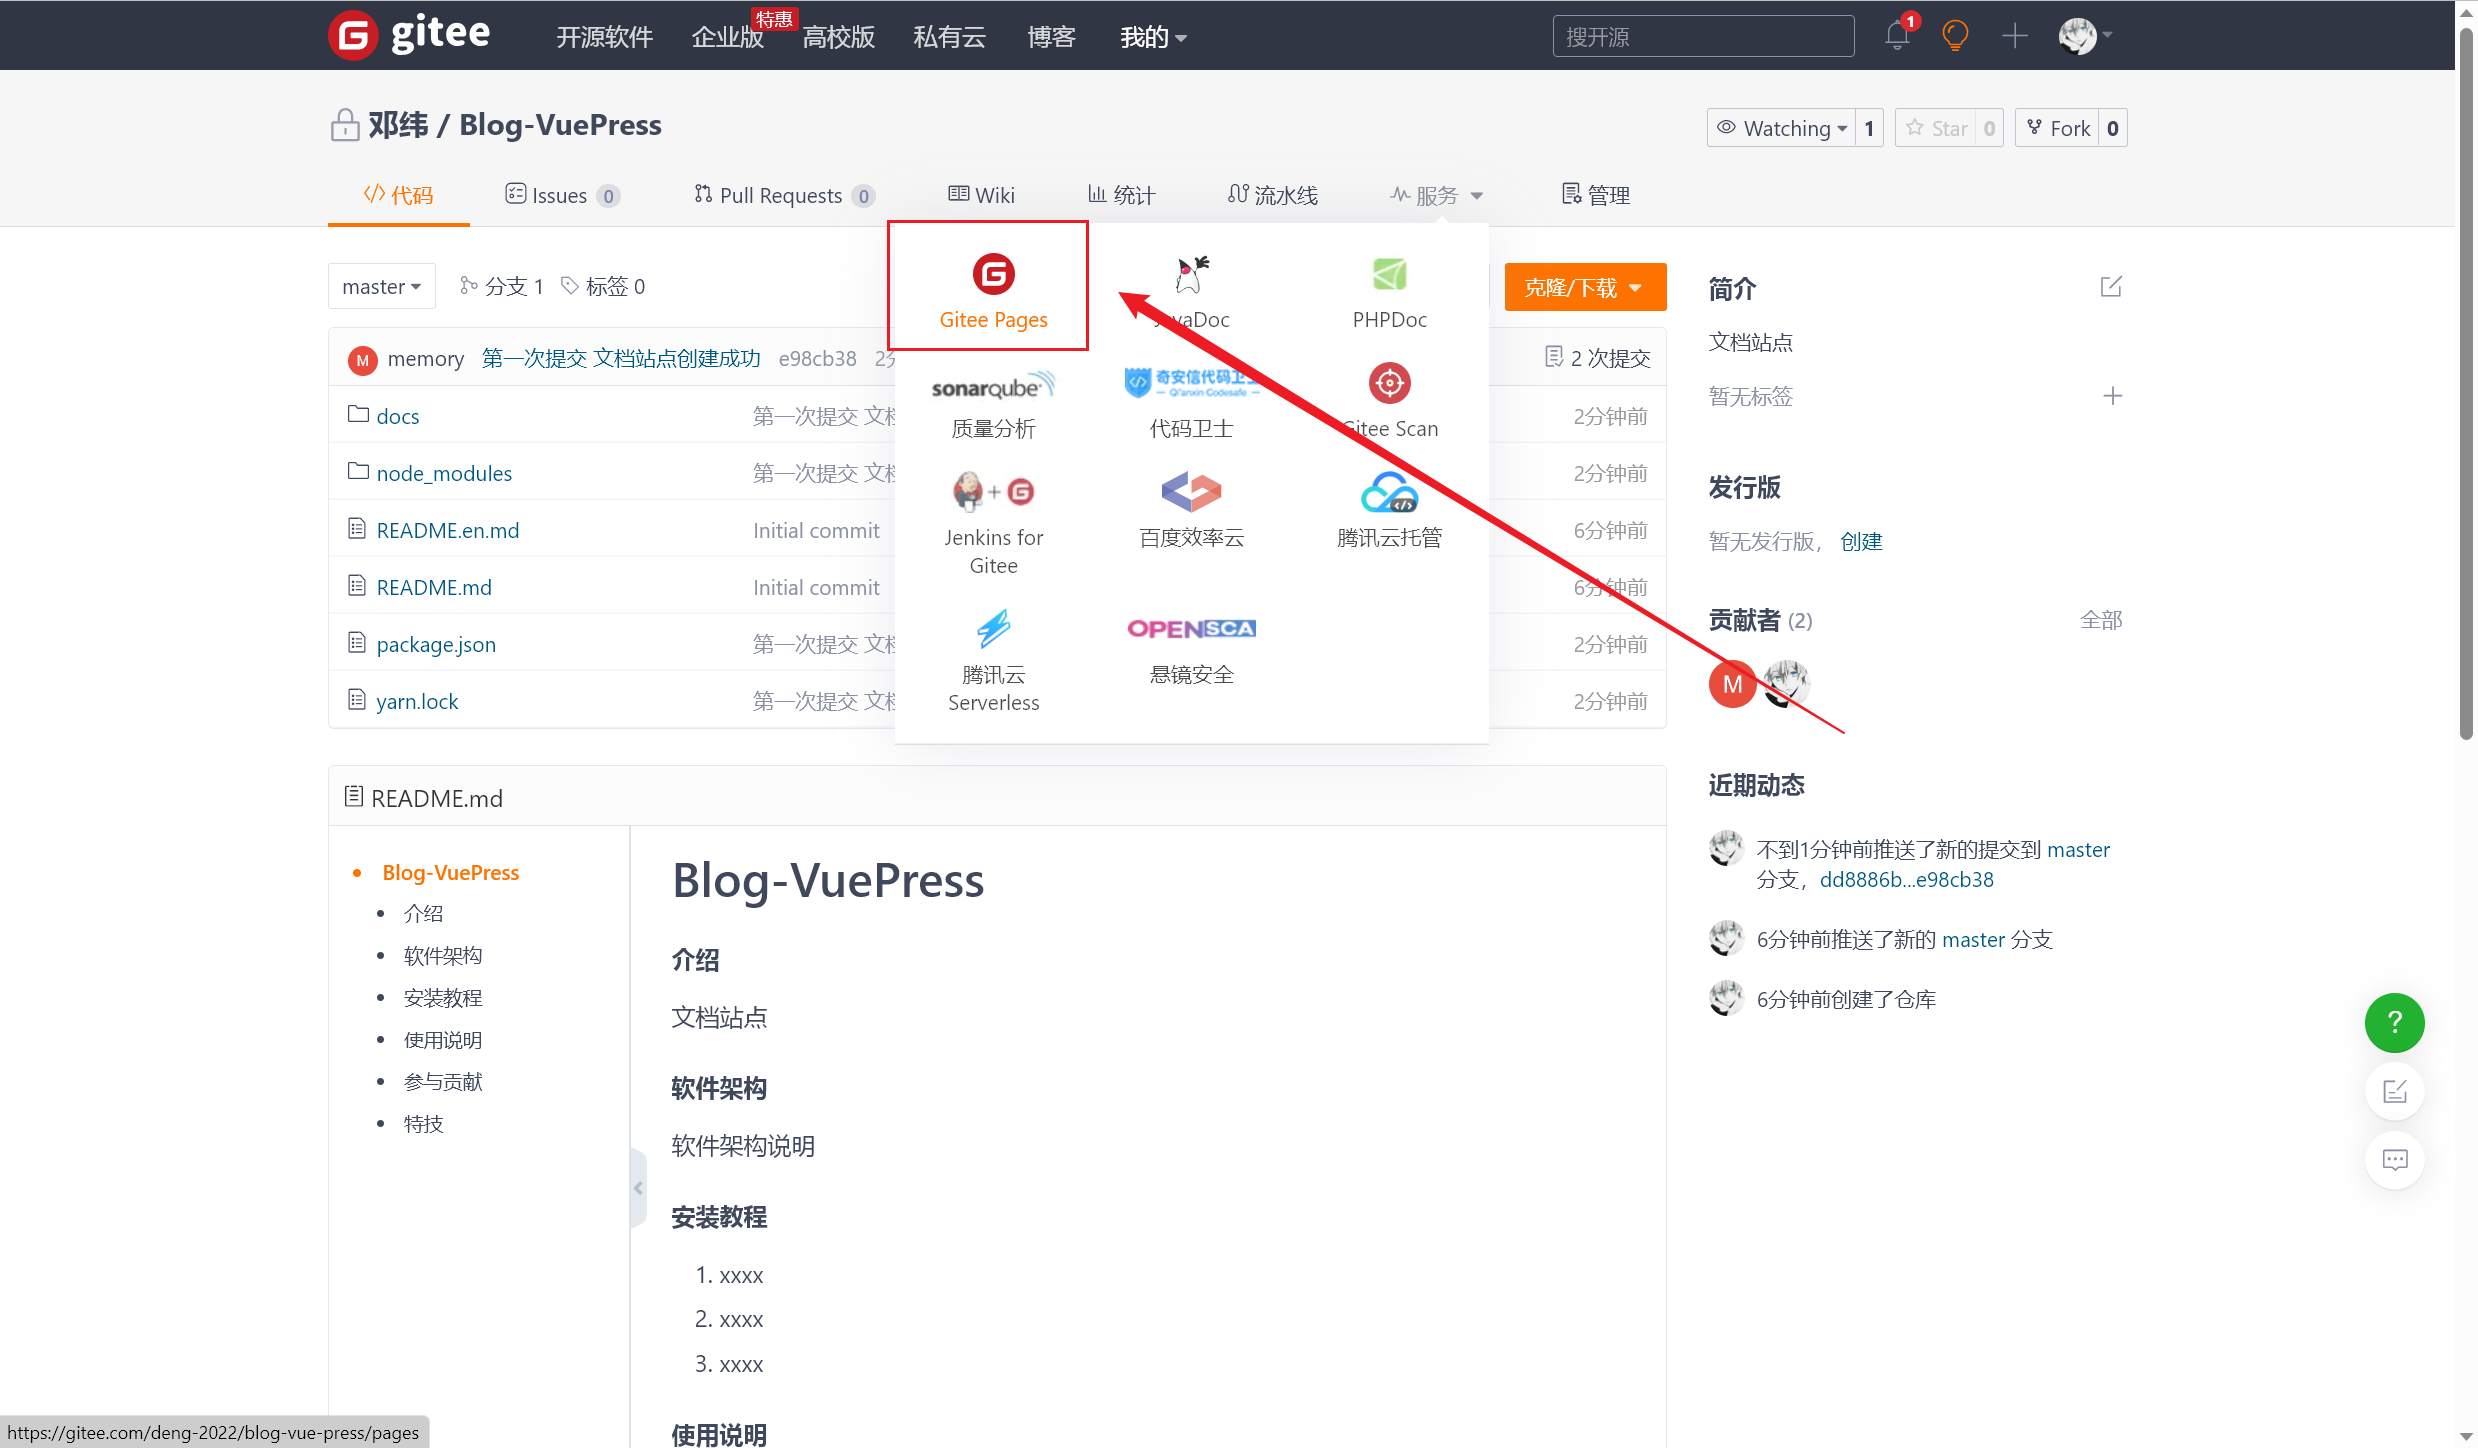
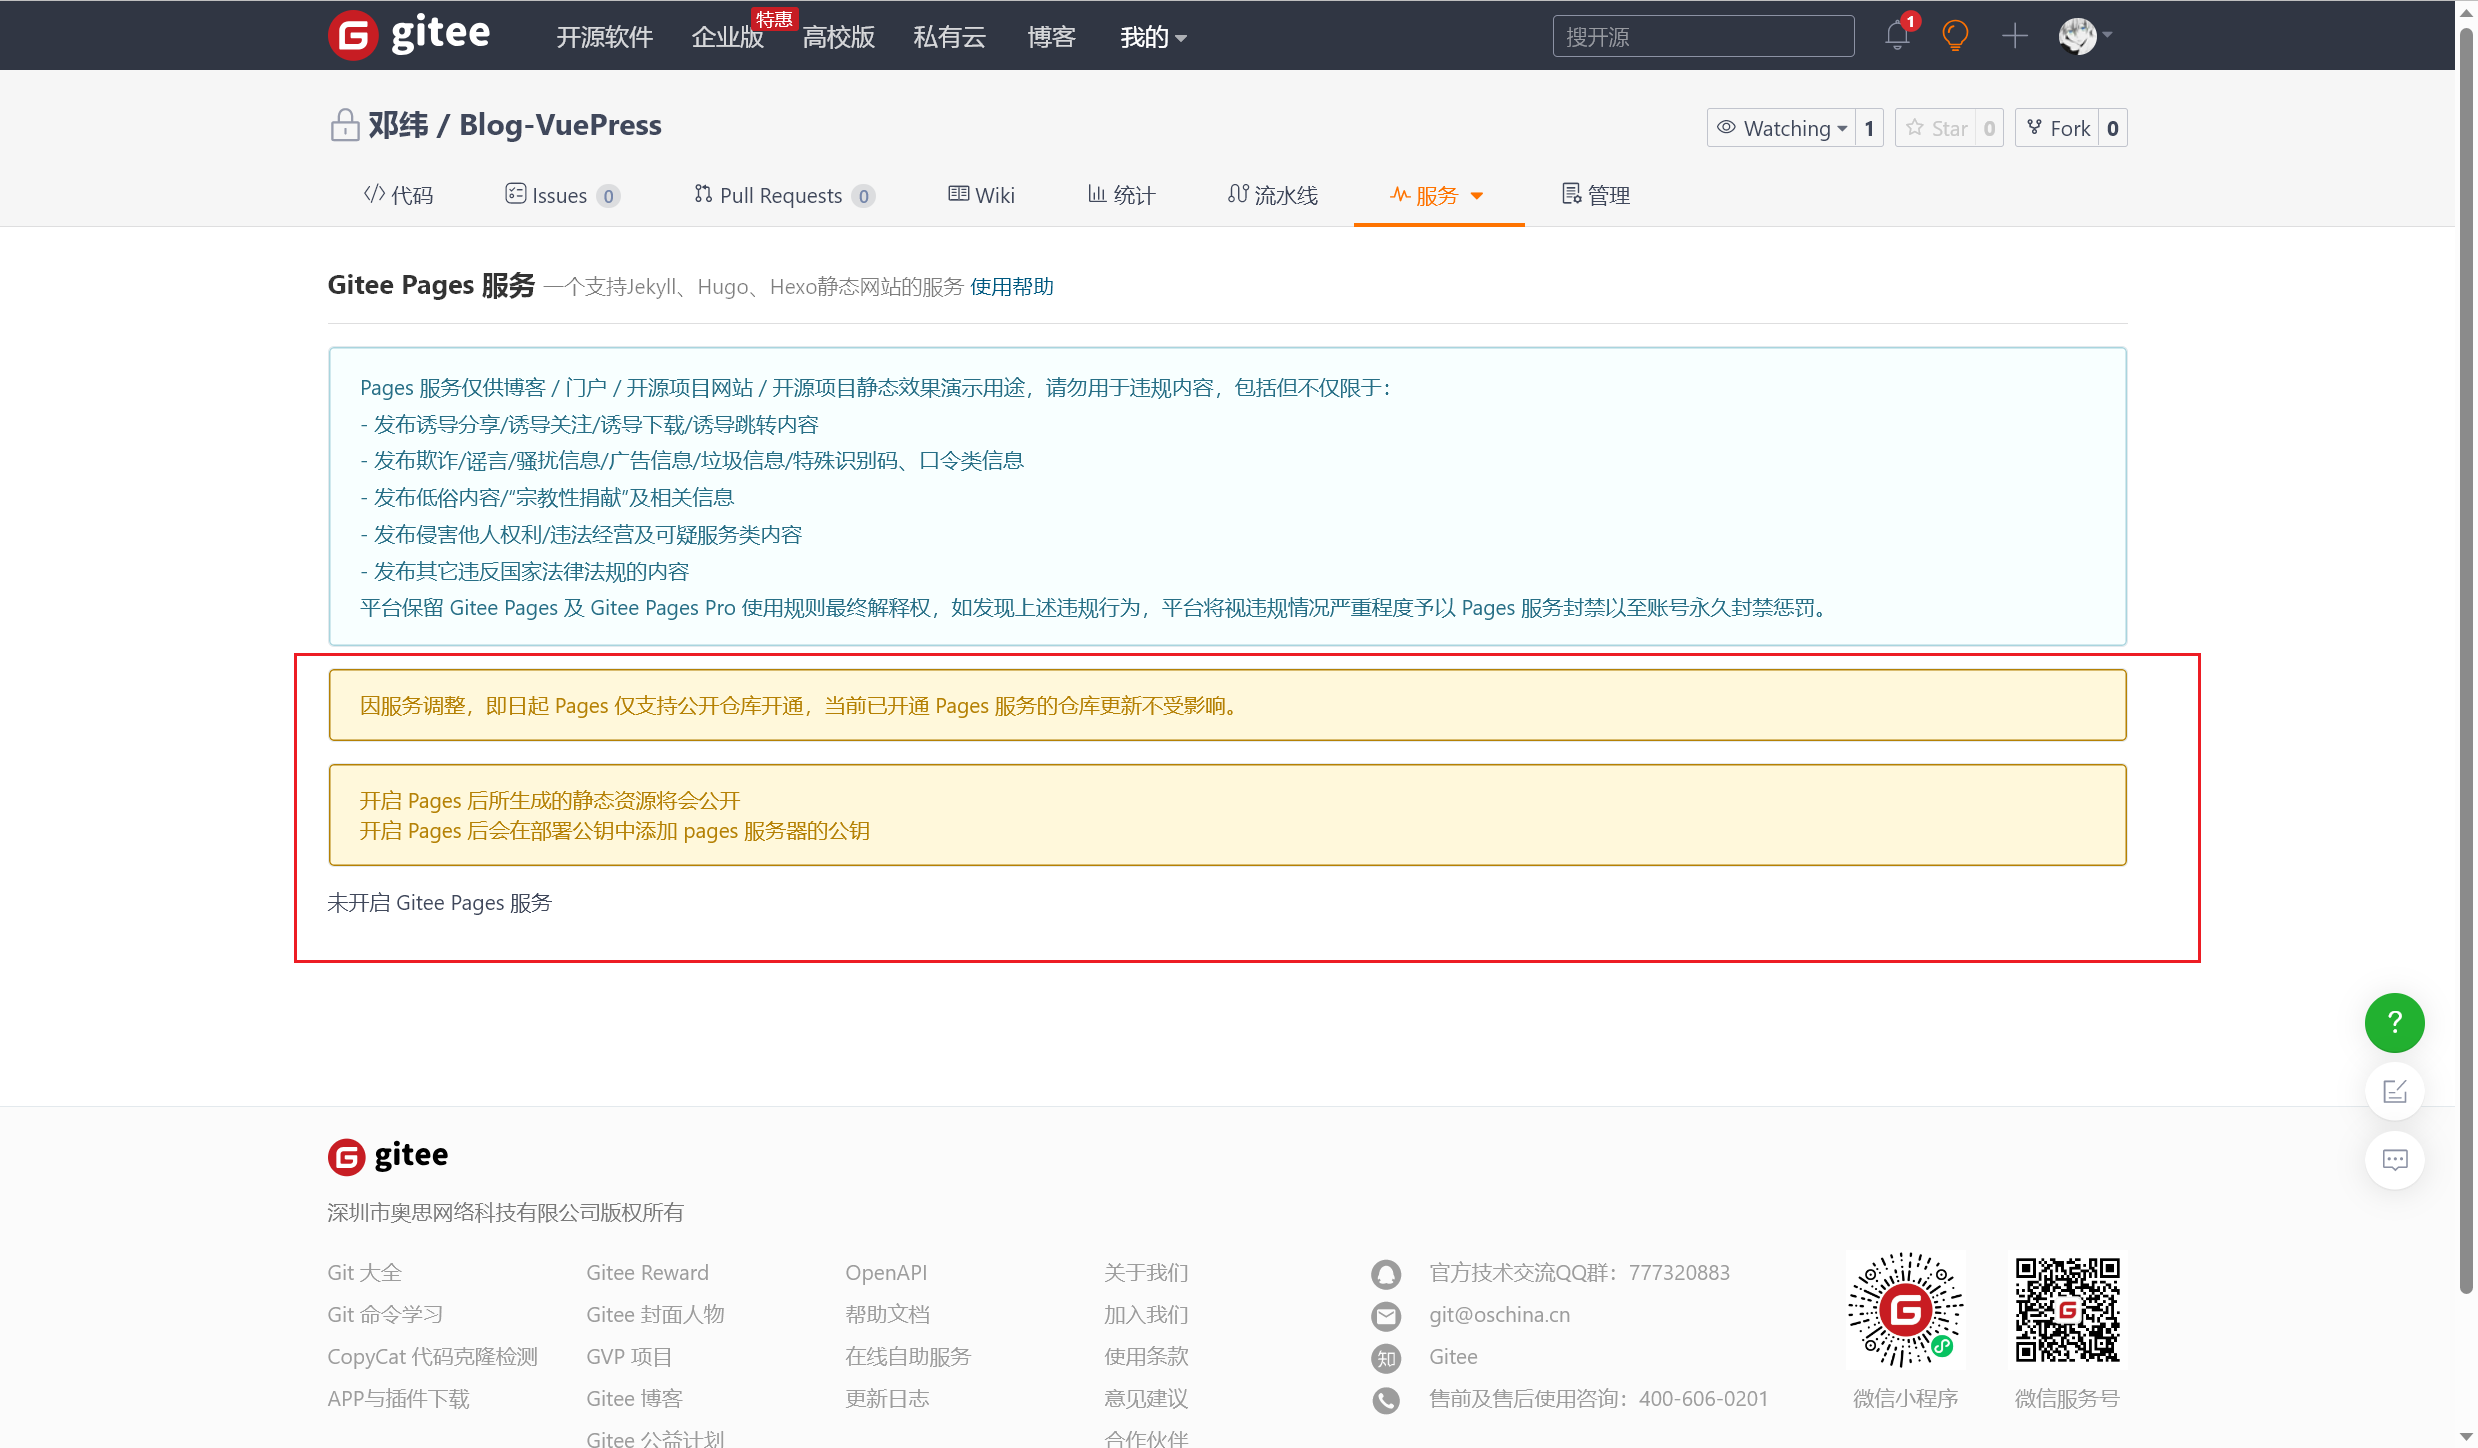
dist下的文件远程推送到指定 Gitee 远程仓库中,开启 GiteePages 服务:
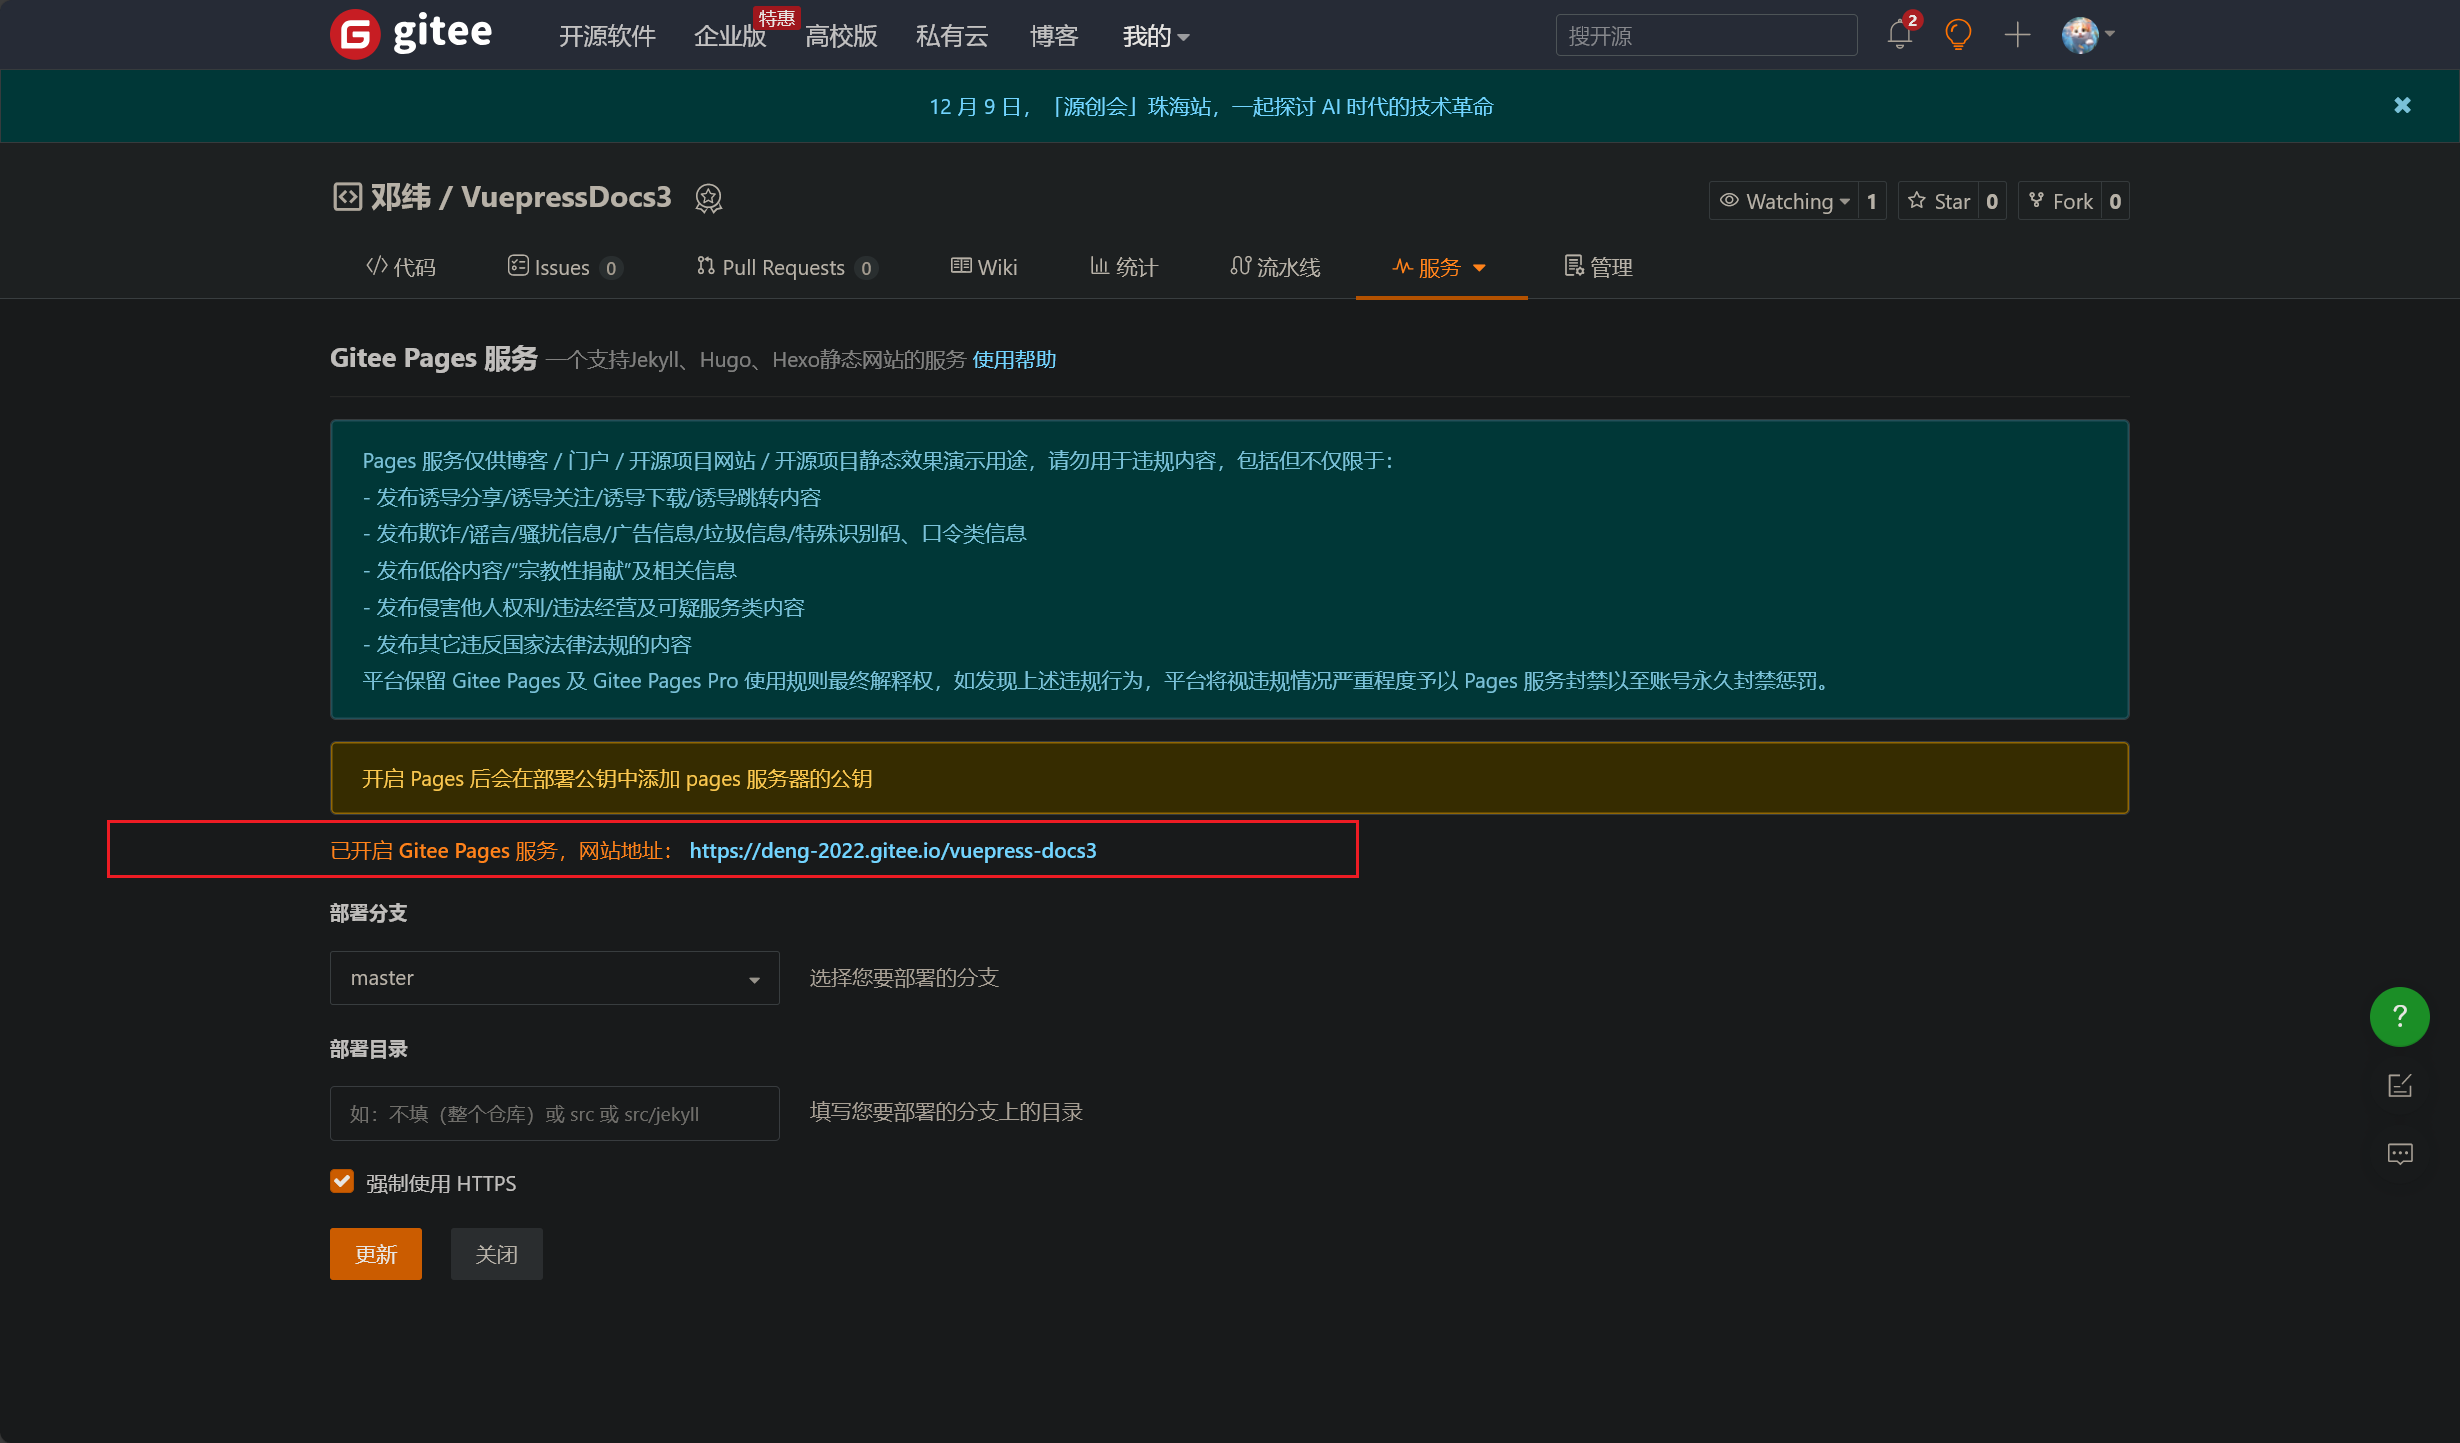
- 大功告成,直接访问即可:Mem-API 开发者文档 (gitee.io)

踩坑记录
- 踩过的坑算很多了,这里一并提一下:(2023/11/28 晚)
2023/11/26 晚
了解到了 Vuepress 的
全局安装(不支持了)、局部安装和直接通过第三方主题安装,并了解了相关配置总结来讲,这晚尝试了下 Vuepress 站点的简单配置,还没开始部署
妈的,搞了一晚上 Vuepress ,好像没啥成果,但我总得记录一些东西吧:
部署 Vuepress 文档站点:原生(全局安装、局部安装) / 第三方主题
局部安装,好多东西还得自己配置,我哪来的闲心
全局安装的话,他奶奶的,执行命令还不起作用
第三方主题,感觉很不亲切
尝试部署 Github,大体上成功了,但是打包完成后执有问题,现在本地部署也出现问题了
2023/11/27 晚
- 也就睡前半个多小时,简单地搞了搞,发现在 Github 上可以直接拉官方代码,实现全局安装
🚀 下载地址:vuejs/vuepress at v1.9.10 (github.com)
- 还想着在这个基础上修修改改,做个文档站点,不过真的复杂,看看了解即可,在这个基础上做改动太不实际了,直接劝退
- 那就用前天晚上的成果,直接着手部署了:Github / Gitee
🍻 推荐阅读:vuepress 打包部署到 Gitee Pages 访问页面出现样式丢失_De Ja Vu 幻觉记忆的博客-CSDN 博客
- Github 不想多说,太他妈吃网速了,访问慢不说,好不容易推送成功,还老是显示部署失败,发了十几条邮箱信息都没咋注意:
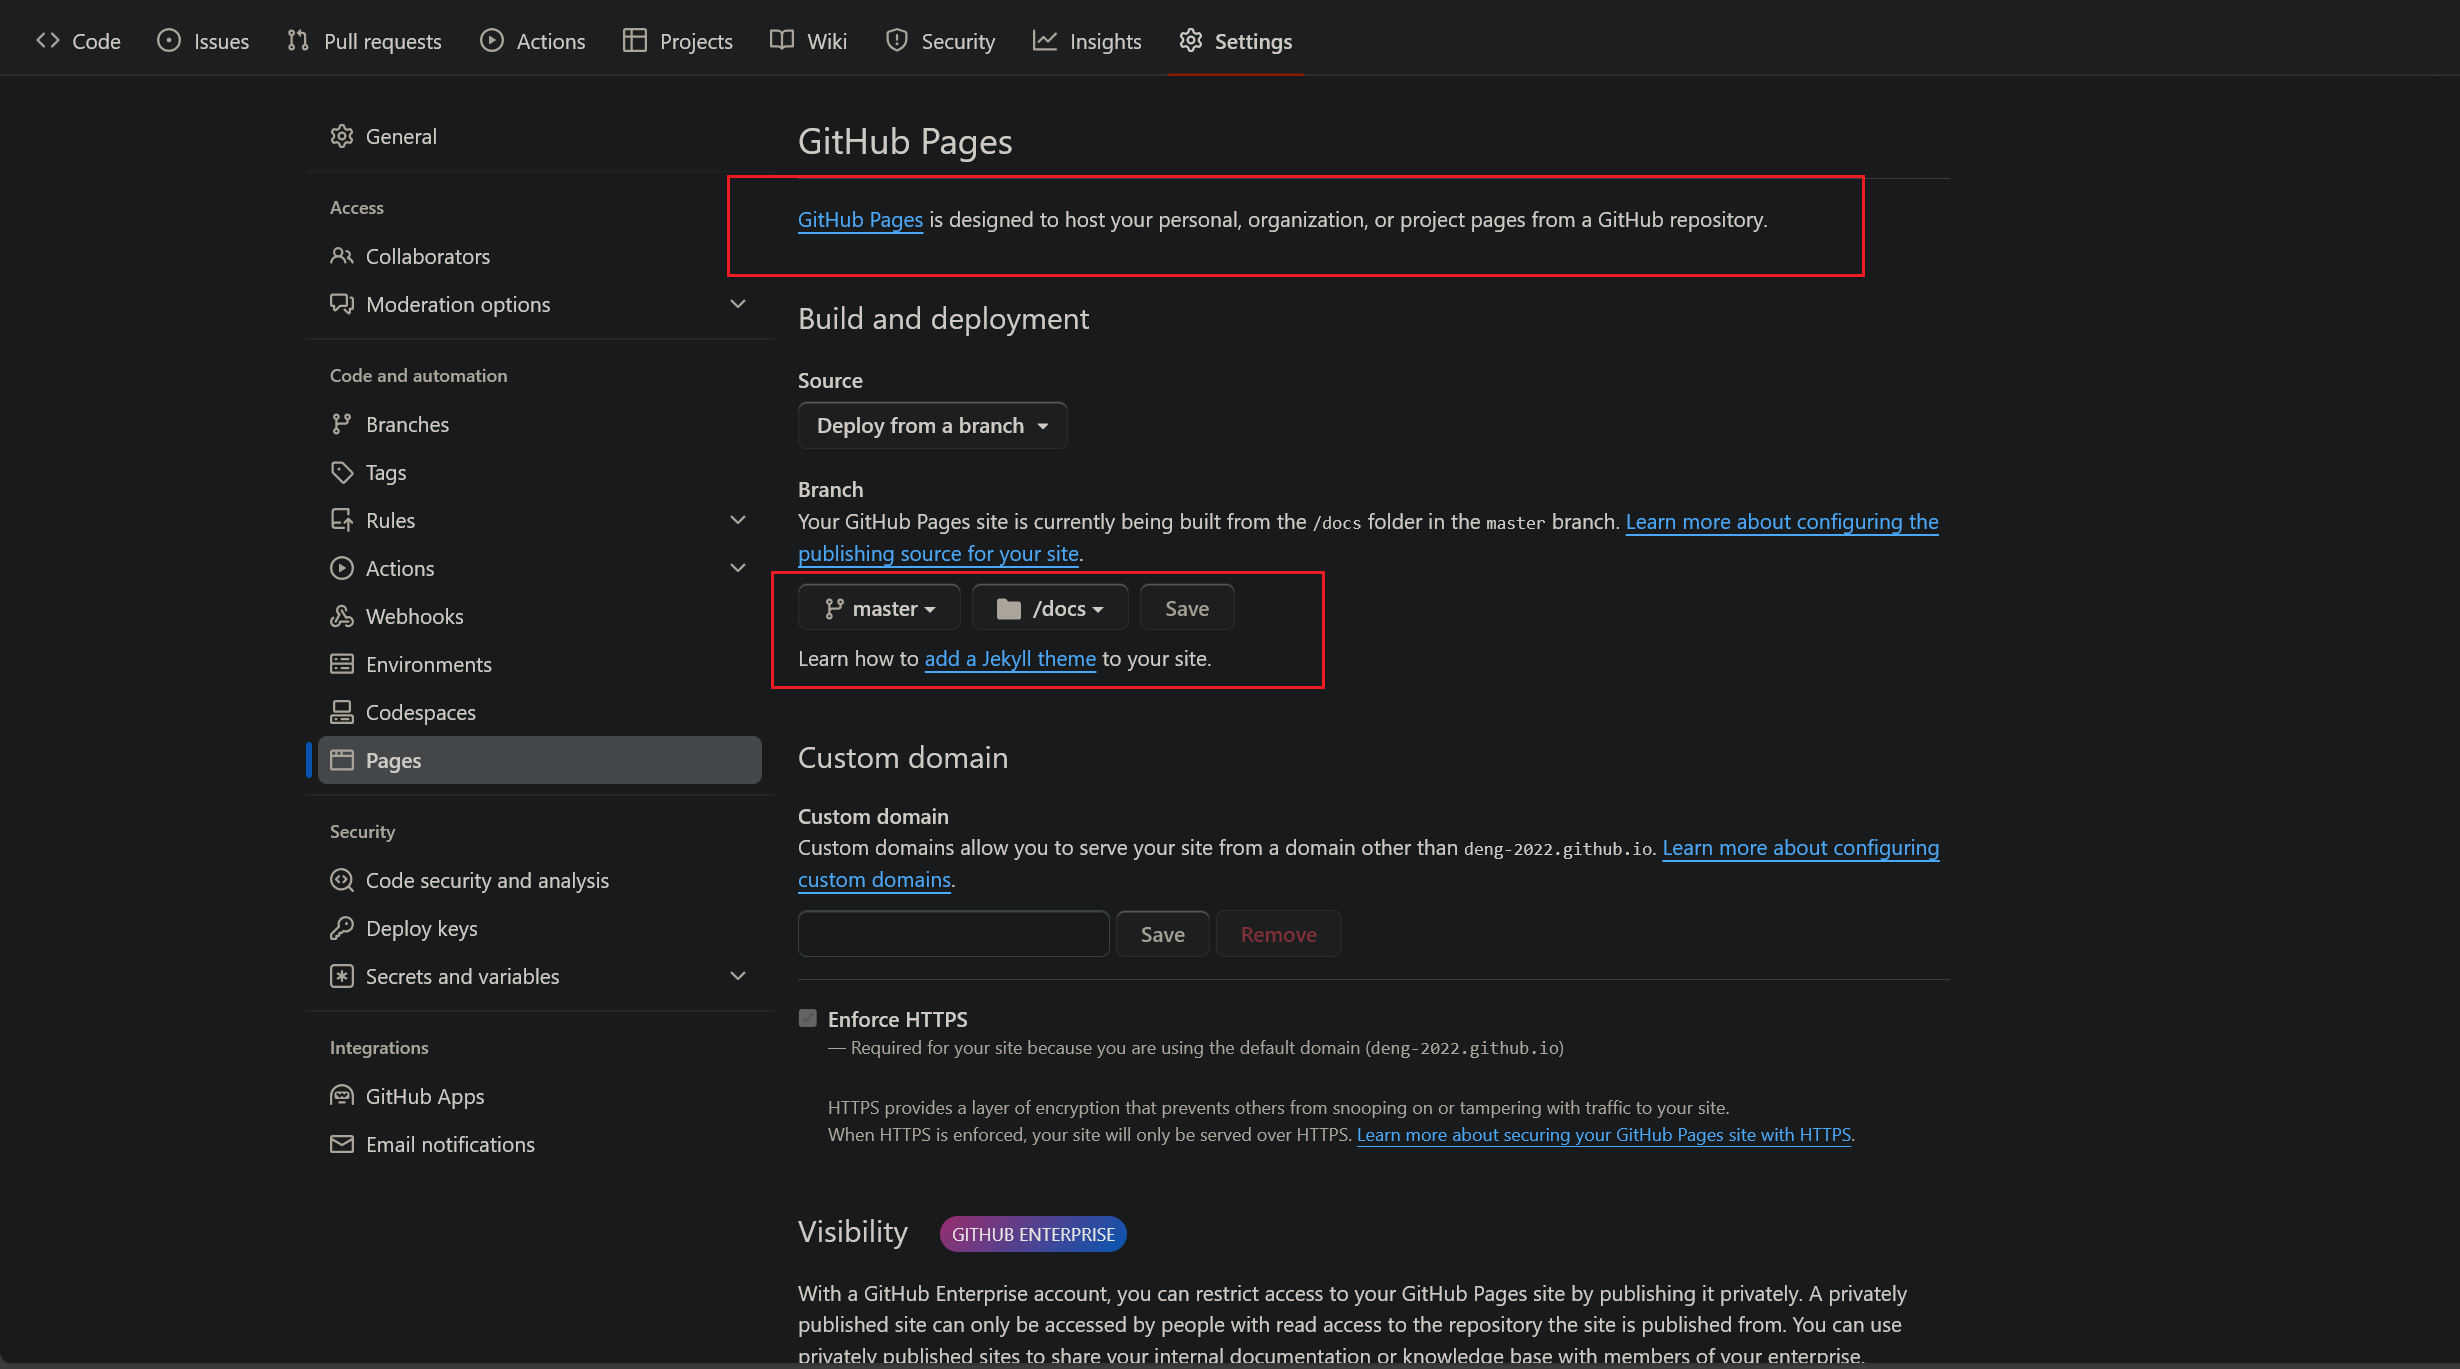
- 呐,上面就是 Github Pages 服务了,太卡了,部署不了,不过网速好的话是没有问题的(2023/11/28 晚)
Vdoing 文档站点 部署
快速搭建
- 拉取官方 demo(2023/12/06 晚)
- 如下,直接按照官方文档的步骤,拉取官方文档站点预设 demo(这一步不用作过多详细解释了,看官方文档就行):
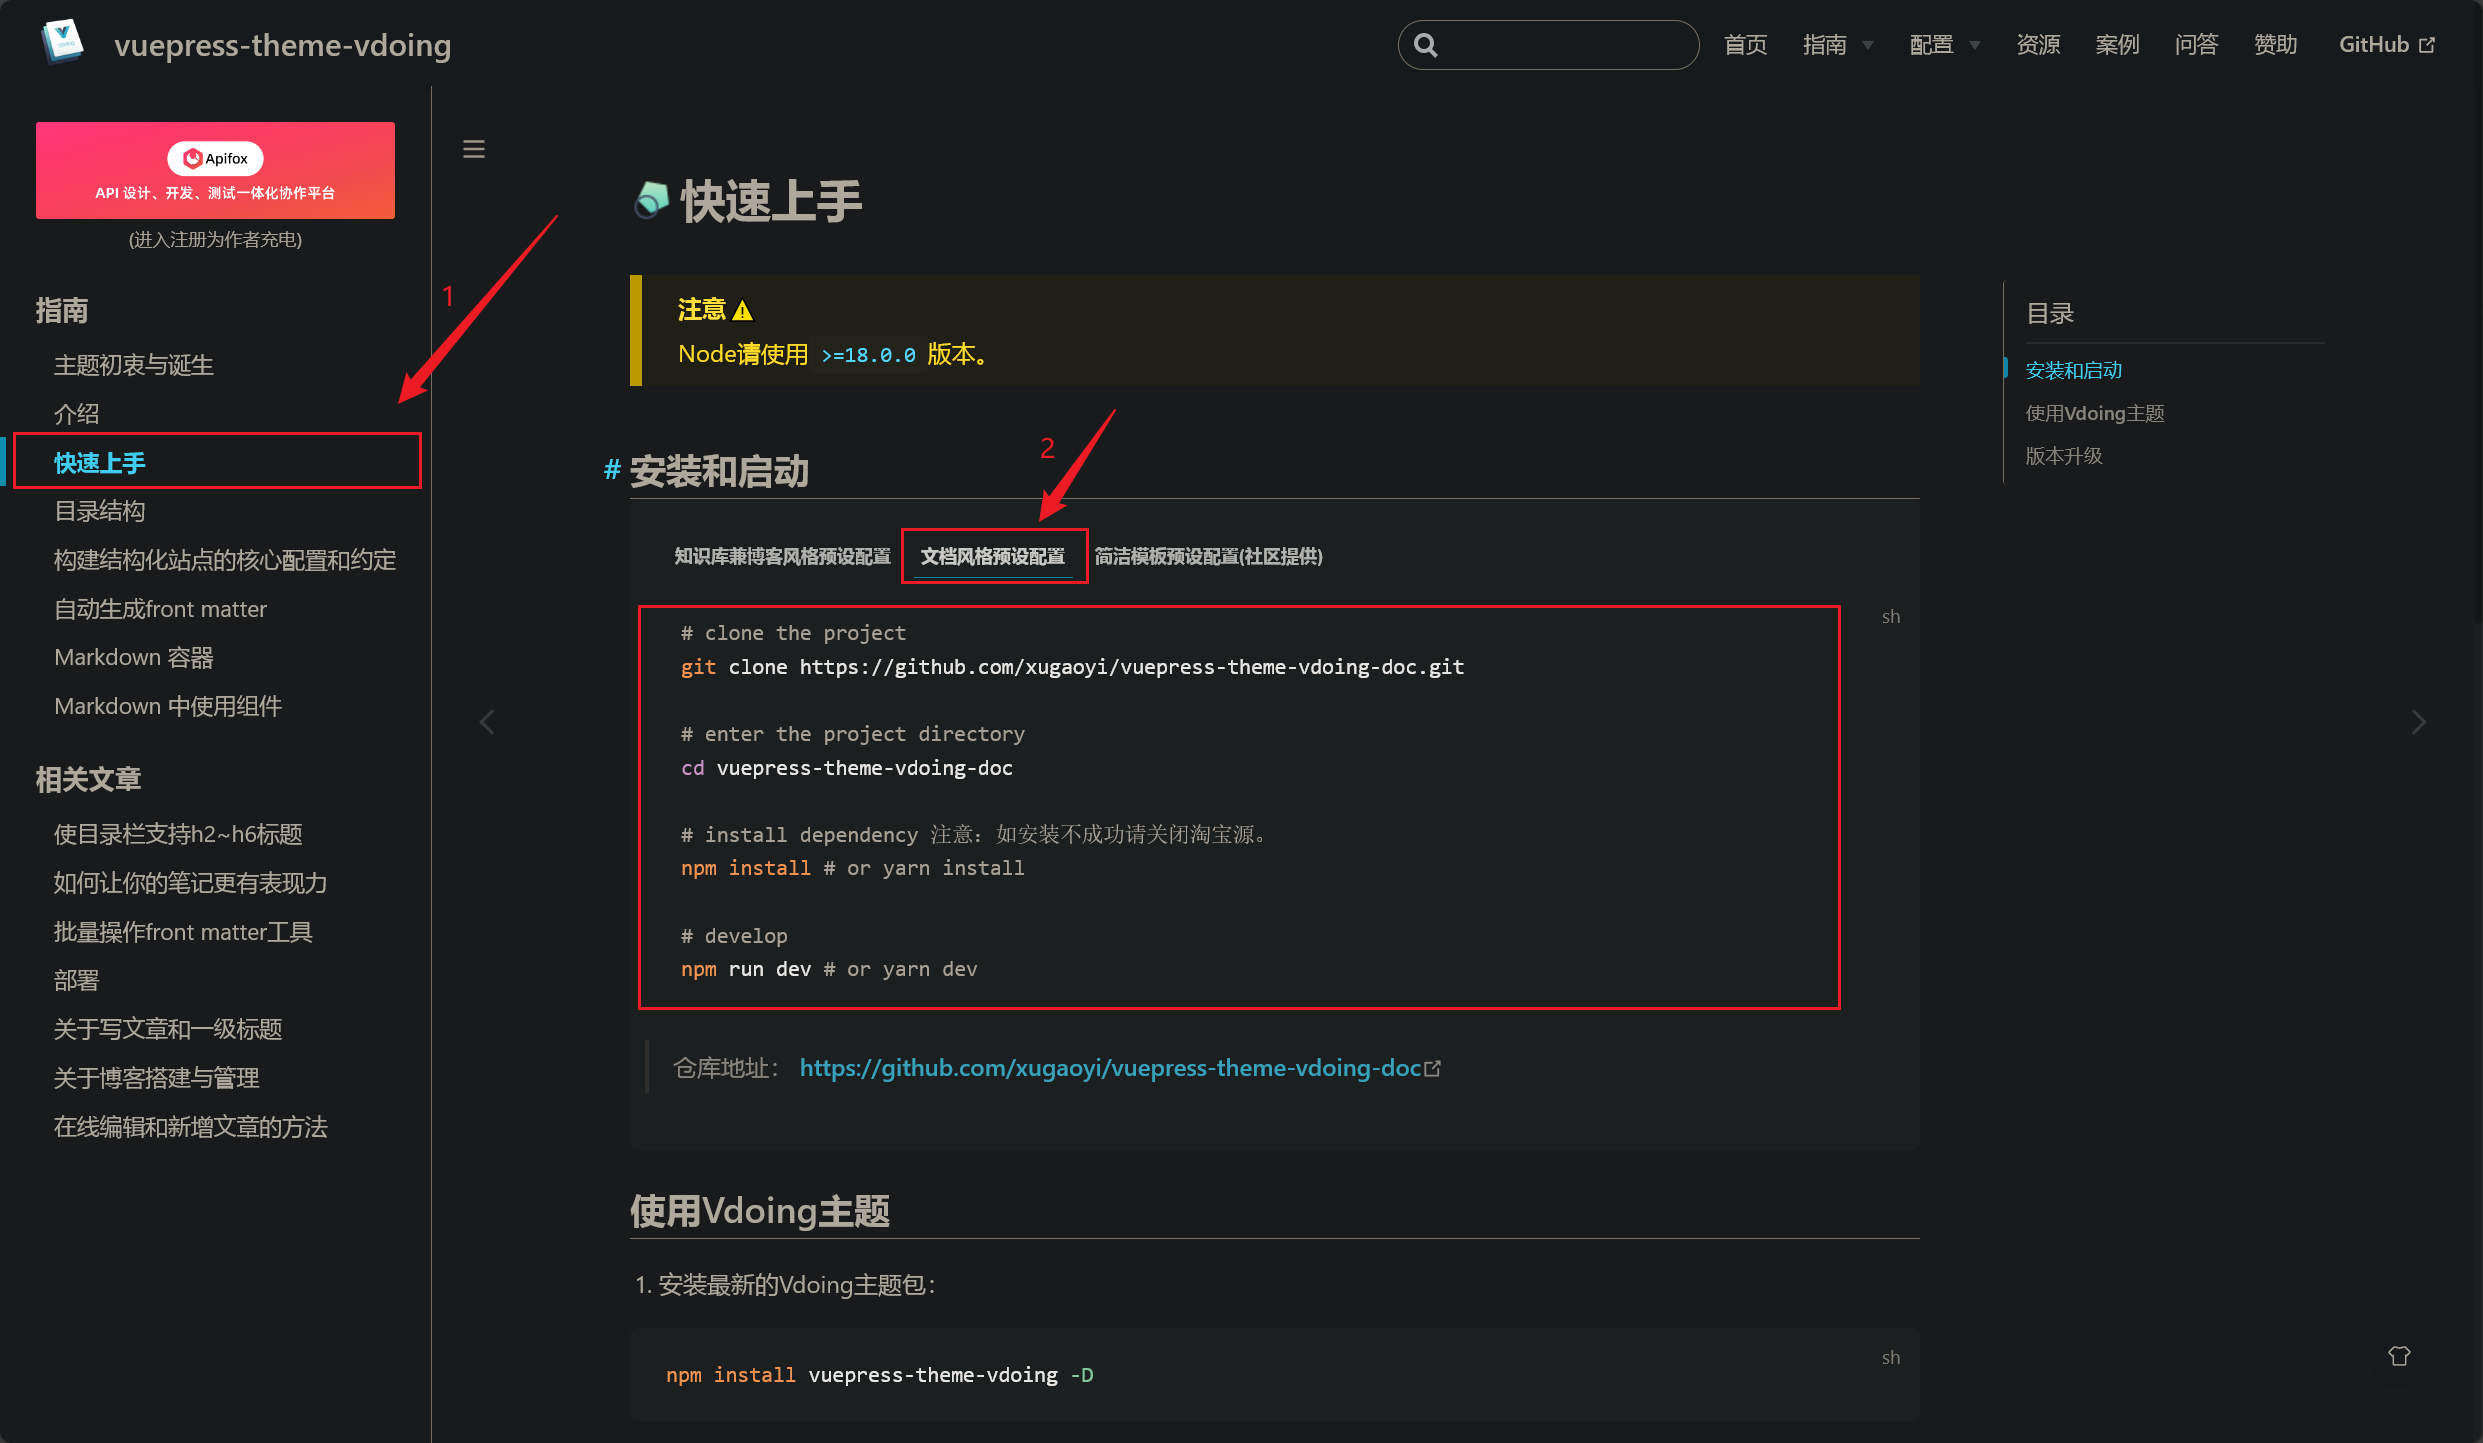
- 拉取成功,简单看一下目录结构(官网提供),最重要的配置文件就是
docs/.vuepress/config.js配置文件了:
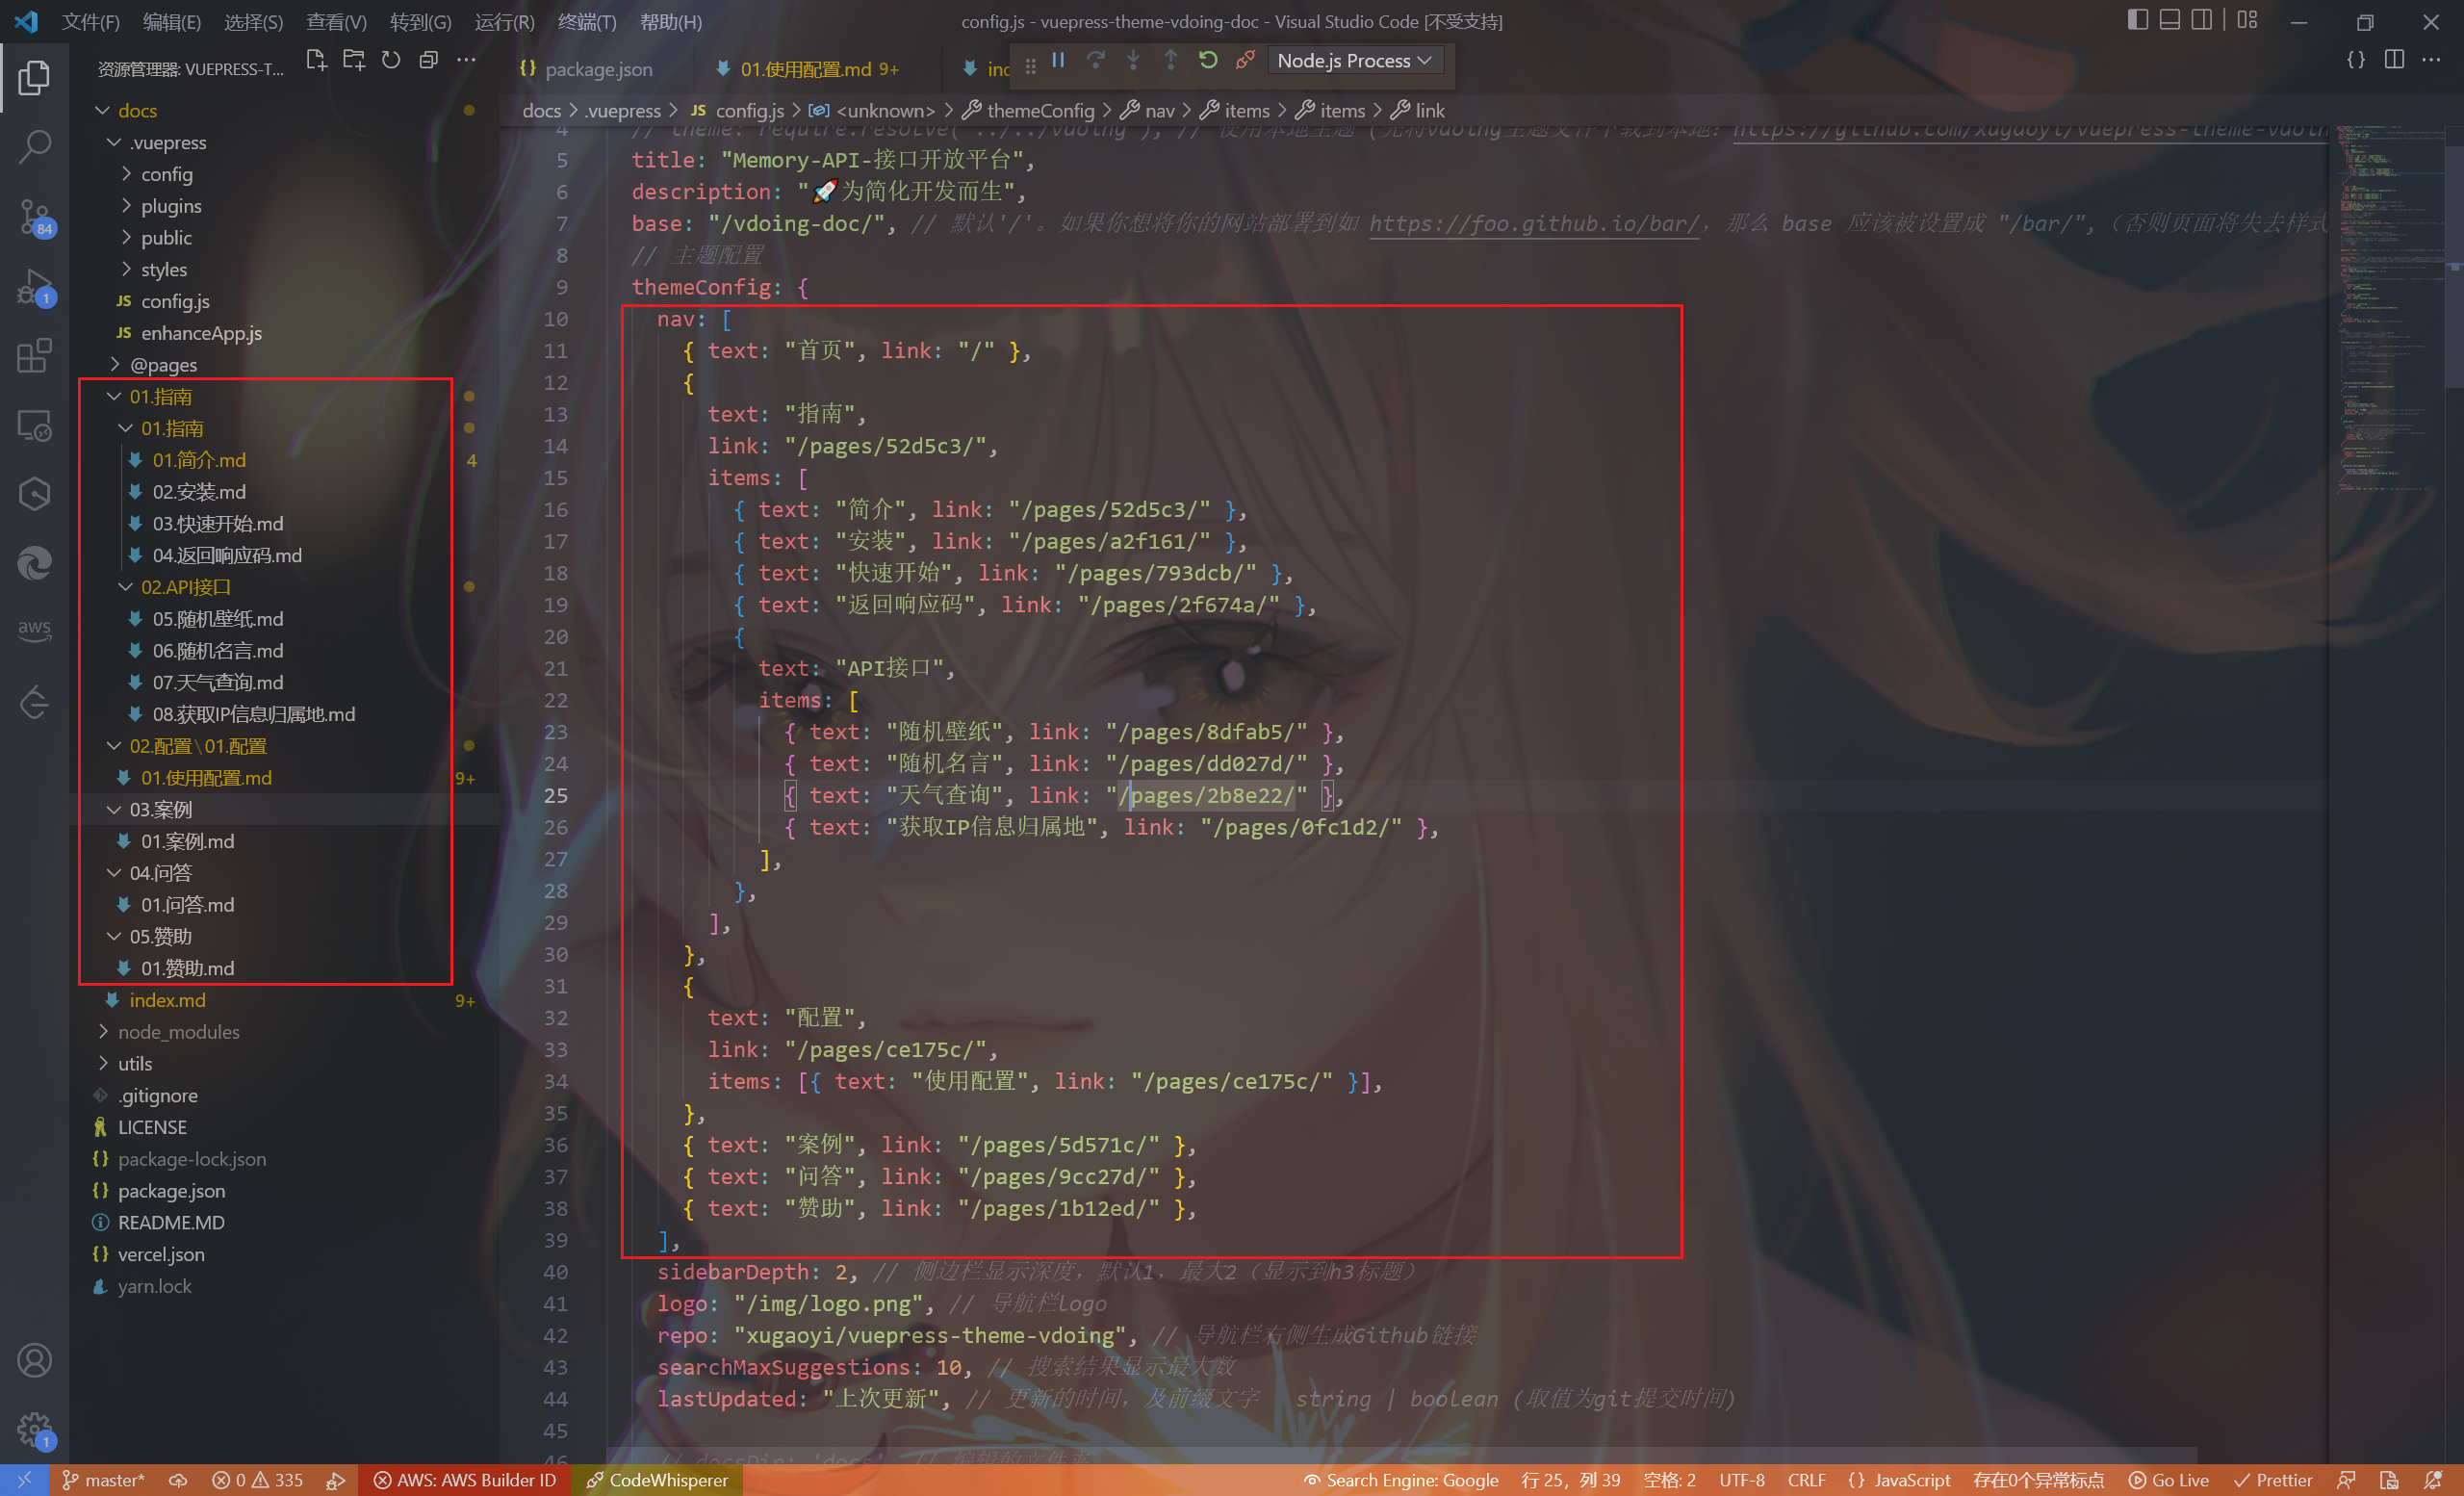
1 | |
简单修改配置:
基本上所有配置官方都已经替我们做好了,我们要做的仅仅是改改
网站标题、导航栏、侧边栏,然后把博文替换成自己的就行简单甩出我的配置,仅供参考,详细的配置这里不作过多介绍,需要靠自己慢慢摸索(2023/12/06 晚)
1 | |
Gitee 部署
- 部署流程跟上面 Vuepress 文档站点部署是一样样的:
配置远程仓库地址 -> 打包 -> 推送至远程仓库 -> 开启 Gitee Pages 服务
值得注意的是,不论是执行 yarn dev 还是 yarn build,都会有这样的友好提示(这也是和 Vuepress 不同的地方):
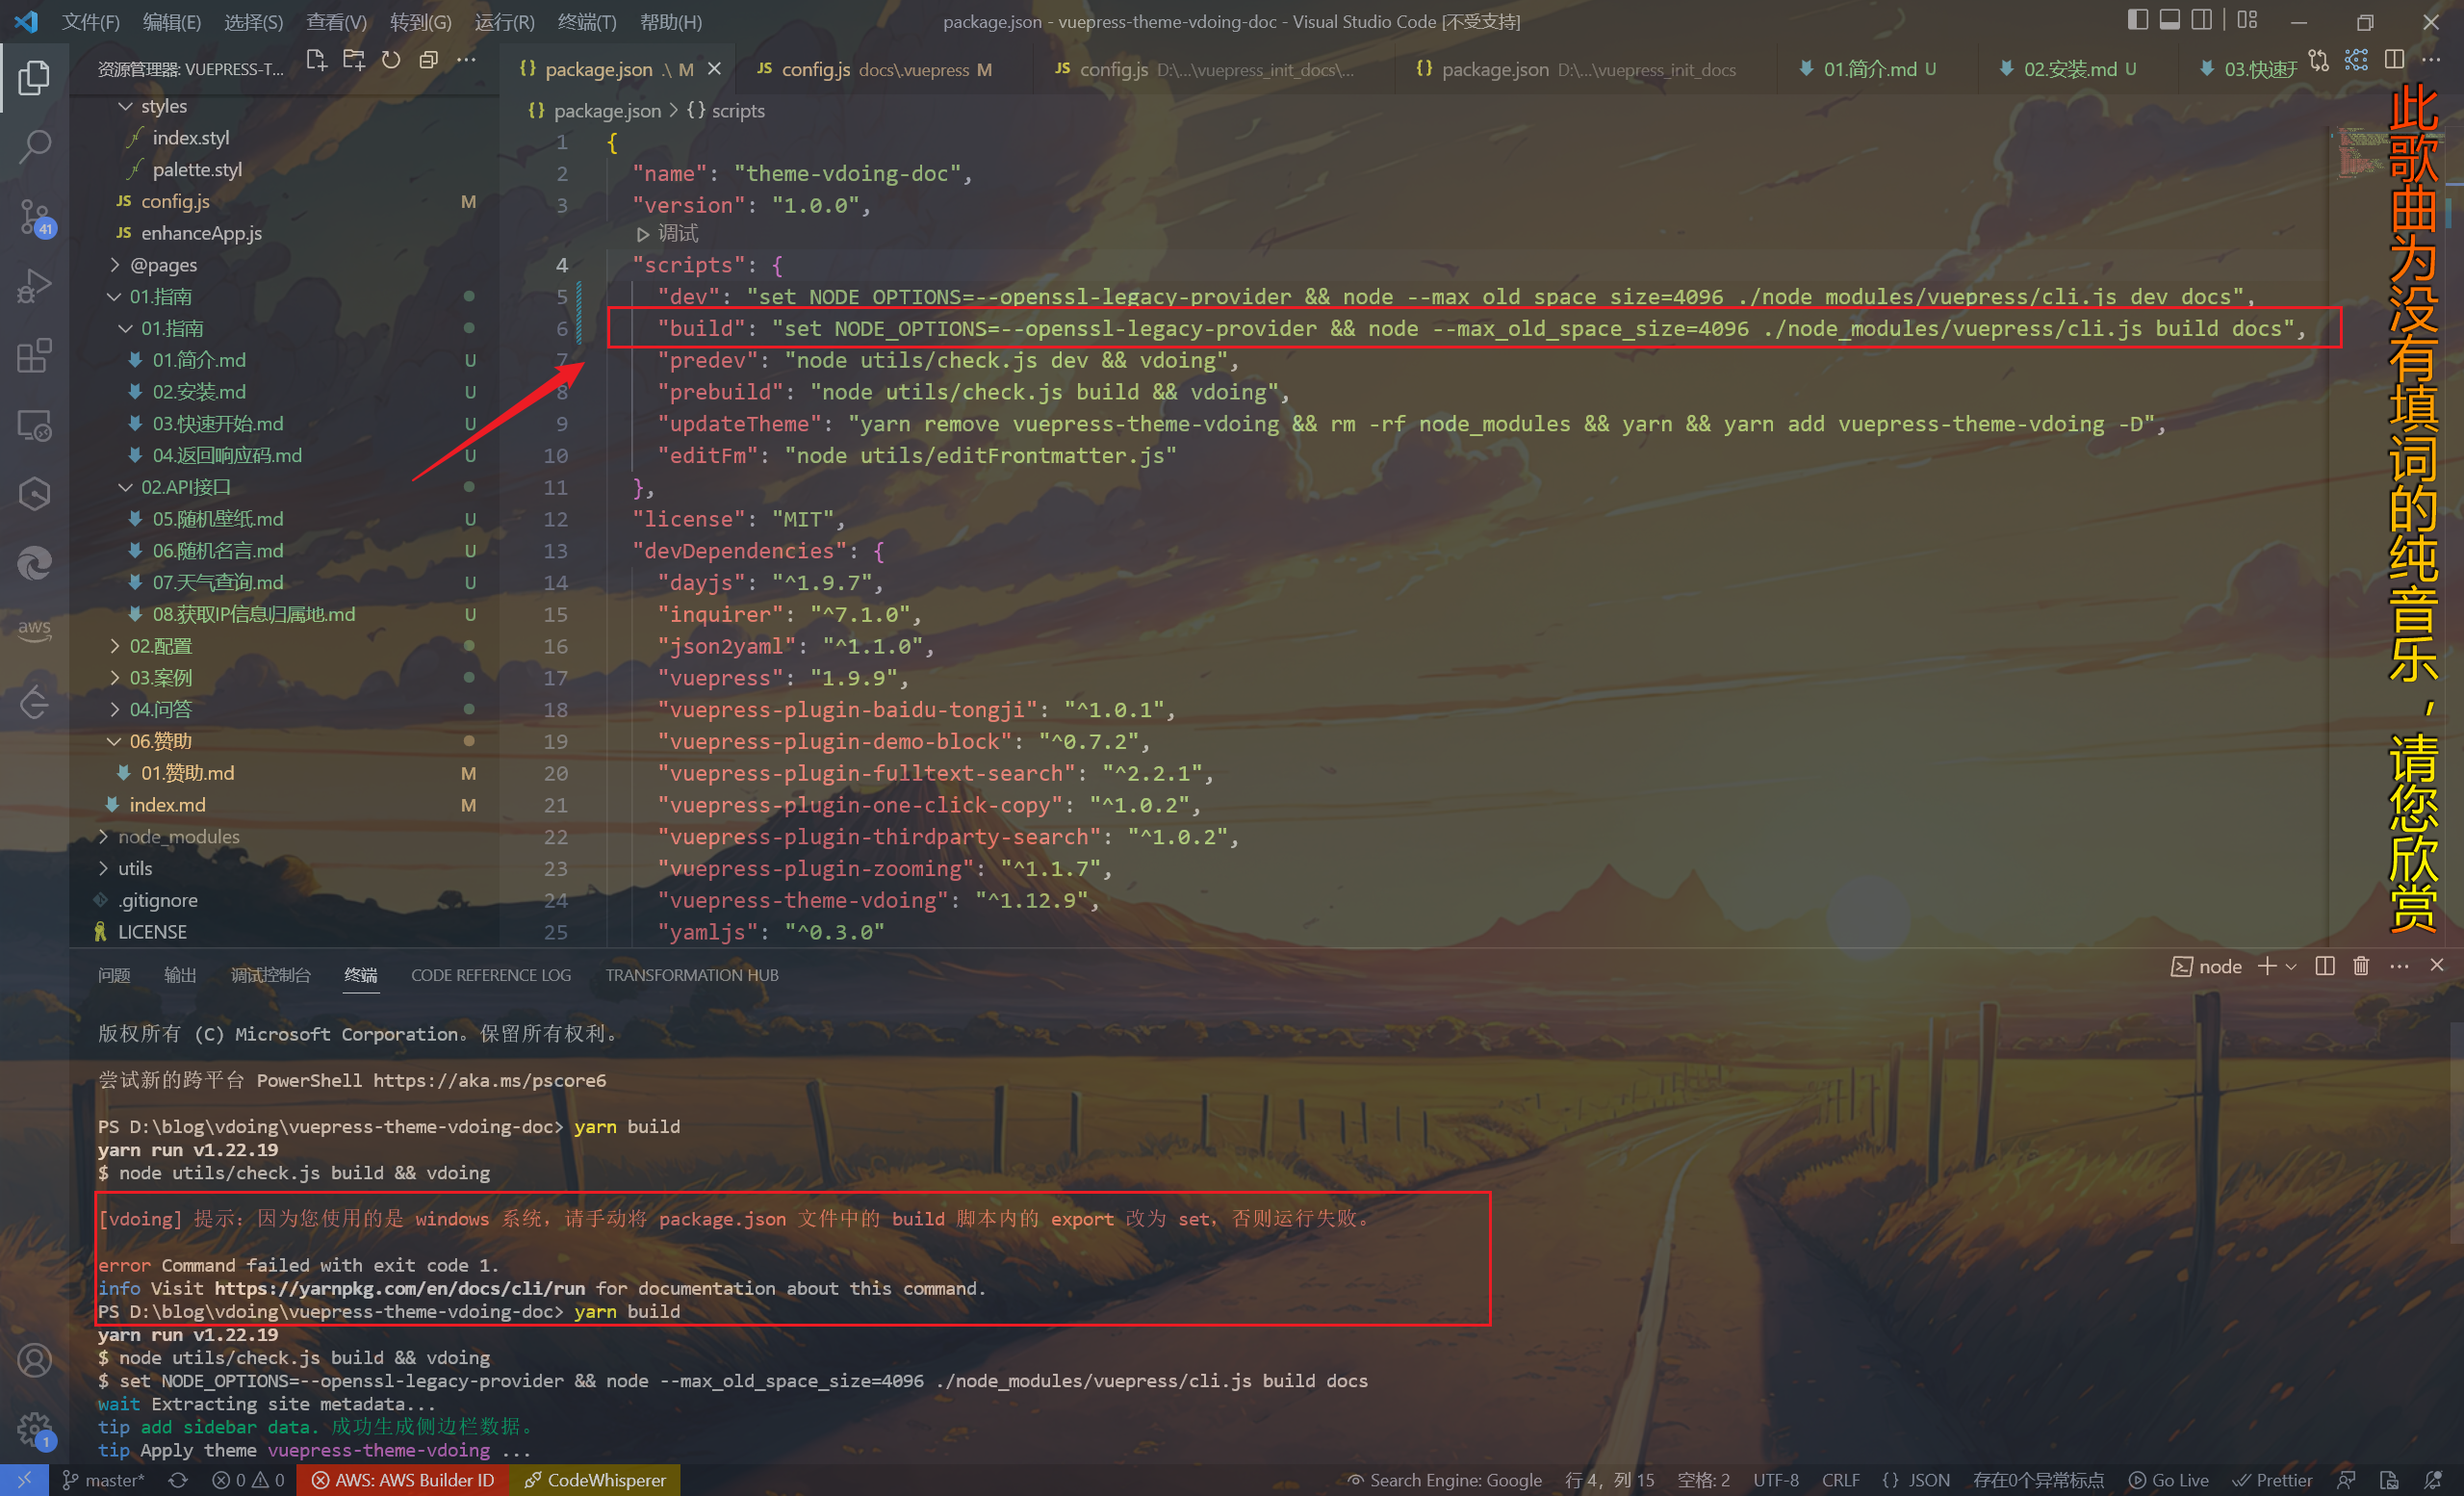
按提示修改就行
踩坑记录
- 一晚上遇到好些个坑,在
config.js配置文件中指定base路径并打包完成后,在dist目录下执行以下命令:
1 | |
- 结果是这样(样式丢失):(2023/12/06 晚)
这样是正常的,在推送
dist目录下的文件到远程仓库的过程中,由于对 git 命令的不熟悉,一直被之前的提交记录所影响建议直接把打包后生成的
dist目录剪切在一个干净的目录下,执行推送推送成功:
- 开启
Gitee Pages服务成功后,直接访问:(2023/12/06 晚)
Vdoing 主题搭建文档站点
Memory Tools
- 今日,
Memory-Tools 开发者文档基本完成!效果如下:(2032/12/19 午)

- 查看详情,可点击跳转:Memory-Tools 开发者文档
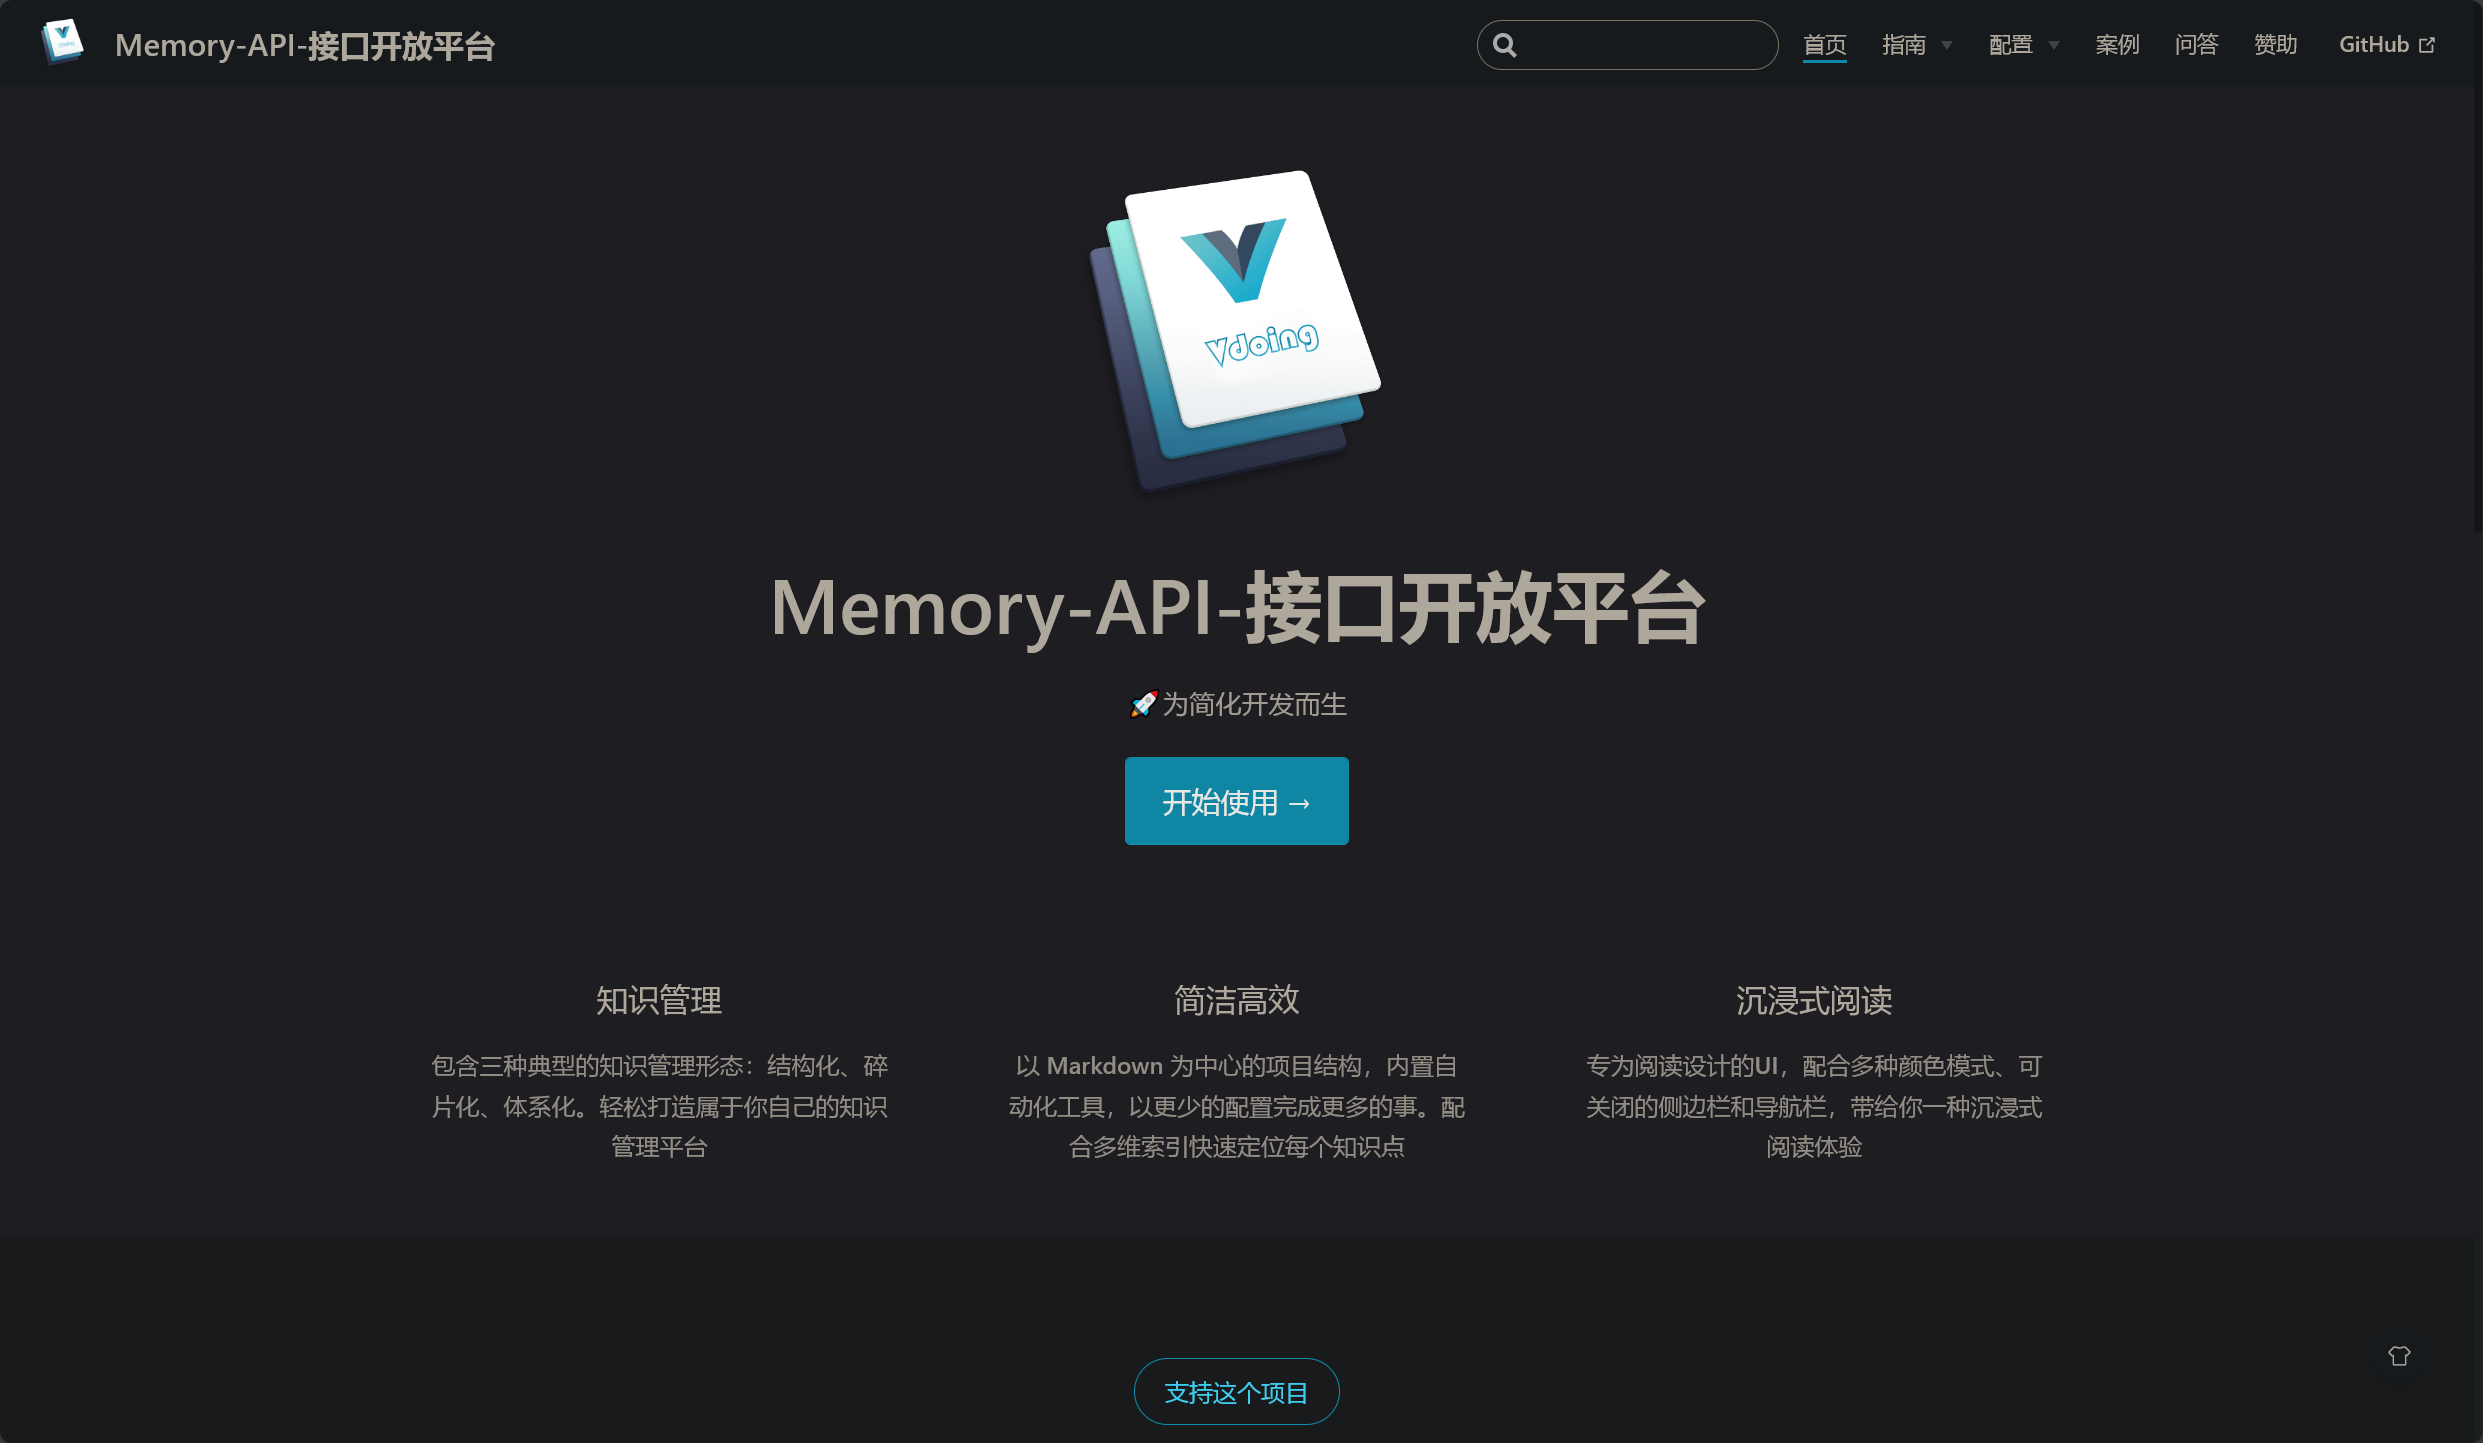
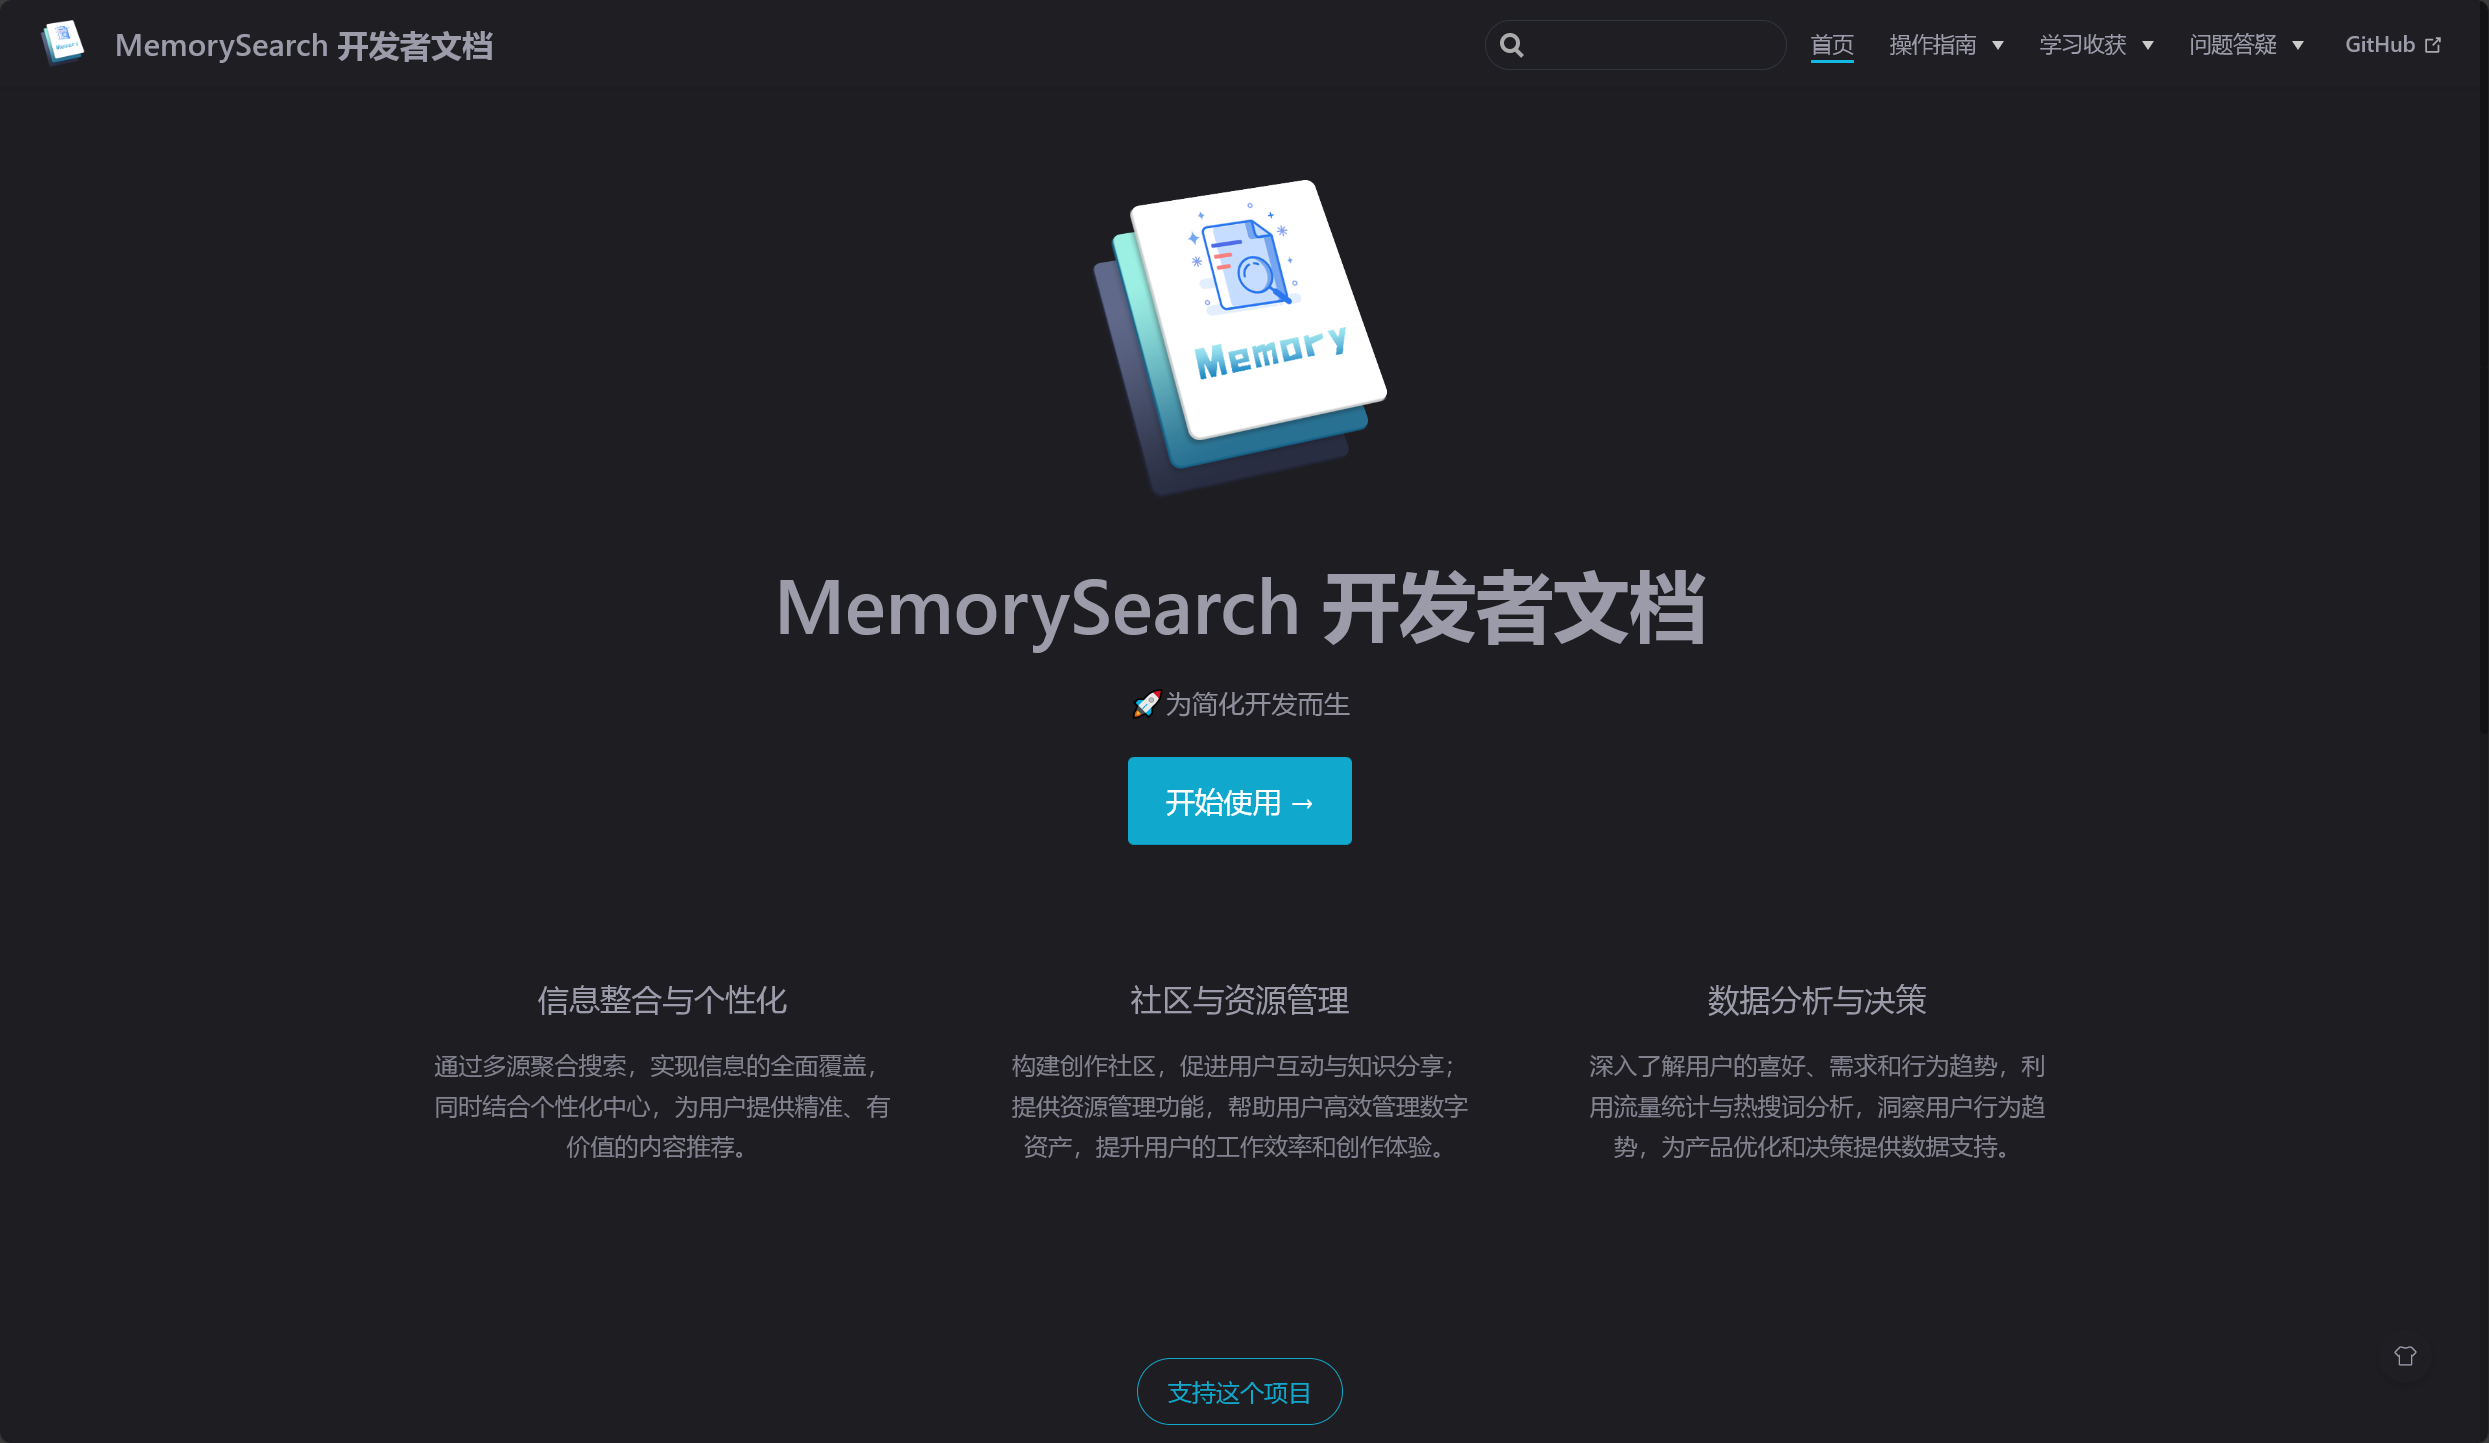
MemorySearch 忆搜阁
今日,基本完成 MemorySearch 忆搜阁 的文档编写和网站首页制作!
网站首页使用 vuepress-theme-hope 主题:

开发文档使用 vdoing 主题:
使用 vdoing 主题搭建的 Vuepress 文档中,在 config.js 和 index.md 文件中,可分别修改文档首页 LOGO 和 导航栏 LOGO:
1 | |
1 | |

严重问题
2024 年 4 月 29 日
基础知识
Gitee 基础知识和使用
- 注册和创建 Gitee 账号
- 创建新的仓库(Repository)
- 了解仓库的组成和功能,例如分支、提交记录等
- 熟悉仓库的基础操作,如上传和下载文件、提交和同步代码等
Gitee Page 服务简介
- 介绍 Gitee 的 Page 服务,它是什么以及它的作用
- 解释 Page 服务的原理和运行机制
- 简要介绍 Page 服务的特性,如自动部署、自定义域名等
托管静态网站的步骤和实践
- 准备网站目录和静态资源
- 在 Gitee 仓库中创建和组织网站文件的结构
- 配置 Page 服务并将网站部署到 Gitee 仓库
- 详细说明自定义域名、HTTPS 等高级配置选项
最佳实践和常见问题解答
- 分享一些使用 Gitee 托管静态网站的最佳实践和技巧
- 解答常见问题,如如何自动构建、如何更新网站内容等
Gitee 托管
总结
- 总结使用 Gitee 的 Page 服务托管静态网站的优势和便利性
- 强调 Gitee 作为开源社区的重要性,并鼓励读者尝试使用 Gitee 进行项目和网站托管